Gluten-Free Recipes for Dessert
Red Velvet Cake
January 27, 2023This is an easy recipe for a gluten-free red velvet cake that is tender, velvety, and perfect for anyone who loves cake. Instructions for making a gluten-free cream cheese frosting are also included. ![]() Thanks to our friends at the Gluten-Free Palate, who provided this recipe!
Thanks to our friends at the Gluten-Free Palate, who provided this recipe!
 Ingredients
Red Velvet Cake:
- 2 cups gluten-free flour blend (Bob’s Red Mill Gluten Free 1 to 1 Baking Flour works well)
- 1 teaspoon baking soda
- 1 teaspoon gluten-free baking powder
- ¼ cup unsweetened cocoa
- 1 teaspoon salt
- 1 and ½ cups granulated sugar
- 1 cup oil
- 2 eggs
- 1 cup buttermilk
- for a dairy-free substitute, mix 1 cup flaxmilk and 2 teaspoons white vinegar, then let sit 2-3 minutes
- 2 teaspoons white vinegar (omit if making dairy-free buttermilk with vinegar)
- 2 teaspoons gluten-free vanilla extract
- 4 teaspoons red food coloring (up to 2 Tablespoons for a deeper color)
- ½ cup plain hot coffee (or hot water)
Cream Cheese Frosting:
- 8 oz. cream cheese, room temperature (or dairy-free cream cheese)
- ½ cup butter (1 stick), room temperature (or dairy-free butter)
- 2 teaspoons vanilla extract
- 4 cups powdered sugar
Instructions
- Preheat oven to 350°F (180°C). Position rack in center of oven. Line two 8″ round baking pans with parchment paper and grease the sides; set aside.
- In a medium mixing bowl, whisk together flour, baking soda, baking powder, cocoa and salt; set aside.
- In a large mixing bowl, combine the sugar and oil.
- Mix in the egg, buttermilk (or dairy-free buttermilk), vanilla, and red food coloring until combined.
- Stir in the white vinegar and hot coffee (or hot water).
- Add the dry ingredients to the wet ingredients and mix just until combined.
- Spoon batter into the prepared baking pans.
- Bake for 30-35 minutes, or until a toothpick comes out clean.
- For the frosting: In a medium mixing bowl, beat together cream cheese (or dairy-free cream cheese), butter (or dairy-free butter) and vanilla until light and fluffy. Gradually add powdered sugar, a half cup at a time, beating well until you reach desired consistency.
- When the cakes are cool, frost.
- Store in an airtight container in the refrigerator for up to 5 days, or in a freezer for up to 3 months.
TAGS: HOLIDAY, DESSERT
Besan Halwa
October 25, 2022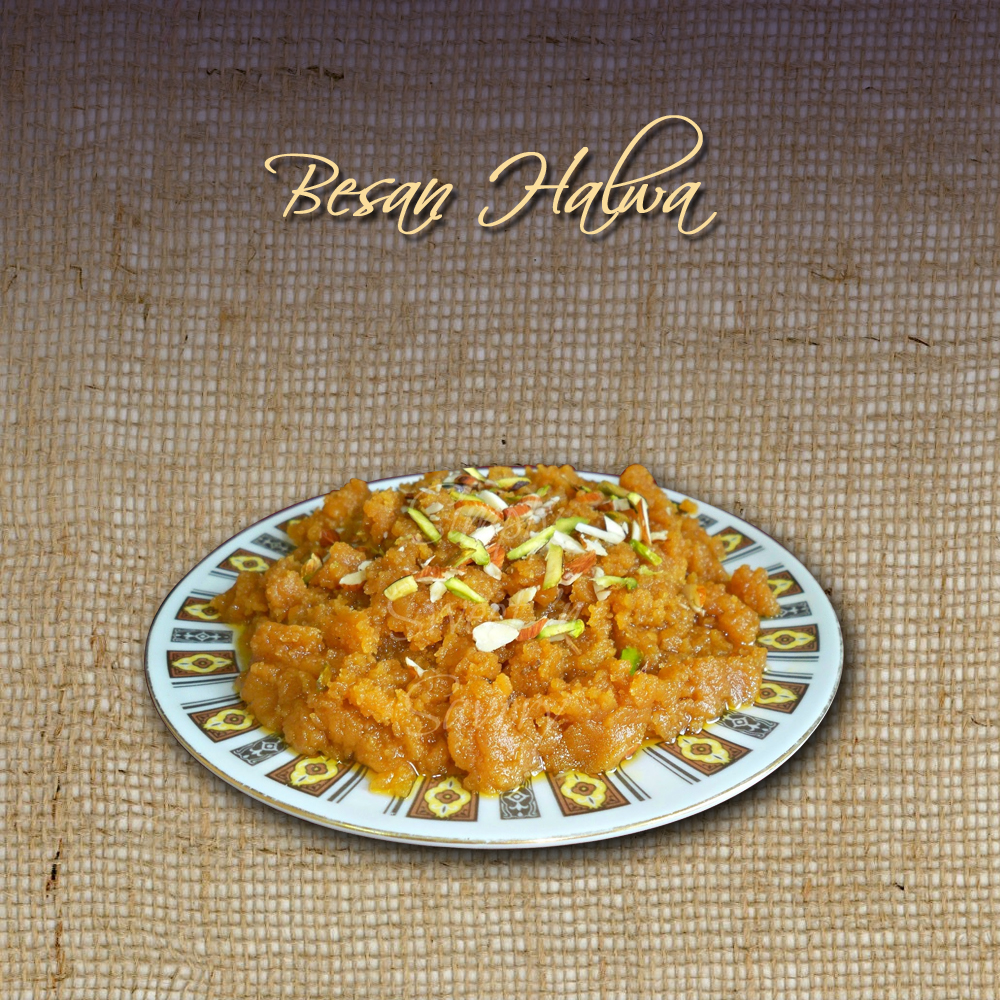 Recipe courtesy Beyond Celiac Ambassador Annika Dhariwal, who runs the blog Gluten-Free Jio
Besan is the Hindi word for gram flour. Also known as garbanzo flour or chickpea flour, besan is made from ground chickpeas, which are naturally gluten-free.
This recipe is for a deliciously rich Indian dessert that’s full of flavor. Find more recipes from Annika on her website.
Ingredients:
- 1 cup besan (gram flour)
- ½ cup ghee
- ½ cup sugar
- 2 cups water, warm
- 2 pinches saffron soaked in 2 Tablespoons warm milk
- 1 teaspoon cardamom powder
- 2 Tablespoons pistachio slivers
- 2 Tablespoons almond slivers
Directions:
- Sieve the besan to a fine flour. Make sure that there are no lumps in the flour.
- Heat ghee in a heavy bottom steel pan.
- Once the ghee is hot, lower the heat to medium and add besan to it.
- Take a heavy flat spatula and start roasting the besan in ghee. After 2 minutes, reduce the heat to low.
- Stir and roast the besan in ghee on low heat for about 15 minutes.
- Roast the besan until it starts separating from the ghee. At that point, begin to slowly add 2 cups of warm water to the pan, stirring until the water is absorbed.
- When the water is absorbed, add the sugar, cardamom and saffron soaked in milk. Keep stirring continuously.
- Switch off the heat when you see the desired consistency (some prefer it a bit smoother, like a paste, and others with more substance and shape) and let it stand for 2-3 minutes.
- Garnish with chopped pistachios and almonds and serve warm.
TAGS: VEGETARIAN, HOLIDAY, DESSERT
Quesillo (Flan)
September 14, 2022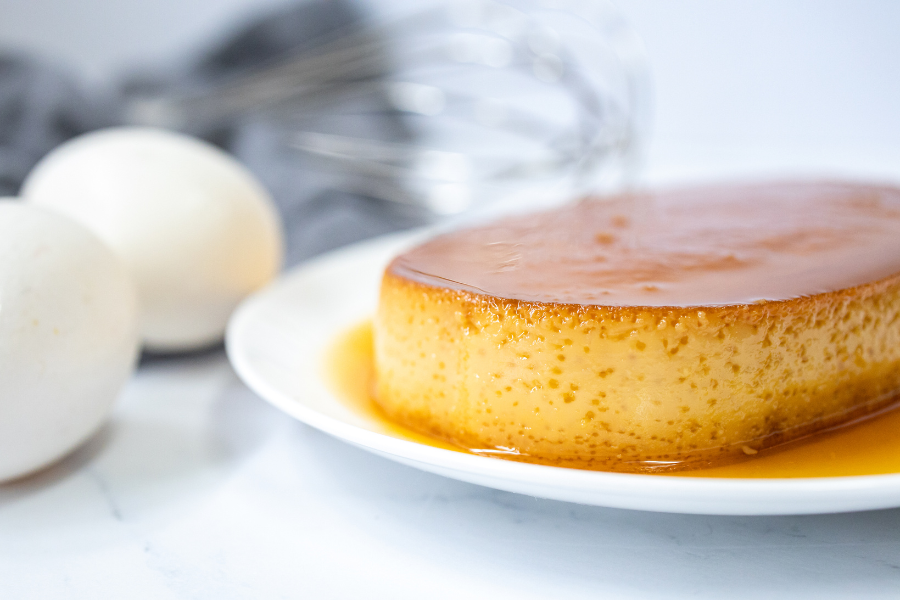
From Maria Luci, Beyond Celiac Director of Research Engagement
This recipe is from my Cuban mother, Ana, who doesn’t always love to cook but when she does she always puts a lot of love into it. She shared this and other family recipes with me when I got married. I treasure the recipe book she made me.
Gluten-Free Cuban Quesillo
Ingredients:
- 2 cans of condensed milk
- 2 cans of evaporated milk
- 8 eggs
- 8 Tablespoons sugar
- 3 Tablespoons water
- 1 Tablespoon vanilla extract
Directions:
- Preheat oven to 375°F
- In a small cookie can* make caramel by mixing the 8 Tbs of sugar with 3 Tbs of water over medium heat. Stir continuously until it turns light brown, then remove from heat.
- In a separate bowl, mix the condensed milk, evaporated milk, eggs and vanilla. Once it’s thoroughly combined, put it in the cookie can on top of the caramel.
- Cook in the oven at 375°F for about an hour, until you can get a toothpick to come out clean from the middle.
- Remove from oven and let cool.
- When the can is cool, place it in the refrigerator. Leave it there until you’re ready to serve.
- About 20 minutes before serving, boil a pot of water.
- Once boiling, hold the can carefully so the bottom is in the water. This will melt the caramel.
- Turn the can upside down over a large dish. Cut into pie slices or squares.
* Editor’s note: this is my mother’s wording, but I’ve seen her use spring form pans or flan molds like this one from Amazon (affiliate link).
Read more »TAGS: HOLIDAY, FOR KIDS, DESSERT
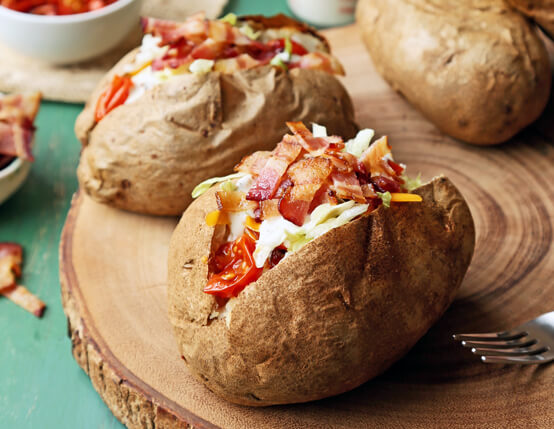
BLT Ranch Baked Potatoes
July 6, 2022![]() Classic baked potatoes are transformed with crispy Jones Dairy Farm Dry Aged Bacon, roasted cherry tomatoes and shredded lettuce.
Classic baked potatoes are transformed with crispy Jones Dairy Farm Dry Aged Bacon, roasted cherry tomatoes and shredded lettuce.
Recipe provided courtesy of Jonathan at The Candid Appetite and Jones Dairy Farm. This recipe is made with certified gluten-free Jones Dairy Farm Dry Aged Bacon.
Ingredients
- 4 large baking potatoes, rinsed and dried
- 1 cup cherry tomatoes, cut in half
- 1 tablespoon olive oil
- 1 teaspoon salt
- 1/2 teaspoon black pepper
- 6 slices Jones Dairy Farm Dry Aged Bacon
- 4 tablespoons butter
- 1/2 cup sour cream
- 1/2 cup sharp cheddar cheese, shredded
- 1 cup shredded iceberg or romaine lettuce
- 1/4 cup buttermilk ranch dressing
Directions
- Preheat oven to 375°F.
- Place potatoes directly on middle oven rack and bake for 20 to 25 minutes or until fork tender.
- Place sliced cherry tomatoes on baking sheet and toss with olive oil, salt and pepper. Roast in oven for 10 to 15 minutes until charred, then remove from oven and allow to cool.
- Heat large skillet over medium-high heat. Drop in sliced bacon and cook for 3 to 5 minutes, until browned and crispy. Using slotted spoon, transfer to plate lined with paper towels.
- Once potatoes are fully cooked, make slit down middle and open by pushing in on sides.
- Top each potato with tablespoon of butter and dollop of sour cream. Fluff with fork to incorporate butter and sour cream with potato.
- Top with cheese, crispy bacon, roasted tomatoes, shredded lettuce and drizzle with ranch.
- Serve immediately and enjoy!
TAGS: RECIPES OF THE WEEK, SIDE DISHES, LUNCH, DESSERT
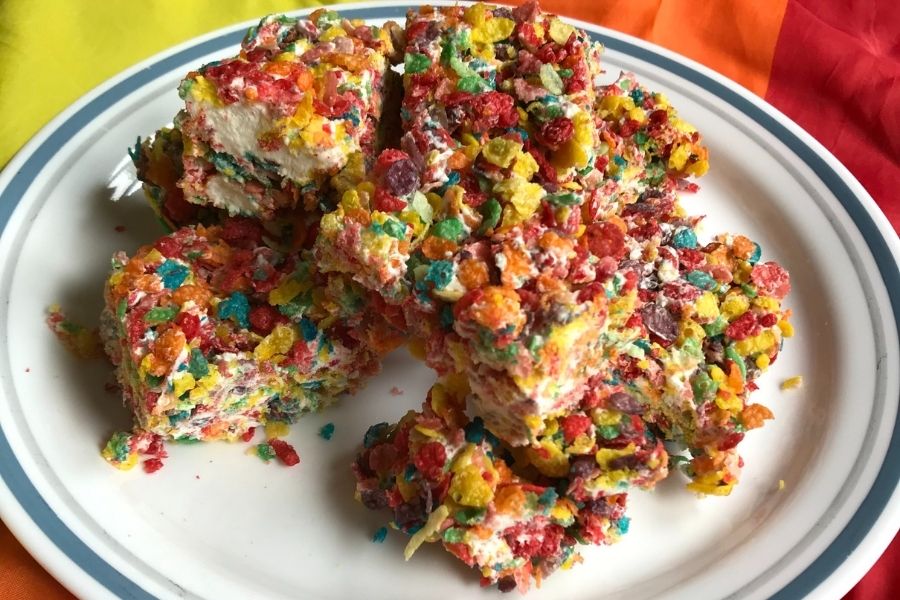
Pride Krispies
June 1, 2022Have you been wondering what to take to the June Pride celebration potluck? We’ve got you covered! These Pride Krispy treats are gluten-free, lactose-free, vegan and delicious.
Ingredients:
- 4 ½ cups Fruity Pebbles cereal (always gluten-free and clearly labeled)
- 10 oz bag full-sized Dandies vegan marshmallows
- ¼ cup coconut oil
Directions:
- Grease an 8×8 or 7×11 baking pan with coconut oil or nonstick cooking spray.
- Cut the marshmallows into quarters with scissors.
- Combine the marshmallows in a pan with the coconut oil and heat on the stove on medium heat, stirring continuously. I found it easier to use a large pan to give the marshmallows more heated surface area and also to have enough room for the cereal when you add it. Note that the marshmallows will not melt to a liquid state, but will instead get soft, sticky and pliable.
- Once the marshmallows are soft, add the cereal a cup at a time. Expose a sticky surface of marshmallow, stick the cereal onto it, fold the cereal in and repeat. You may want to use your hands for the mixing process once most of the cereal is in the pan, but warning! It will be hot! If you have heat resistant silicone cooking gloves, this would be a great time to use them!
- Once the cereal is mixed in, transfer the mixture to your baking pan and push it into place, all the way to the edges.
- Refrigerate for several hours or overnight and then cut into squares.
TAGS: DAIRY-FREE, VEGAN, HOLIDAY, DESSERT
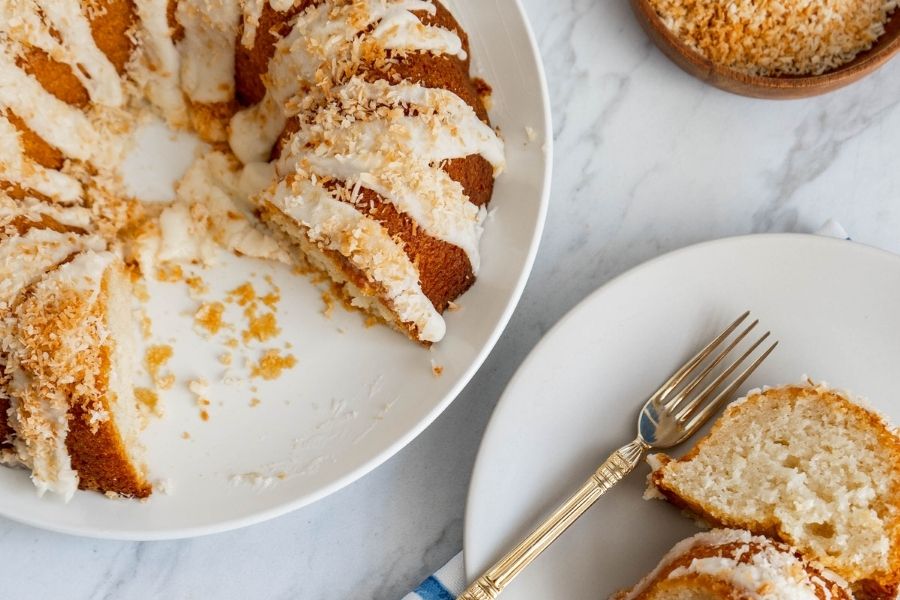
Coconut Cake
April 4, 2022This recipe was provided courtesy of Taleen Benson, author of the cookbook Just as Tasty: Gluten-Free and Eggless Baking Through the Seasons and blogger at Just As Tasty.
Ingredients for the Cake
Makes 12 servings
- 2 cups (296g) gluten-free flour blend
- 2 teaspoons baking powder
- ½ teaspoon baking soda
- ¼ teaspoon fine sea salt
- 1 cup (226g) unsalted butter, room temperature
- 1 cup (200g) granulated sugar
- ¾ cup (171g) plain Greek yogurt, room temperature
- 2 teaspoons vanilla extract
- 1 cup (240ml) buttermilk, room temperature
- ⅔ cup (35g) unsweetened shredded coconut
Ingredients for the Glaze and Topping
- 1 cup (120g) powdered sugar, sifted
- 5 tablespoons heavy whipping cream
- 1 cup (53g) unsweetened shredded coconut, toasted*
*To toast the shredded coconut, spread an even layer on a parchment-lined baking sheet. Toast in the oven at 350°F for 5 minutes.
Directions
- Preheat the oven to 350°F. Grease a 9.5” bundt pan and set aside.
- In a large bowl, whisk the flour, baking powder, baking soda, and salt together. Set aside.
- Using a hand mixer or a stand mixer fitted with the paddle attachment, cream the butter with the sugar until smooth. Add the Greek yogurt and vanilla extract and beat to combine. Add the dry ingredients in thirds, alternating with the buttermilk. Start and end with the dry mixture and beat briefly after each addition to combine. Fold in the shredded coconut.
- Pour the batter into the prepared pan. Bake for 48–50 minutes, or until a toothpick inserted into the cake comes out clean. Allow the cake to cool in the pan for 30 minutes before inverting onto a wire cooling rack. Cool completely before topping with the glaze.
- To make the glaze: Mix the powdered sugar and heavy cream until the glaze reaches drizzling consistency, then drizzle over the cake and top with shredded coconut.
TAGS: HOLIDAY, DESSERT
Grandma’s Noodle Kugel
March 29, 2022 Kugel, a sweet, egg noodle casserole, is a common sight at any Jewish party. Try making this for your next holiday event, Jewish or not.
Ingredients
- ½ stick butter or margarine
- ½ pound gluten-free lokshen (egg noodles)
- 3 eggs
- 3 cups milk
- 1 small carton cottage cheese
- ½ cup sour cream
- 2 teaspoon sugar
- 2 teaspoon cinnamon
- 1/3 cup raisins
Directions
- Preheat oven to 375°F.
- Cook noodles and drain.
- Separate 3 eggs and beat yolks, reserving egg whites.
- In a separate bowl, whip egg whites until stiff.
- Melt butter or margarine in baking pan.
- Combine noodles with egg whites, cottage cheese, sour cream, sugar, cinnamon and raisins in baking pan.
- Stir in milk and fold in egg yolks.
- Bake 60 minutes.
- Let stand 15 minutes. Can be served warm or cold.
TAGS: HOLIDAY, DINNER, DESSERT
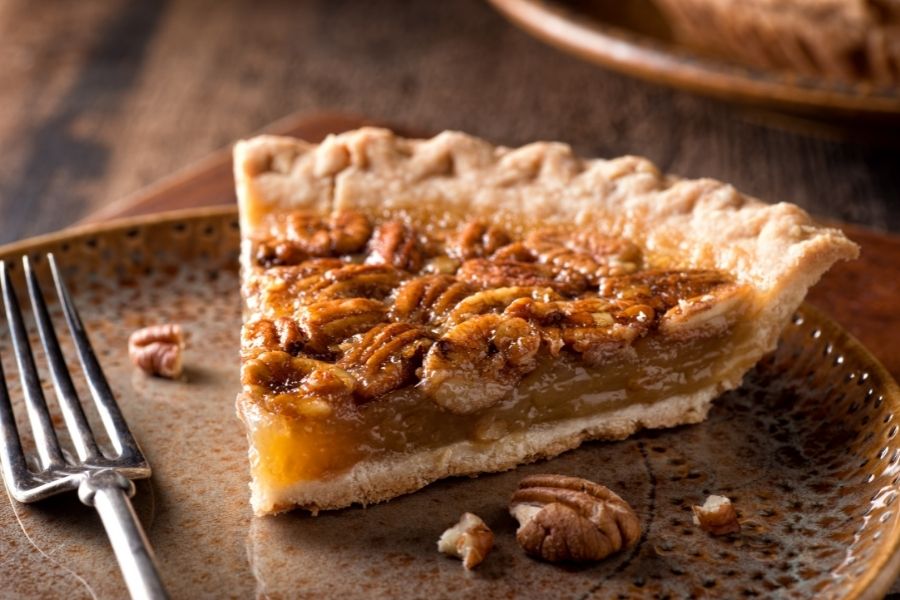
Bittersweet Chocolate Pecan Pie
March 10, 2022No Southern holiday would be complete without a pecan pie! For an extra touch, serve this pie with whipped cream or vanilla ice cream.
Ingredients:
- Frozen gluten-free pie crust
- 1 ½ cups pecan halves or pieces
- 1 ½ cups dark chocolate chips
- 1 Tbsp. gluten-free all-purpose flour
- 1/2 cup (1 stick) unsalted butter at room temperature
- 1/2 cup packed light brown sugar
- 3 large eggs
- 1/2 cup dark corn syrup, molasses, maple syrup or honey
- 2 tsp. pure vanilla extract
- 1/4 tsp. salt
Directions:
- Preheat oven to 350°F.
- Toss together the pecans, chocolate and flour in a medium bowl.
- With an electric mixer on medium speed, beat together the butter and sugar in a large bowl until light and fluffy.
- Beat in the eggs, one at a time, beating well and scraping down the sides of the bowl after each addition.
- Add vanilla, salt and your choice of syrup, and beat until blended; the mixture may look curdled—this is normal.
- Stir in most of the the pecan mixture. Set aside a few to top the pie.
- Transfer the filling to the pie shell, then arrange some pecans on the top.
- Bake for about 55 minutes, until a wooden pick inserted in the center comes out with just a bit of melted chocolate. The pie should be set around the edges, but still jiggly at the center.
- Cool the pie completely in the pan on a wire rack and then enjoy! The pie will keep for two days at room temperature.
TAGS: DESSERT, HOLIDAY
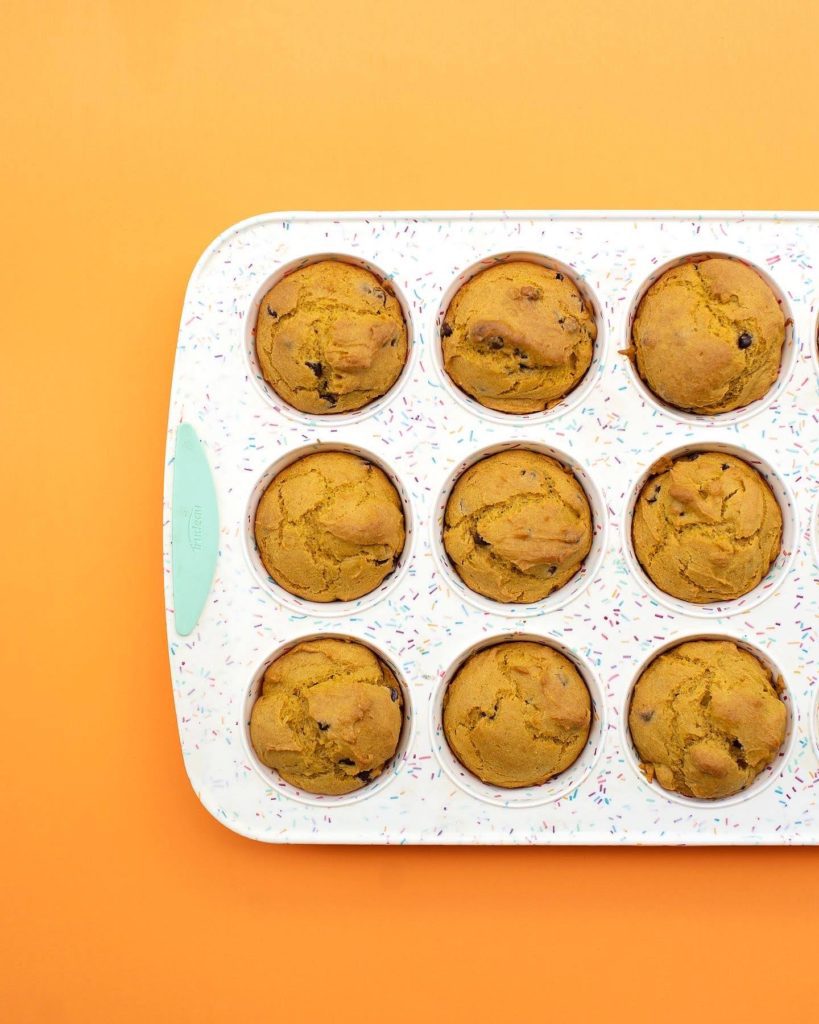
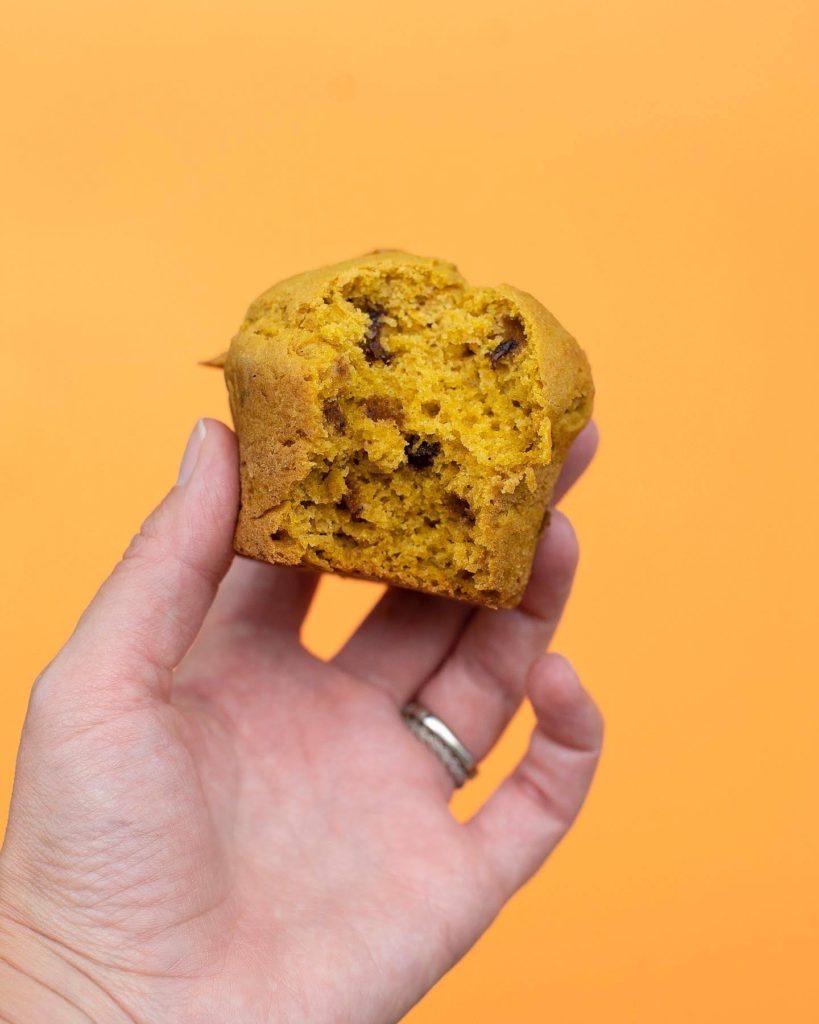
Pumpkin Chocolate Chip Muffins
November 2, 2021This recipe earned an honorable mention in the 2021 Beyond Celiac Gluten-Free Holiday Recipe Contest!
Recipe by Katie Blauser
Gluten-Free Pumpkin Chocolate Chip Muffins by Katie
Ingredients:
- 1 cup canned pumpkin (not pumpkin pie)
- 1/2 cup brown sugar
- 1/2 cup oil (coconut or olive)
- 2 eggs
- 2 cups Josie’s Best Muffins & More Gluten-Free Mix
- 1 teaspoon baking powder
- 1 teaspoon baking soda
- 1/4 teaspoon salt
- 2 tablespoons maple syrup
- 1/2 cup gluten-free chocolate chips
Directions:
- Preheat the oven to 350°F. Grease or line a muffin tin.
- Mix the wet ingredients together well.
- Gradually add the dry ingredients and mix until there’s no lumps. Gently stir in the chocolate chips.
- Spoon the batter into the prepared muffin tin.
- Bake for 22–24 minutes.
TAGS: THANKSGIVING, HOLIDAY, FOR KIDS, DESSERT, BREAKFAST
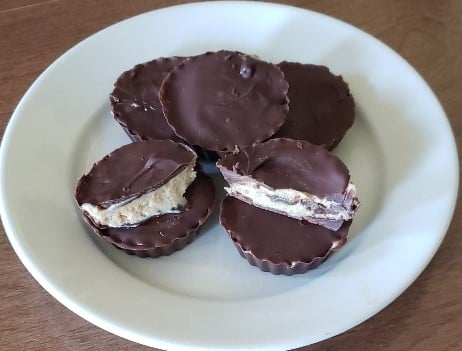
Peanut Butter Cups

This recipe earned an honorable mention in the 2021 Beyond Celiac Gluten-Free Holiday Recipe Contest!
Recipe by Tammy Aiken
Gluten-Free and Dairy-Free Peanut Butter Cups by Tammy
Ingredients:
- 1/3 cup gluten-free smooth peanut butter
- 1/8 teaspoon sea salt or table salt
- 1 tablespoon confectionery sugar (powdered sugar)
- 1 cup Enjoy Life Semi-sweet Vegan chocolate chips
- Peanut butter cup mold. I use the Palksky chocolate almond peanut butter cup mold.
Directions:
- In a glass measuring cup mix the peanut butter, salt, and sugar. Set aside.
- In another glass measuring cup or a microwavable bowl, add 1 cup of chocolate chips.
- Melt the the chocolate chips in the microwave in 30 seconds intervals until smooth, mixing as you go.
- Warm the peanut butter mixture in the microwave for 15 to 20 seconds until melted and smooth. Mix.
- Add 1 full teaspoon of chocolate to each mold section. Spread over the bottom and up the sides of the mold.
- Add 1/2 tablespoon of the peanut butter filling to each section and spread over the bottom.
- Add 1/2 tablespoon of chocolate over the top and spread to cover.
- Put into the refrigerator for 25 to 30 minutes and allow them to set.
- Remove the mold from the fridge, pop each cup out and enjoy.
TAGS: DAIRY-FREE, VEGETARIAN, HOLIDAY, DESSERT