Gluten-Free Recipes for For Kids
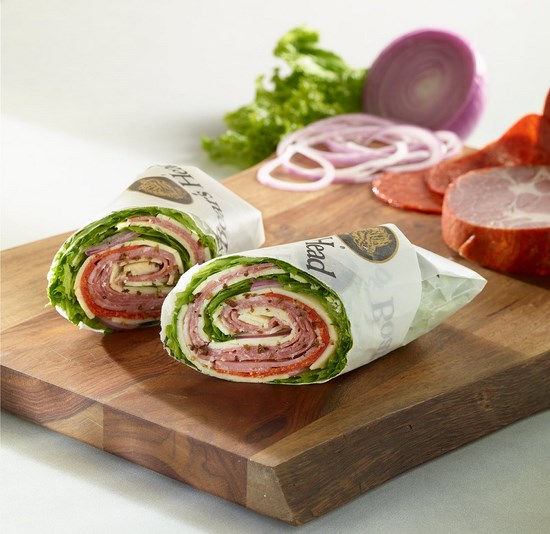
Deluxe Low Sodium Roast Beef Lettuce Wrap
January 19, 2015Deluxe Low Sodium Roast Beef Lettuce Wrap

Courtesy of Boar’s Head Brand
Ingredients:
-
3 large Romaine lettuce leaves
-
4 slices Boar’s Head Deluxe Low Sodium Roast Beef
-
2 slices Boar’s Head Lacey Swiss Cheese
-
3 tomatoes, sliced
-
2 Tbsp. Boar’s Head Deli Dressing
Directions:
-
Lay lettuce leaves on a flat, clean work surface onto sandwich paper. Layer the tomatoes, followed by the Deluxe Low Sodium Roast Beef onto the lettuce leaves.
-
Spread the Deli Dressing onto the Deluxe Low Sodium Roast Beef. Place the Lacey Swiss Cheese on top of the Deluxe Low Sodium Roast Beef. Roll the lettuce leaves as a wrap inside of sandwich paper. Cut in half if desired and serve.
<< Back to Recipes
TAGS: FOR KIDS, LUNCH
Gluten-Free Mini Quiches
December 8, 2014Gluten-Free Mini Quiches
![]()
Courtesy of Crunchmaster and Carol Kicinski
Makes 24 mini quiches
Ingredients:
- Gluten-free non-stick cooking spray
- 1 ¼ cups finely crushed Crunchmaster Multi-Grain Crackers Rosemary & Olive Oil
- 6 Tbsp.. unsalted butter, melted
- 2 Tbsp. olive oil
- 1 cup finely chopped onion
- 1 – 10 oz. package frozen spinach, thawed
- ½ tsp. salt
- ½ tsp. black pepper
- ¼ tsp. grated fresh nutmeg
- 1 cup shredded sharp cheddar cheese
- 2 large eggs
- 1 cup milk
- 1 roasted red pepper, cut into 48 small slivers
Directions:
- Preheat oven to 350 degrees. Spray a min muffin pan (24 tins) with non-stick cooking spray.
- Combine the cracker crumbs and melted butter. Divide crumb mixture among the prepared mini muffin cups and press down firmly. Bake for 7 – 8 minutes. Remove from oven and set aside.
- In a large skillet over medium heat, heat the oil and add the chopped onion. Cook the onions until very soft and starting to brown, about 10 minutes, stirring occasionally. Squeeze all the liquid out of the spinach, add to the onions along with the salt, pepper and nutmeg and cook, stirring, for 30 seconds. Divide the mixture evenly on the cracker crumbs. Divide the shredded cheese on top of the spinach mixture.
- Whisk the eggs and milk together and spoon into the muffin cups; do not fill all the way. Top with the roasted red pepper slivers and bake until set and browned, about 20 minutes.
<< Back to Recipes
TAGS: FOR KIDS, BREAKFAST
Gluten-Free Baked Crispy Coconut Chicken
October 13, 2014Gluten-Free Baked Crispy Coconut Chicken
Courtesy of Attune Foods and Chef Janet
Ingredients: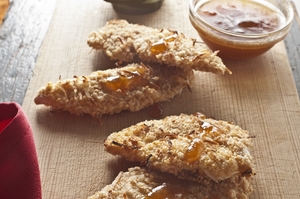
- 1 lb. boneless skinless chicken breast
- 1 egg
- 1/4 cup coconut flour
- 1/4 cup brown rice flour
- 3 cups Erewhon Gluten-Free Crispy Brown Rice Cereal
- 1/3 cup shredded coconut
- 1 tsp. salt
- Gluten-free non-stick spray
Apricot/Peach Dipping Sauce Ingredients:
- 3 Tbsp. apricot or peach jam or orange marmalade
- 1/4 tsp. mustard powder
- 1/4 tsp. ground ginger
- Pinch dried red chili flakes
- 2 Tbsp. vinegar
- 2 tsp. coconut aminos or gluten-free tamari
Directions:
- Make the sauce:
Combine all the sauce ingredients. Depending on the jam you use, you may want to add more vinegar. Taste it and season it up to your taste. If you like it more or less spicy, adjust the amount of chili flakes. To make it more savory and less sweet, add a bit more coconut aminos or tamari. Don’t be afraid to play with the flavors, that’s what good cooks do! Just be sure to add ingredients in small amounts and continually taste as you go. - Pre-heat the oven to 350°.
- If you want chicken fingers, cut the chicken into strips trying to keep the sizes as even as possible. Otherwise, butterfly each breast and then cut in half.
- Put the brown rice cereal in a food processor and process until it resembles coarse bread crumbs. These make a great substitute for panko bread crumbs.
- Clear some counter space. You will need 2 large plates, a wide bowl (not too big) and a sheet pan or cookie sheet fitted with an oven safe wire rack sprayed with canola oil spray.
- Beat the egg in the wide bowl with 2 tsp. water. Leave the fork with the bowl.
- Put the coconut flour and brown rice flour on one of the plates, add 1/2 tsp. of the salt and mix thoroughly. If you don’t have coconut flour, all brown rice is fine.
- Place the rice crumbs, shredded coconut and 1/2 tsp. salt on the other plate and mix well with your fingers.
- Use only your left hand (the “wet” hand”) to handle the chicken and use only your right (the “dry” hand) to touch the flour and crumbs.
- Place the chicken on the flour plate and coat completely. Use your dry hand to sprinkle and press the flour into any crevices.
- Use your wet hand to transfer the chicken to the egg bowl. Coat with egg, flip with the fork. Then pick it up with the fork or your wet hand, let the excess egg drip off into the bowl and lay it onto the rice crumbs plate.
- Use your wet hand to flip. Then use your dry hand to press the chicken down. This will help the crumbs to adhere. Flip and press again. If there are any uncoated spots use your dry hand to sprinkle and press the crumbs onto the chicken.
- Use your dry hand to transfer the coated breast to the wire rack.
- Repeat until all the chicken is coated.
- Bake for 10 minutes then flip. Bake another 15 minutes or so. Times will vary depending on the thickness and size of your chicken pieces.
<< Back to Recipes
TAGS: FOR KIDS, DINNER
Cinnamon Roll Pancakes
September 22, 2014Cinnamon Roll Pancakes
Courtesy of Allergic Living and Alisa Fleming
Makes 14 pancakes
Cinnamon Filling
Ingredients: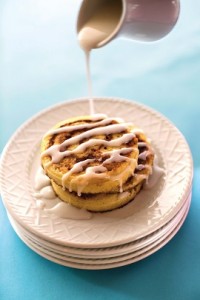
- 1/2 cup packed brown sugar
- 1/3 cup melted dairy-free margarine
- 2 tsp. ground cinnamon
Pancakes
Ingredients:
- 1 1/4 cup brown rice flour
- 1/2 cup potato starch
- 1/4 cup tapioca starch
- 4 tsp. baking powder
- 1/2 tsp. salt
- 2 large eggs or 1 Tbsp. egg replacer + 2 Tbsp. warm water
- 1 1/4 -1 3/4 cup unsweetened or original non-dairy milk alternative (such as rice, flax, or coconut milk beverage)
- 2 Tbsp grapeseed or canola oil
- 1 Tbsp. maple syrup
- 1/2 tsp. vanilla extract
- 1 batch Maple Glaze (recipe follows) or additional maple syrup for topping
Directions:
- Place the cinnamon filling ingredients in a ziplock plastic bag, close the top, and squeeze to combine.
- In a small bowl, combine flour, starches, baking powder, and salt.
- ln a mixing bowl, briefly whip the eggs or egg replacer with water. Whisk in 1¼ cup milk alternative, oil, maple, and vanilla. Add the dry ingredients to the wet, whisking just until combined.
- Add up to ½ cup additional milk alternative (or as needed) to create a pourable but slightly thick batter. Less liquid will be required for puffier pancakes, while more liquid might be needed at higher altitudes or if using the non-gluten-free option (at end of recipe). Let batter rest while you preheat a large skillet or griddle over medium heat.
- Once hot, grease the griddle with cooking spray or dairy-free margarine.
- Pour 1/4 cup of batter for each pancake and cook for 2 minutes.
- Snip a very small corner from the bottom of the plastic bag, and squeeze the filling onto the pancake, starting in the centre, and swirling outward, like you would see on a cinnamon roll. Try to keep the filling at least 1/2-inch from the edge.
- Let the pancakes cook a few more minutes, or until bubbles form in the batter.
- Flip, and cook for 2 to 3 minutes more.Note that the gluten-free pancakes may not brown, but they will have a light and fluffy finish.
- Remove to serving plates and drizzle with pure maple syrup or the Maple Glaze, if desired.
Maple Glaze: In a small bowl, whisk 1/2 cup sifted powdered sugar, 3 Tbsp. maple syrup, 1/2 tsp. vanilla extract, and 1 Tbsp. dairy-free margarine until smooth.
<< Back to Recipes
TAGS: FOR KIDS, DAIRY-FREE, BREAKFAST
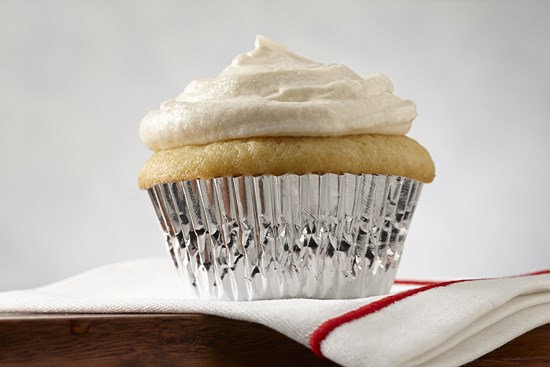
Gluten-Free Dairy-Free Vanilla Cupcakes with Vanilla Frosting
September 8, 2014Gluten-Free Dairy-Free Vanilla Cupcakes with Vanilla Frosting

Courtesy of Thai Kitchen
Prep Time: 25 minutes
Cook Time: 22 minutes
Makes 24 servings
Vanilla Cupcakes Ingredients:
- 1 cup cornstarch
- 1 cup sorghum flour
- 1/2 cup tapioca flour
- 1 1/4 tsp. xanthan gum
- 3/4 tsp. baking powder
- 1/4 tsp. baking soda
- 1/2 tsp. salt
- 1 1/2 cups granulated sugar
- 1 cup vegetable oil
- 1 cup Thai Kitchen Coconut Milk
- 1 Tbsp. McCormick Pure Vanilla Extract
- 4 eggs
Vanilla Frosting Ingredients:
- 1 cup gluten-free dairy-free spread, such as soy margarine or vegan buttery sticks or spread, softened
- 1 Tbsp. McCormick Pure Vanilla Extract
- 1 box (16 oz.) confectioners’ sugar
- 2 Tbsp. Thai Kitchen Coconut Milk
Directions:
- For the cupcakes, mix cornstarch, sorghum flour, tapioca flour, xanthan gum, baking powder, baking soda and salt in medium bowl. Set aside.
- Beat granulated sugar, oil, coconut milk and vanilla in large bowl with electric mixer on medium speed until well blended. Beat in eggs, 1 at a time. Gradually add flour mixture beating on low speed after each addition until smooth. Do not overbeat. Spoon batter into 24 paper-lined muffin cups.
- Bake in preheated 350°F oven 20 to 22 minutes or until toothpick inserted into cupcake comes out clean. Cool in pans on wire rack 5 minutes. Remove from pans; cool completely.
- For the frosting, beat spread and vanilla in large bowl with electric mixer on medium speed until light and fluffy. Gradually add confectioners’ sugar, beating until well blended after each addition and scraping sides and bottom of bowl frequently. Add coconut milk; beat until light and fluffy. Frost cooled cupcakes with frosting.
Read labels of all recipe ingredients, especially your flours, to ensure all are gluten-free.
Want more kid-friendly recipes? Sign up for a free eCookbook here.
<< Back to Recipes
TAGS: FOR KIDS, DESSERT
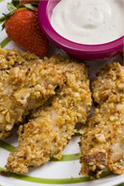
Nutty Ranch Chicken Strips
August 29, 2014Nutty Ranch Chicken Strips

Courtesy of Blue Diamond
Makes 4 to 6 servings
Ingredients:
- 1 (4.25-oz.) box Blue Diamond Almond Nut Thins
- 1/4 cup Blue Diamond Smokehouse Almonds, finely chopped
- 1 (1-oz.) packet dry gluten-free ranch dressing mix
- 1/3 cup light gluten-free ranch dressing
- 1 Tbsp. melted butter
- 1 1/4 lbs. chicken tenderloin or 1 1/2-inch cubes boneless, skinless chicken breast
- Olive oil cooking spray
Directions:
- Preheat oven to 400°F and spray a baking sheet with gluten-free nonstick cooking spray. Place Blue Diamond Nut Thins in a gallon-size bag and fold over the top. Crush with a rolling pin until chips are in tiny pieces. Add Blue Diamond Almonds and dry ranch dressing mix to bag and shake well to mix.
- Stir together ranch dressing and butter in another medium bowl. Dip each chicken tenderloin in ranch dressing and shake off excess. Roll in chip mixture, pressing into the surface to coat well; place on prepared baking sheet. Coat with nonstick cooking spray and bake for 10 minutes. Coat with cooking spray again and cook for 10 minutes more.
Quick tip: Any of the coating mixture that falls off the chicken after cooking is great sprinkled over a tossed green salad or mashed potatoes.
<< Back to Recipes
TAGS: FOR KIDS, DINNER
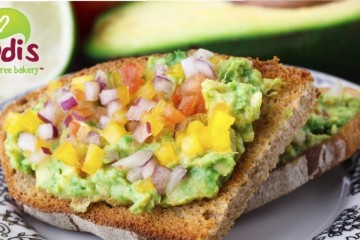
Avocado Toast
August 4, 2014Avocado Toast
![]()
Courtesy of Rudi’s Gluten-Free Bakery
Ingredients:
- 2 slices Rudi’s Gluten-Free Multigrain Sandwich Bread
- 1/2 avocado
- 1/2 lime
- 1 clove fresh garlic, chopped
- 1 Tbsp. red pepper flakes
- Salt and freshly ground pepper to taste
Directions:
- Toast bread slices until slightly golden-brown.
- In a small bowl, mash up avocado. Gently squeeze in juice from the lime and stir. Add in garlic, red pepper flakes, salt, and pepper.
- Spread avocado mixture over toast. Top with addition red pepper flakes or spices if desired.
Tip:For even more flavor, try topping your toast with other items like fresh or sun-dried tomatoes, cilantro, sprouted lentils, or even salsa!
<< Back to Recipes
TAGS: APPETIZERS/SNACKS, VEGETARIAN, FOR KIDS, BREAKFAST
Berry Yogurt Parfaits with Cherry-Almond Granola
June 30, 2014Berry Yogurt Parfaits with Cherry-Almond Granola
![]()
Courtesy of Rudi’s Gluten-Free Bakery

Makes 4 servings
Ingredients:
- 4 Rudi’s Gluten-Free Cherry-Almond bars, crumbled (1 cup)
- 1 1/4 cups low-fat vanilla yogurt
- 1 1/2 cups mixed berries (blueberries, raspberries and quartered strawberries)
- 2 tsp. honey
Directions:
- In each of four parfait glasses, spoon 2 Tbsp. yogurt, 2 Tbsp. crumbled bar, ¼ cup berries, another 2 Tbsp. yogurt, 2 Tbsp. berries, and any remaining granola.
- Drizzle each parfait with 1/2 tsp. honey. Serve immediately, or cover with plastic wrap and refrigerate for up to 3 hours before serving.
<< Back to Recipes
TAGS: FOR KIDS, DESSERT, BREAKFAST
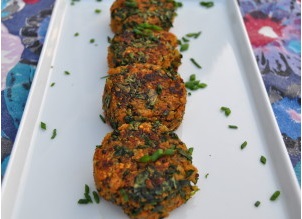
Sweet Potato-Kale Quinoa Cakes
May 19, 2014Sweet Potato-Kale Quinoa Cakes
Makes 12 Cakes
Ingredients:
- 10 medium white mushrooms
- 6 green onions
- 2 cloves garlic
- 2 medium sweet potatoes, shredded
- 1 cup finely chopped kale
- 1 tsp. cumin
- 1 cup steamed quinoa
- 1 Tbsp. flax meal or chia meal + 4 Tbsp. hot water
- Zest from 1 lime
- ¼ cup crushed Enjoy Life Garlic and Parmesan Plentils
- 2 Tbsp. minced fresh chive
- 2 Tbsp. minced fresh cilantro
Directions:
- Preheat oven to 350°F.
- Place the mushrooms, green onions and garlic cloves in the base of a small food processor. Pulse until everything is finely chopped.
- Warm a sauté pan over medium heat and add a glug of olive oil. Sauté the mushroom mixture for 7-8 minutes until the mushrooms have released their liquid and are lightly golden. Add the shredded sweet potatoes, chopped kale and cumin and sauté another 3-4 minutes. Add ¼ cup water and cook until the potatoes are softened and liquid has evaporated. Pour into a large bowl.
- Add the steamed quinoa, the flax meal/chia meal mixture, lime zest, crushed Plentils and the minced chive and cilantro. Season with salt and pepper and mix until thoroughly combined. Form the mixture into 12 evenly sized cakes, about 2” in thickness.
- Heat a large nonstick fry pan over medium and add a glug of oil. Place the cakes in the pan and cook 3–4 minutes on one side, gently flip and cook 3–4 minutes on the other side. Place on a baking sheet and continue until all cakes are lightly cooked on both sides. Place in the oven to continue cooking for another 10 minutes. Serve with your favorite gluten-free BBQ sauce.
<< Back to Recipes
TAGS: VEGETARIAN, SIDE DISHES, FOR KIDS, APPETIZERS/SNACKS
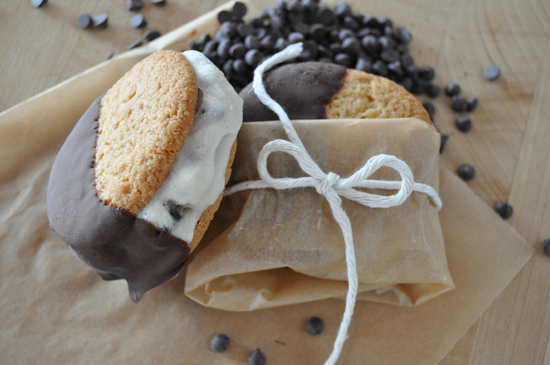
Frozen S’more Cookie Sandwiches
April 14, 2014Frozen S’more Cookie Sandwiches

Courtesy of Enjoy Life
and Kendra Peterson, chef/owner of Drizzle Kitchen
 Makes 4 cookie sandwiches
Ingredients:
Sandwich Ingredients:
- 1 pint vanilla hemp milk ice cream, softened
- 4 Tbsp. Enjoy Life Semi-Sweet Chocolate Mini Chips
- 8 Enjoy Life Vanilla Honey Graham Crunchy Cookies
Chocolate Coating Ingredients:
- ¼cup Enjoy Life Semi-Sweet Chocolate Mini Chips
- 2 tsp. sunflower seed oil
Directions:
- Mix the Enjoy Life Semi-Sweet Chocolate Mini Chips in with the softened hemp milk ice cream.
- Scoop about ¼ cup onto 4 of the Enjoy Life Vanilla Honey Graham Crunchy Cookies (the “inside” of the cookie).
- Top with another cookie and use a spoon to press more of the hemp ice cream onto the sides to fill out the cookie.
- Place on a parchment lined cookie sheet and pop in the freezer for about an hour to set.
- Meanwhile, melt the ¼ cup Enjoy Life Semi-Sweet Chocolate Mini Chips with the 2 tsp. sunflower seed oil. Remove the cookies sandwiches, one at a time, from the freezer and dip about half into the chocolate. Replace on parchment lined baking sheet in freezer and continue with the remaining cookies until they are all coated in chocolate-y goodness.
- Freeze until relatively firm, about another hour or so, and then wrap in plastic wrap until ready to enjoy.
<< Back to Recipes
TAGS: FOR KIDS, DESSERT