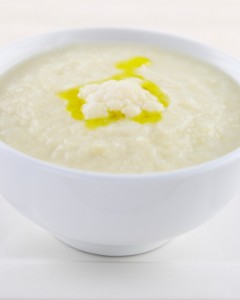
Shepherd’s Pie with a Cauliflower Twist
October 16, 2008Shepherd’s Pie with a Cauliflower Twist

This recipe is an old favorite which I made gluten-free and without potatoes. I use mashed “cauliflower” as the topping and no one even knows. Not even my pickiest tester – my daughter.
Ingredients:
Topping
- 1 head cauliflower
- 2 tbsp butter or soy butter – not melted
- 2 tbsp rice milk (or milk of choice)
Filling
- 1 tbsp olive oil
- 1 large onion diced
- 3 celery stalks diced
- 2 carrots diced
- 2 cloves garlic diced
- 2 lbs ground beef (chicken or turkey)
- ¾ tsp chili or chipotle
- 2½ tbsp of cornstarch
- 6 oz peas (frozen or fresh sweet peas)
Directions:
Preheat oven 420 degrees.
Topping
1. Steam cauliflower till soft in 2½ cups of water (drain and save water).
2. Place in bowl and mash with a fork.
3. Take a blender or food processor and puree. Add butter and milk if you desire a slightly creamier texture.
4. Salt and pepper to taste.
Filling
1. Heat oil in large skillet.
2. Cook onion about 2 minutes on medium heat.
3. Add celery, carrot and garlic. Cook about 8 – 10 minutes
4. Add beef and cook for about 5 minutes. Stir and break up pieces so they’re small.
5. Add the cornstarch to 2 cups of your saved water from your steamer and whisk it. Add mixture to beef and simmer around 1-2 minutes on low heat.
6. Pour filling into a 2-quart dish.
7. Evenly distribute cauliflower mash over the top, sealing edges.
8. Bake for approximately 30 minutes.
<< Back to Recipes
TAGS: DAIRY-FREE, FOR KIDS, DINNER
Tex-Mex Turkey Meatloaf (First Place Winner!)
October 15, 2008Tex-Mex Turkey Meatloaf (First Place Winner!)
From Elizabeth Mwanga of Queens Village, NY
This recipe earned one of four First Place prizes in the Beyond Celiac 2011 “Holiday Dips & Dishes” Gluten-Free Recipe Contest, sponsored by Crunchmaster.
From Elizabeth Mwanga of Queens Village, NY
Ingredients
Meatloaf
- 2 lbs ground turkey
- ½ cup finely ground Crunchmaster Multigrain Crackers
- 1 egg, beaten
- 3 tsp olive oil
- 1 clove garlic, finely minced
- 1/2 onion, finely diced
- 1/2 red pepper, finely diced
- 1/2 green pepper, finely diced
- 1/4 cup frozen corn kernels
- 1/4 tbsp cumin
- 1/4 tbsp chili powder
- 1/4 tbsp cayenne pepper
- 1/4 cup of plain tomato sauce*
- 1 tbsp chile in adobo sauce*
- 1 chile in adobo, finely diced*
- Salt, pepper to taste
Topping
- 1/2 cup salsa (non-chunky works best)*
- 1 tsp chile in adobo sauce*
- 1/2 tbsp honey
- Salt and pepper to taste
Directions
- Preheat oven to 375° F.
- Lightly grease a large baking sheet with 1 tsp of oil. Heat 3 tsp of olive oil in a sauté pan and cook onion, garlic, red and green pepper over a medium flame until soft, for approximately 3 minutes. Turn off heat and remove pan from stove; allow to cool for 5 minutes.
- In a large mixing bowl, add the ground turkey, egg, ground crackers, tomato sauce, chile, chile sauce, frozen corn, cumin, chili powder and cayenne pepper, salt and pepper. Mix well to combine all ingredients.
- In a small bowl, prepare the topping by stirring together all of the ingredients.
- Add the sautéed veggies to the turkey mixture and combine well.
- Transfer the turkey mixture onto the sheet pan and form into a rectangular loaf. Pour the glaze over the top and spread evenly.
- Place a sheet of aluminum foil loosely over the top of the meatloaf and place in the oven for 30 minutes. Remove the foil and continue to cook for an additional 15 minutes.
- Remove from oven, slice and serve.
* Note: Always check the label to ensure ingredients are gluten-free.
<< Back to Recipes
TAGS: HOLIDAY, FOR KIDS, DINNER
Cauliflower Mashed Potatoes
October 14, 2008Cauliflower Mashed Potatoes
Ingredients:
- 4 ½ cup cauliflower
- ¾ cup cashews, soaked in water for 4 hrs. (optional)
- 2 Tbsp. olive oil
- 1 ½ tsp. salt
- 1 Tbsp. lemon juice
- 1 medium garlic clove
Directions:
Blend all ingredients together. If you’re using a Vitamix blender, blend fast and long enough to heat up.
<< Back to Recipes
TAGS: VEGAN, THANKSGIVING, SIDE DISHES, PALEO, HOLIDAY, FOR KIDS, DAIRY-FREE
Garden Vegetable Risotto
October 10, 2008Garden Vegetable Risotto
Gluten-Free, Fresh & Delicious: Garden Vegetable Risotto
By Vanessa Maltin,
NFCA Director of Programming & Communications
Ingredients
- 6 tablespoons olive oil
- 1 cup yellow onion, diced
- 2 cloves fresh garlic, minced
- 1 1/2 cups Arborio rice
- 3 cups vegetable stock
- 1 cup button mushrooms, sliced
- 1 cup zucchini, diced
- 1 cup yellow squash, diced
- 1 cup green peas
- 2 carrots, peeled and cut into thin strips
- 2 cups dry white wine
- 2 cups grated parmesan cheese
- Salt, to taste
- Pepper, to taste
In medium-sized saucepan heat 3 tablespoons of olive oil. Sauté onions and garlic in oil until they begin to brown. Add rice and remaining olive oil and allow to brown for 2-3 minutes, stirring constantly.
Slowly add vegetable stock one cup at a time and allow liquid to absorb before adding more. After adding 3 cups of vegetable stock, add in mushrooms, zucchini, squash, peas and carrots.
Add in white wine gradually, allowing time for liquid to absorb. After adding second cup of white wine, add parmesan cheese. Allow cheese to melt for about two minutes. Add salt and pepper to taste. Once cheese is fully melted and liquid is absorbed, remove from heat. Allow to cool for 2-3 minutes before serving.
See more low-cost gluten-free recipes at www.GlutenFreeonaBudget.com.
<< Back to Recipes
TAGS: DINNER, VEGETARIAN, SIDE DISHES
Stuffed Chicken
August 10, 2008Stuffed Chicken
Stuffed Chicken
By Chef Edgar Steele
NFCA Chef Spokesman
Ingredients
- 3 Chicken Breasts
- 4 slices Prosciutto
- Fresh Mozzarella or Fontina cheese
- Gluten free pesto sauce
- Fresh basil leaves
- Sundried tomatoes, chopped
- 2 cups gluten free bread crumbs
- 1 cup Pecans
- 1 tsp dried thyme
- 1 tsp dried cumin
- 1 cup gluten free all purpose flour
- 1 beaten egg
- Slice each chicken breast in 2 long pieces then place between two sheets of plastic wrap and pound until thin (about 1/8 thick).
- Place 1 slice of prosciutto, cheese, pesto sauce, sundried tomatoes and basil leaves (each ingredient can be added in the quantity desired) on top of the chicken breast. Roll up each piece of chicken into a tight log making sure to roll it down the length of the slice, not across the width. Fasten each roll with twine. Season the chicken with salt and pepper.
- Place the pecans, thyme, cumin and salt in a food processor. Combine the mixture with the bread crumbs. First coat the chicken with flour, then coat it with the beaten egg and bread crumbs until completely covered.
- Fry the breaded chicken in 350°F vegetable oil until golden and then remove the twine. Place the chicken roll in an oven set at 350°F for 8 to 10 minutes or until the internal temperature is 165°F. If you prefer not to fry the chicken, you may sear it in a hot sauté pan with a littler oil and finish it in the oven as directed above.
- Remove the cooked chicken from the oven and slice it into pieces. Serve it with any accompaniment you choose.
<< Back to Recipes
TAGS: DINNER
Rice with chicken (Arroz con pollo)
August 4, 2008Rice with chicken (Arroz con pollo)
Rice with chicken (Arroz con pollo)
By Chef Edgar Steele
NFCA Chef Spokesman
Ingredients
- 2 1/2 cups rice, preferably short grain
- 3 cups chicken stock
- 1 whole chicken
- 1 small red pepper, diced
- 1 small onion, diced
- 3 garlic, minced
- 1/2 tsp. dried orégano
- 1/2 cup chorizo, diced
- 1/4 cup ham of your choice, diced
- green olives (optional)
- 1 tbsp. tomato paste
- 1 bay leaf
- Saffron
- Break the chicken into breasts, thighs, drumsticks and wings or buy each part individually. Season all of the pieces with salt and pepper. Heat enough vegetable oil in a saucepot to coat the bottom of the pan. Sear the chicken parts on all sides (making sure oil is hot before searing it) until golden brown. When finished, take them out and put them on a paper towel to absorb the excess oil.
- In the same pot where chicken was seared, add the tomato paste and a pinch of saffron, keep stirring it for 5 minutes then add the diced onions and the red peppers. When they’re half way cooked add the chorizo, ham, olives, oregano and garlic.
- Place the seared chickens back in the pot and add the 3 cups of rice and salt. Stir everything together and add the 3 1/2 cups of chicken stock and the bay leaf. Taste the liquid and adjust the seasoning. Bring the liquid to a boil over high heat until the liquid has evaporated almost completely and lower heat to low. Cover and stir every 10 minutes. After 30 minutes the rice should be finished cooking and the chicken will be cooked.
<< Back to Recipes
TAGS: DINNER
Beet and Orange Salad
May 5, 2008Beet and Orange Salad
From Chef Oonagh Williams of Royal Temptations Catering
Ingredients:
- 4 small beets cooked and peeled, or use roughly half of a 15 oz. can of small whole beets
- 1 Tbsp. balsamic vinegar
- 3 Tbsp. orange juice
- 1 tsp. Dijon mustard (make sure it’s gluten-free)
- 2 tsp. maple syrup or honey
- ½ cup olive oil
- Salt and pepper
- Greens of 2 green onions, sliced thinly
- 2 Tbsp. fresh parsley
- Zest of half an orange
- Fresh orange, clementines etc., segmented, or small can of mandarin oranges
- Romaine or butter lettuce, shredded
- 4 oz. goat cheese
- ½ cup chopped nuts
Directions:
1. Put balsamic vinegar, orange juice, Dijon mustard, maple syrup, salt and pepper in a container large enough to take vinaigrette and beets. Mix together.
2. Add olive oil, parsley and green onions. Mix it all together using an immersion blender until herbs are chopped and vinaigrette begins to thicken. Taste and adjust seasonings, sweetness, etc.
3. Cut beets into ½ inch cubes using a fluted cutter for a prettier presentation. Add beets to half of the vinaigrette. Preferably leave beets in the dressing for a few hours for flavors to develop.
4. Divide shredded lettuce between two plates. Top with beets in vinaigrette and a few slices of goat cheese (or whichever cheese you prefer). Add some slices of orange
5. Finish with chopped nuts or crushed nut brittle and a drizzle of orange vinaigrette.
Tips and Alternatives:Cook the beets in boiling water, or you can microwave them in a microwave safe bowl with a cover, 2 tablespoons of water and 2 small beets for about 8-10 minutes.
Choose whatever cheese or nuts you would like to top the salad. Omit them for dairy-free or nut-free.
<< Back to Recipes
TAGS: VEGETARIAN, SIDE DISHES, APPETIZERS/SNACKS
Butter Hollandaise Sauce & Dairy-Free Hollandaise Sauce
Butter Hollandaise Sauce & Dairy-Free Hollandaise Sauce
From Chef Oonagh Williams ofRoyal Temptations Catering
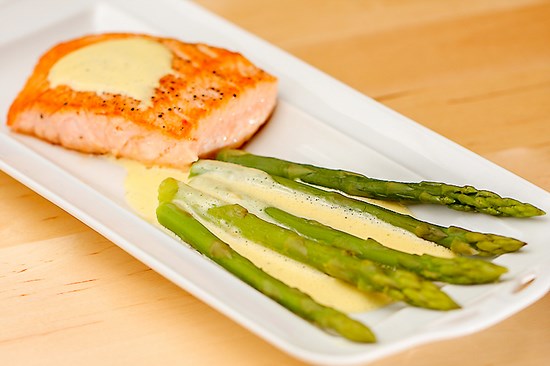
This makes only a small quantity, just right for 2 people.
Ingredients:
- 1 egg yolk at room temperature
- 1+1/2 tsp. lemon juice (Please use a real lemon and not the bottled stuff)
- ¼ tsp. gluten-free Dijon mustard
- 2 Tbsp. heavy cream
- 2 Tbsp. butter
Directions:
- In a 2 cup glass jug that is wide enough for an immersion blender. Blend egg yolk, mustard, salt and pepper.
- Heat lemon juice in microwave for just a few seconds. With the immersion blender running, pour lemon juice onto the egg and keep running for a few more seconds.
- Melt butter in microwave, add cream and heat until just ready to boil over.
- With immersion blender already running, pour butter and cream mix over egg mix and continue to run as sauce thickens.
- If sauce is not thick enough, then microwave at 10% power for literally a few seconds at a time. Do not cook at a higher temperature or longer time or you will get scrambled eggs. Whisk sauce with a small whisk each time you stop microwave. Sauce is ready when you can draw your clean finger through the sauce on the back of a spoon and sauce stays either side of the line. Immediately spoon onto casserole or refrigerate sauce overnight and spoon cold sauce onto hot dish.
Dairy-Free Hollandaise Sauce
I know so many of us with celiac disease are either dairy-free as well. My son and cousin are both dairy-free. However, many of us will fight to the bitter end to keep eating our dairy. So, while I am not willing to give up dairy, I certainly have family and friends that need dairy-free but still want foods that taste delicious. Plus, if I can make something dairy-free and delicious while lowering cholesterol or calories, that’s good for everyone. I’ve also made made my English lemon curd with coconut oil, it works and is tasty, but there is a definite coconut taste to me.
I made this over Christmas for my friend Gina Sandora, who has a dedicated gluten-free bakery (Allergeena) in Portland, Maine. Her stomach is happier when she limits the dairy and face it , Hollandaise, is really high in dairy. I add parsley and green onion to give more flavor. The whole meal we enjoyed was gluten-free and dairy-free. Both of our husbands are still wheat eaters. I even whipped in coconut cream instead of cream for the frozen dessert.
Ingredients:
- 1 egg yolk at room temperature
- 1+1/2 tsp. lemon juice (Please use a real lemon not the bottled stuff)
- ¼ tsp. gluten-free Dijon mustard
- 2 Tbsp. coconut cream (I used Aroy-D brand. Pure Asian coconut cream, not sweetened cream of coconut. Do notuse a “lite” coconut milk. The ones I’ve seen in the stores are thickened with a lot of gums, but to me the flavor is disappointing. And you are trying to make sure you have flavor.)
- 2 Tbsp. coconut oil, melted (Coconut oil is solid at room temperature, the same as butter, and you want that, not just a liquid oil. I melted some coconut oil and thenI measured out the 2 Tbsp. You need to be accurate with this small of a quantity.)
- 1 Tbsp. green of green onions
- 1 Tbsp. fresh parsley
Directions:
- In a 2 cup glass jug that is wide enough for an immersion blender, blend egg yolk, mustard, salt and pepper.
- Heat lemon juice in microwave for just a few seconds. With immersion blender running, pour lemon juice onto egg and keep running for a few more seconds. Add parsley and green onions and run to chop.
- onut oil in microwave, measure 2 Tbsp., add coconut cream to the 2 Tbsp. coconut oil (coconut oil will try to harden) and heat until just ready to boil over.
- With the immersion blender already running, pour coconut oil and coconut cream mix over egg mix and continue to run as sauce thickens.
- If sauce is not thick enough, then microwave at 10% power for literally a few seconds at a time. Do not cook at a higher temperature or longer time or you will get scrambled eggs. Whisk sauce with a small whisk each time you stop the microwave. Sauce is ready when you can draw your clean finger through the sauce on the back of a spoon and sauce stays either side of the line. Immediately spoon onto casserole or refrigerate sauce overnight and spoon cold sauce onto hot dish.
About Chef Oonagh Williams
 Like Chef Oonagh at Gluten Free Cooking with Oonagh on Facebook, where she posts recipes, her appearances on NH ABC WMUR TV, Local and National radio, products she’s tried, where she will be speaking next. Contact Chef Oonagh on Skype for consultations on food for the gluten-free and other food allergy diets. Her gluten-free cookbook, Delicious Gluten Free Cooking has over 200 pages with full color photos. Click the link for photos and a list of all recipes. E-mail at [email protected].
<< Back to Recipes
TAGS: SIDE DISHES, DAIRY-FREE
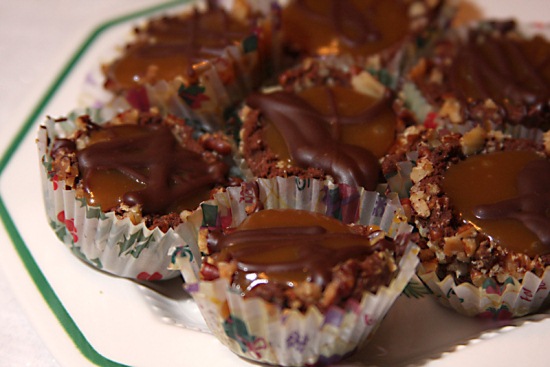
Chocolate Caramel Cookies
Chocolate Caramel Cookies
From Chef Oonagh Williams of Royal Temptations Catering
Ingredients:
- 1 stick of butter (4 oz.), soft at room temperature
- ¼ cup powdered sugar
- 1 ½ tsp. vanilla
- 2 Tbsp. maple syrup, honey or corn syrup
- 1/2 cup Oonagh’s Gluten-Free Flour Mix
- 1 Tbsp. cornstarch
- 3 Tbsp. regular cocoa
- ¼ cup almond meal/almond flour/ground almonds
- 1/8 tsp. xanthan gum
- 1/8 tsp. baking powder
- Salt
- 1-2 cups (4-8 oz.) chopped nuts
- Store-bought caramel sauce (Make sure it’s gluten-free!)
- ¼ cup semi-sweet chocolate chips, melted.
Directions:
1. Preheat oven to 350 degrees. Beat butter and sugar together until light and creamy, stir in vanilla and mix well.
2. Add flours, xanthan gum, baking powder, cocoa, syrup and salt. Mix until a soft dough is formed.
3. No need to refrigerate dough. Using a tablespoon, scoop dough into a cereal bowl containing some of the chopped nuts, then transfer to a cookie sheet.
4. Bake in preheated oven for 15 minutes. Remove from oven and use a ‘tamp’ (like a mini rolling pin with a ball at each end) to press dough down to make a well in the dough. Return to oven and cook for a further 10 minutes while watching them. They do over cook easily, but you want them totally cooked or they will taste grainy. Remove from oven, press down again with the tamp and leave to cool.
5. Warm the caramel sauce so it is can be easily poured. Spoon or pour ½ tsp. of sauce into each indent in the cookies. Leave to set up or chocolate will melt into warm caramel, instead of sitting on top.
6. Remove cookies from cookie pan and place on chopping board or paper towel. Drizzle with melted chocolate. If you use a small fork you get skinnier drizzles than with a spoon that too often just leaves a blob of chocolate. Leave to cool so chocolate hardens. Store in the refrigerator and bring to room temperature for eating.
Tips & Alternatives:
Bake the cookies in mini muffin cups to keep things neat. This also makes them easier to transfer and serve.
<< Back to Recipes
TAGS: FOR KIDS, DESSERT
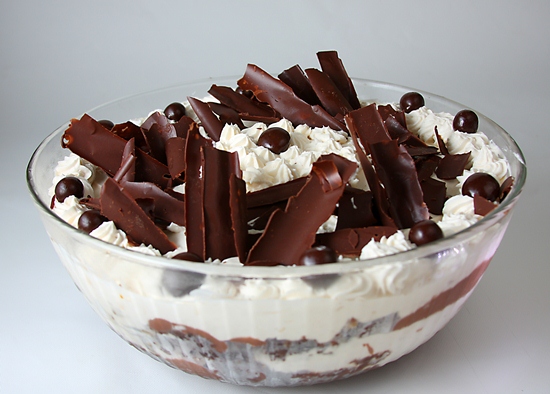
Chocolate Overkill Dessert
Chocolate Overkill Dessert
From Chef Oonagh Williams of Royal Temptations Catering
Ingredients:
Cake
- 1 batch of Gluten-Free Fudge Cake (just the cake; not the raspberry topping)
- 1 batch of Egg-Free Chocolate Pudding
- 1 pint of heavy or whipping cream whipped with 2 Tbsp. powdered sugar, 1 tsp. vanilla and 1/8 tsp. xanthan gum
- 3x recipe for Hazelnut Fudge Brownies
- Kahlua or coffee to sprinkle between layers (optional)
Topping
- ½ cup gluten-free semi-sweet chocolate chips and/or your favorite candies
- 1 pint whipping or heavy cream for piping on top whipped with 2 Tbsp. powdered sugar, 1 tsp. vanilla and 1/8 tsp. xanthan gum
Directions:
I used a 4.5 qt (4.5 liter) bowl.
1. Break up cake between your fingers into small pieces. Put cake pieces into bowl.
2. Sprinkle with ¼ cup Kahlua or plain coffee. The cake and brownie pieces are moist enough on their own, so feel free to skip this step unless you want the extra flavor.
3. Spread half of chocolate custard over cake layer.
4. Spread first pint of heavy cream whipped with sugar, vanilla and xanthan gum on top of custard.
5. Sprinkle lightly or heavily with candy/small chocolate pieces.
6. Repeat steps 1-5 using brownie instead of cake. Reserve some of the whipped cream if you want to pipe around the bowl.
7. Keep dessert in refrigerator and remove about 30 minutes to 1 hour before serving.
Tips and Alternatives:
For a semi-homemade version, use boxed gluten-free cake and brownie mix, instant chocolate pudding mix (make sure it’s gluten-free) and frozen whipped topping.
Get creative with your toppings. A layer of strawberries, raspberries or mango would be great.
<< Back to Recipes
TAGS: DESSERT
Showing 911-920 of 937
< 1 2 … 91 92 93 94 >