Gluten-Free Recipes for Dairy-Free
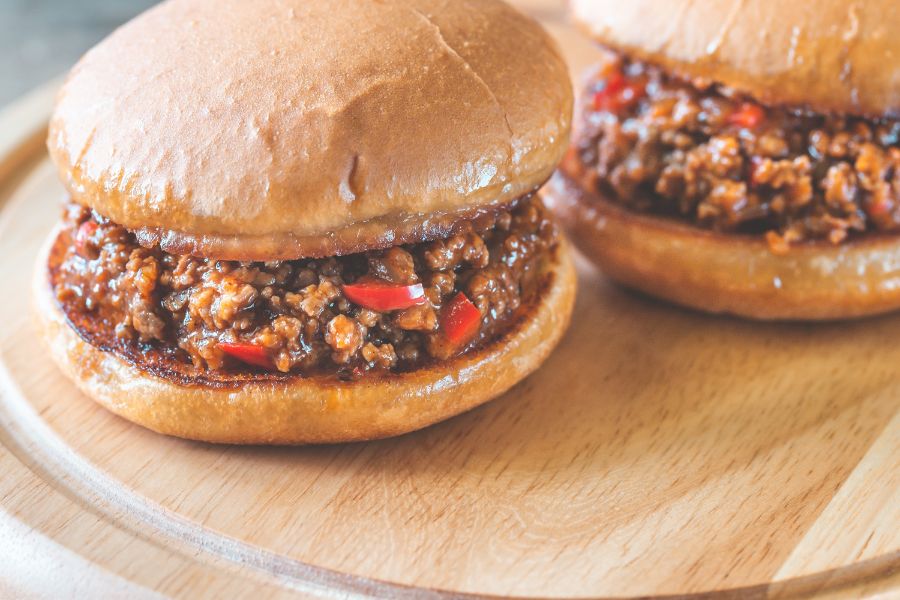
Gluten-Free Sloppy Joes
May 10, 2024Sloppy Joes are an American classic. A loose mixture of beef, tomato sauce and onions all on a soft bun makes for a delectable (and yes, somewhat messy) dish! Make it for a summer potluck and adjust the seasoning to your taste.
This recipe was provided courtesy of our friends at the Gluten-Free Palate.
Ingredients
- 1 pound ground beef
- 2 Tablespoon olive oil
- 1 teaspoon salt
- 1 teaspoon black pepper
- ½ white or yellow onion, chopped
- ½ red bell pepper, chopped
- 1 Tablespoon minced garlic
- Tomato mixture:
- 1 15oz can diced tomato
- 2 Tablespoon tomato paste
- 1 teaspoon chili powder
- 1 teaspoon cumin
- 1 teaspoon salt
- 1 teaspoon black pepper
- Gluten-free hamburger buns
- Cheddar cheese, for serving (optional)
Instructions
- Heat a large skillet over medium heat, then drizzle with the oil and add the beef. Season with salt and pepper and cook until you don’t see pink anymore.
- Add the onion and red bell pepper and stir to combine. Cook for an additional several minutes or until the vegetables are tender.
- Add the garlic and cook for another minute.
- Add the tomato mixture of canned tomato, tomato paste, chili powder, cumin, salt, and pepper. Stir to combine and cook for an extra minute or two until everything is well combined and cooked.
- Remove from the heat and serve over the gluten-free buns.
- If you want a studier, cripsy bun, try toasting them in a pan or in a toaster before serving with meat.
TAGS: DAIRY-FREE, DINNER, FOR KIDS, LUNCH
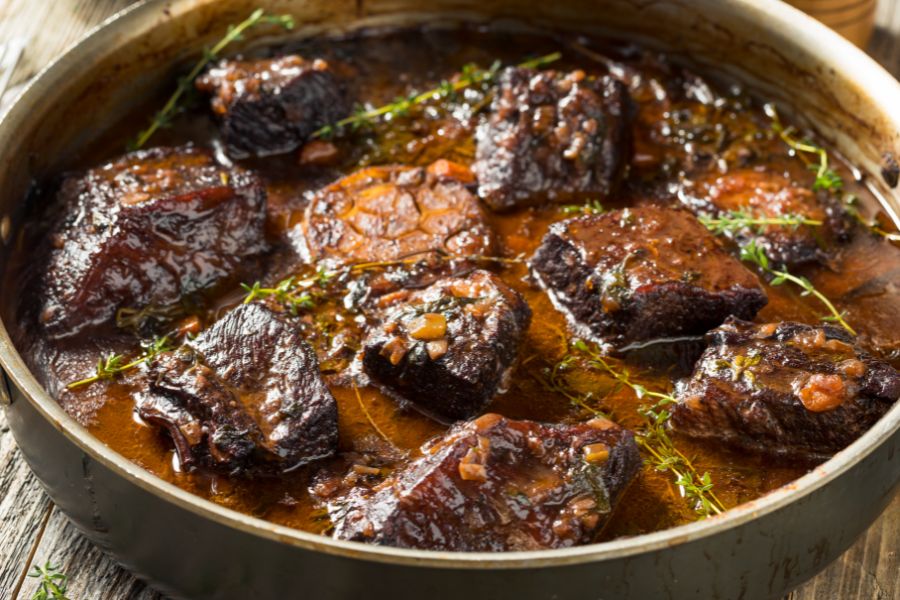
Gluten-Free Pressure Cooker Short Ribs
April 24, 2024A fast and easy recipe for tender ribs worthy of being the main course at any expensive restaurant. Pair it with mashed potatoes, green beans, lemon asparagus, or biscuits. You could also try making it in a slow cooker, which would take 6 to 8 hours.
This recipe was provided courtesy of the Gluten-Free Palate.
Ingredients
- 1 teaspoon rosemary
- 1 teaspoon onion salt
- ½ teaspoon paprika
- ½ teaspoon ground pepper
- ½ teaspoon sage
- 2 lbs beef short rib
- 2 Tablespoons oil, ideally one that can handle high temperatures
- 1 (6oz) can tomato paste
- 1 and ½ cups water or broth
- ¼ cup balsamic vinegar
- 2 Tablespoons Dijon mustard
- 1 Tablespoon unsweetened cocoa powder
- 6 cloves garlic, whole
Instructions
- Mix the spices (rosemary, onion salt, paprika, ground pepper, sage) and rub on the outside of the beef short rib; set aside.
- Drizzle oil into pressure cooker, then lower short ribs in. (If using Insta Pot, set it to sauté)
- Sear all sides.
- Remove short ribs; set aside.
- Add tomato paste, water, balsamic vinegar, Dijon mustard, cocoa, and garlic to the pot and mix with a spoon until combined.
- Add short ribs back in.
- Place lid on pressure cooker and lock into place. Make sure your steam vent is turned to closed, and, if using Insta Pot, turn the settings to “Pressure Cooker”, and set the timer for 40 minutes.
- Once the 40 minutes have passed, let the pot sit for 10 minutes.
- Carefully press the pressure release valve, and, once all the pressure is released, unlock the lid.
- Spoon sauce over each piece of beef short rib and serve warm.
TAGS: DAIRY-FREE, DINNER, LUNCH
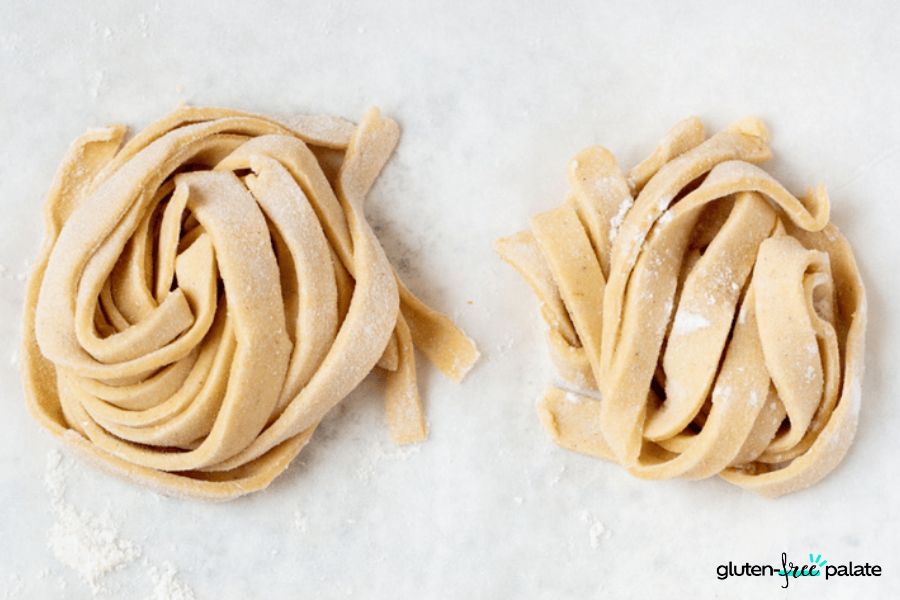
Homemade, Gluten-Free Pasta (no machine needed!)
July 3, 2023Are you missing perfect, slightly chewy pasta on the gluten-free diet? Then read on for a simple recipe for delicious, gluten-free pasta! You’ll be making fancy, authentic noodles in no time.
If you have a pasta machine, use it to make a more consistent noodle shape. Otherwise, don’t worry! Your pasta will be equally tasty if you hand cut it.
This recipe is provided courtesy of our friends at the Gluten-Free Palate.
Ingredients
- 1 ½ cups all-purpose gluten-free flour
- 2 teaspoons xanthan gum (only if your flour doesn’t contain it)
- 3 large eggs
Instructions
- In a large bowl, mix the flour with the xanthan gum, if using.
- Make a well in the middle of the flour and add the eggs. Mix well using a fork until all the ingredients are combined and you have a slightly sticky pasta dough. If the dough feels too dry you can add one more egg or a couple tablespoons of water until you reach the desired consistency. If the dough is too wet, add a little bit more gluten-free flour.
- Knead the dough on a floured surface for 2-3 minutes until you get a smooth ball of dough. There’s no gluten to be formed so you don’t need to knead the dough for too long, but the kneading ensures that you break apart lumps of flour, if any exist.
- Cut the dough into quarters and roll it out one at a time with a rolling pin. Roll it out into a loose rectangular shape.
- Fold the long ends together (so it’s easier to cut, unless you’re using a very long knife. You could even fold it in thirds). Then slice the dough with a knife according to how thick you want your pasta to be. Unroll or unfold your dough, then toss the pasta strands in some flour and shape them into nests (pictured). You can let the pasta dry, or you can cook it right away in salted, boiling water for 4-8 minutes.
- Top your noodles with your favorite gluten-free sauce and serve!
TAGS: LUNCH, DAIRY-FREE, DINNER, VEGETARIAN
Roti (Indian flatbread)
April 5, 2023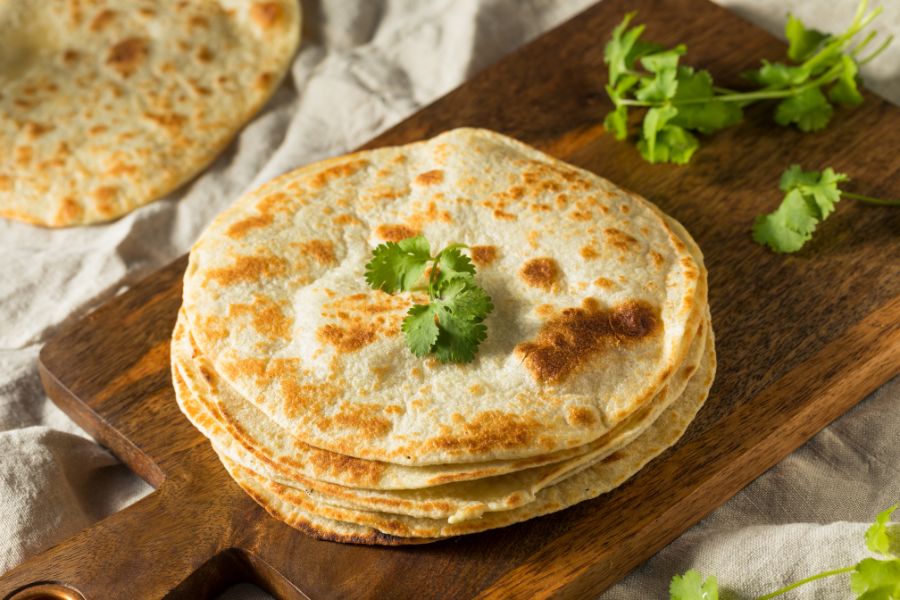
Roti is undoubtedly a staple of Indian cuisine, and it’s popular across all of South East Asia as well. They’re fairly easy to make, but traditionally contain wheat—we’re here to help! Try this gluten-free recipe with your next curry.
This recipe is provided courtesy of the Gluten-Free Palate.
Ingredients
Yields 6 servings
- ½ cup chickpea flour (also called besan or gram flour)
- ¼ cup cassava flour
- 1 cup gluten-free 1-to-1 flour
- 1 teaspoon xanthan gum
- ½ teaspoon fine sea salt
- 2 teaspoon baking powder
- 2 Tablespoon olive oil
- 2 ½ cups hot water
Instructions
- Place all of the dry ingredients in a medium-sized bowl: chickpea flour, cassava flour, gluten-free plain flour, xanthan gum, fine sea salt, and baking powder. Mix well using a whisk or wooden spoon.
- Add olive oil. Pour hot water a little at a time. Mix well using a wooden spoon until you can form it into a dough ball. The dough should be soft and firm but not too sticky—you probably won’t need to use all the water.
- Slice the dough into 6 pieces and then roll each piece into a small ball. Place them in the bowl and cover with a damp cloth.
- On a flat, floured surface, lay one of the dough balls and start to roll it until really thin. Make it as round as you can.
- Once you have rolled and shaped all the dough, heat a cast iron grill pan until hot.
- Place a roti circle onto the hot pan and leave to cook until you just start to see bumps appearing on the surface. Now flip the flatbread using a silicone spatula.
- Using a clean kitchen towel, press down very lightly for a few seconds to help the inside cook quickly, and then allow the bread to cook. After a few times, the roti starts to puff up. At that point, remove from heat and let the bubble deflate naturally.
- Enjoy roti with curry while hot!
TAGS: BREADS, DAIRY-FREE
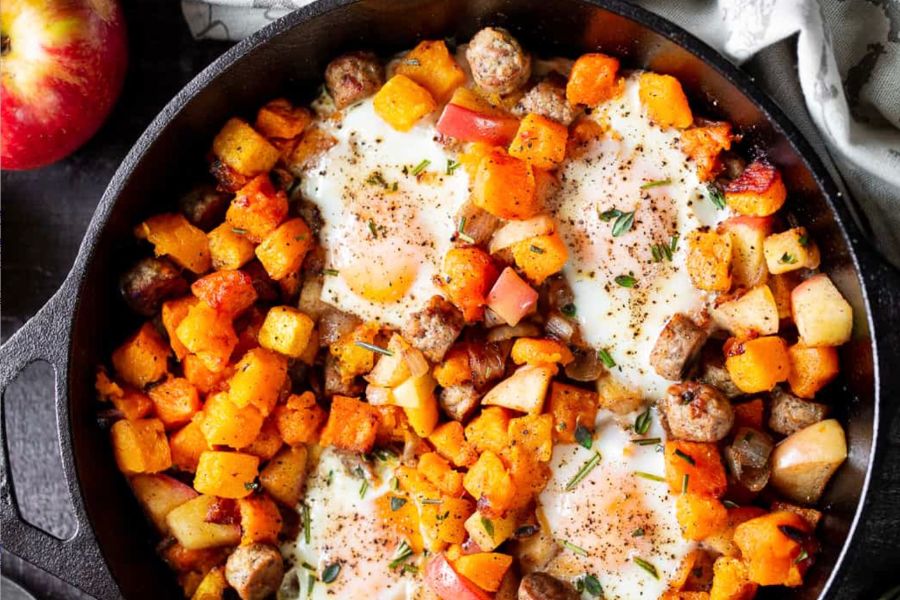
Butternut, Apple and Chicken Sausage Hash
September 9, 2022You’ll love this sweet and savory butternut squash hash with chicken sausage and apples. Made with certified gluten-free sausage links from Jones Dairy Farm, this recipe is ideal for an autumn weekend brunch or breakfast for dinner! Recipe is courtesy of Michele from Paleo Running Momma.
Ingredients
- 4 cups butternut squash, cubed about 1 inch
- 2 tablespoon ghee or preferred cooking fat, melted
- 1 package Jones Dairy Farm chicken sausage links, cut into bite size pieces
- 1 large apple, chopped; honeycrisp or pink lady work best
- 1 medium onion, chopped
- 1/2 teaspoon cinnamon
- 1 tablespoon minced fresh poultry herbs, plus more for garnish
- 4 eggs
- Sea salt
- Salt and pepper to taste
Directions
- Preheat oven to 425°F and line a large baking sheet with parchment paper.
- In large bowl, toss butternut squash cubes with 1 tablespoon of ghee. Evenly coat with sea salt and spread into single layer on baking sheet.
- Roast in oven 25–30 minutes, or until golden brown and soft.
- Meanwhile, heat large cast iron skillet (or heavy nonstick skillet) over medium high heat. Once hot, add remaining tablespoon of ghee.
- Add chicken sausage and cook, stirring 2 minutes or until brown.
- Add onions and reduce heat to medium. Cook and stir until onions are translucent and sausage is toasty.
- Add apples, cinnamon, herbs, salt and pepper. Stir until apples are soft, about 2–4 minutes.
- Turn off heat and once the butternut squash is roasted, gently fold into mix (drain excess grease first, if desired).
- Create four indents in hash and carefully crack one egg into each groove.
- Sprinkle eggs with salt, pepper and additional herbs, then cover and return skillet to medium heat.
- Cook until eggs are cooked to preference, 5–10 minutes.
- Serve right away and enjoy!
TAGS: DAIRY-FREE, DINNER, LUNCH, RECIPES OF THE WEEK, BREAKFAST
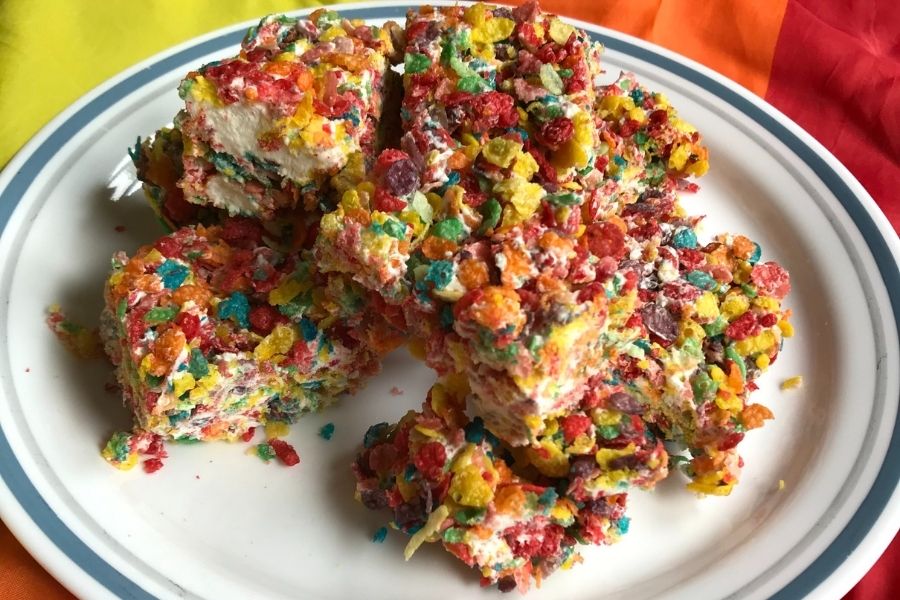
Pride Krispies
June 1, 2022Have you been wondering what to take to the June Pride celebration potluck? We’ve got you covered! These Pride Krispy treats are gluten-free, lactose-free, vegan and delicious.
Ingredients:
- 4 ½ cups Fruity Pebbles cereal (always gluten-free and clearly labeled)
- 10 oz bag full-sized Dandies vegan marshmallows
- ¼ cup coconut oil
Directions:
- Grease an 8×8 or 7×11 baking pan with coconut oil or nonstick cooking spray.
- Cut the marshmallows into quarters with scissors.
- Combine the marshmallows in a pan with the coconut oil and heat on the stove on medium heat, stirring continuously. I found it easier to use a large pan to give the marshmallows more heated surface area and also to have enough room for the cereal when you add it. Note that the marshmallows will not melt to a liquid state, but will instead get soft, sticky and pliable.
- Once the marshmallows are soft, add the cereal a cup at a time. Expose a sticky surface of marshmallow, stick the cereal onto it, fold the cereal in and repeat. You may want to use your hands for the mixing process once most of the cereal is in the pan, but warning! It will be hot! If you have heat resistant silicone cooking gloves, this would be a great time to use them!
- Once the cereal is mixed in, transfer the mixture to your baking pan and push it into place, all the way to the edges.
- Refrigerate for several hours or overnight and then cut into squares.
TAGS: DAIRY-FREE, DESSERT, HOLIDAY, VEGAN
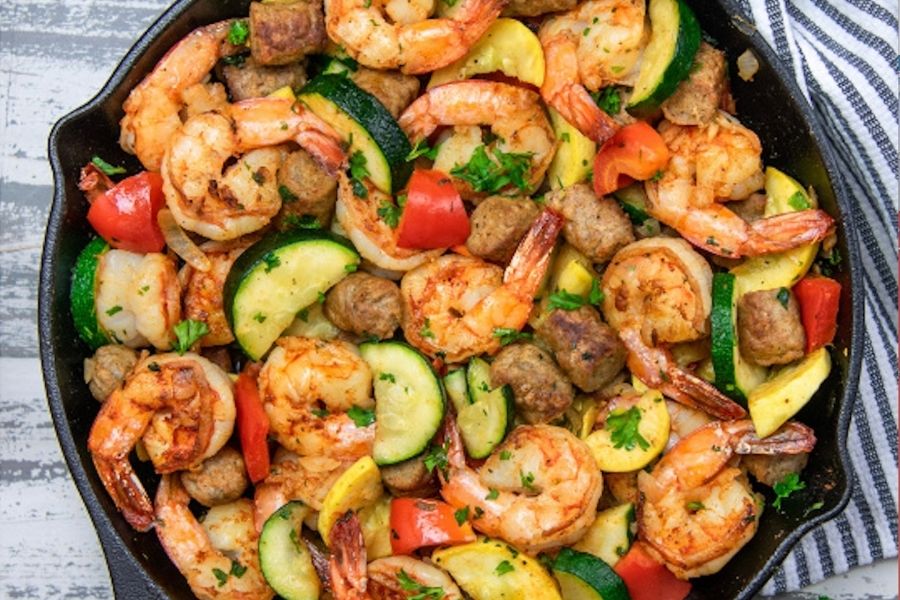
Garlic Shrimp and Sausage Skillet
May 19, 2022Recipe courtesy of Jones Dairy Farm and Rena from Healthy Fitness Meals
Start the summer season right with this shrimp and sausage skillet featuring summer squash!
This recipe is made with all-natural, certified gluten-free Jones Dairy Farm Turkey Sausage Links.
Ingredients:
- 1 package (7 oz) Jones Dairy Farm Turkey Sausage Links, chopped
- 1 pound raw shrimp, peeled and deveined
- 1 medium green zucchini, sliced
- 1 medium yellow zucchini, sliced
- 1 small onion, chopped
- 1 small red bell pepper, chopped into chunks
- 2 tablespoons olive oil, divided
- 1 tablespoon garlic powder
- 1 tablespoon mild paprika
- 2 tablespoon fresh parsley, chopped (plus more to garnish)
- Salt and pepper to taste
Directions:
- Place shrimp in small bowl and mix in one tablespoon olive oil, salt, pepper and paprika.
- Add shrimp to a large skillet over medium heat. Cook 2-3 minutes on each side. Remove shrimp and set aside.
- Using the same skillet, add one tablespoon of oil, turkey sausage, and onions. Toss together for about two minutes.
- Add bell pepper, zucchini, parsley, garlic powder, salt, and pepper to taste. Cook for three minutes until zucchini is tender and cooked through.
- Add cooked shrimp back in. Toss for another two minutes.
- Garnish with fresh parsley and serve. Enjoy!
TAGS: DAIRY-FREE, DINNER, LUNCH, RECIPES OF THE WEEK
Peanut Butter Cups
November 2, 2021
This recipe earned an honorable mention in the 2021 Beyond Celiac Gluten-Free Holiday Recipe Contest!
Recipe by Tammy Aiken
Gluten-Free and Dairy-Free Peanut Butter Cups by Tammy

Ingredients:
- 1/3 cup gluten-free smooth peanut butter
- 1/8 teaspoon sea salt or table salt
- 1 tablespoon confectionery sugar (powdered sugar)
- 1 cup Enjoy Life Semi-sweet Vegan chocolate chips
- Peanut butter cup mold. I use the Palksky chocolate almond peanut butter cup mold.
Directions:
- In a glass measuring cup mix the peanut butter, salt, and sugar. Set aside.
- In another glass measuring cup or a microwavable bowl, add 1 cup of chocolate chips.
- Melt the the chocolate chips in the microwave in 30 seconds intervals until smooth, mixing as you go.
- Warm the peanut butter mixture in the microwave for 15 to 20 seconds until melted and smooth. Mix.
- Add 1 full teaspoon of chocolate to each mold section. Spread over the bottom and up the sides of the mold.
- Add 1/2 tablespoon of the peanut butter filling to each section and spread over the bottom.
- Add 1/2 tablespoon of chocolate over the top and spread to cover.
- Put into the refrigerator for 25 to 30 minutes and allow them to set.
- Remove the mold from the fridge, pop each cup out and enjoy.
TAGS: DAIRY-FREE, DESSERT, HOLIDAY, VEGETARIAN
Snow Queen Snow Balls
June 1, 2021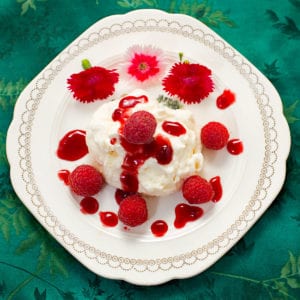
Recipe courtesy of Chef Oonagh Williams of Royal Temptations Catering, from her Delicious Gluten Free Cooking ebook.
With life hopefully opening up, I made one of our favorite desserts again, but as individual portions that you can pull out of freezer—”snow balls” instead of a Snow Queen. It’s always been very popular at parties. So very easy, quick to make and freeze, and naturally gluten-free. It’s basically whipped cream and crushed meringues frozen. However, for many of us desserts to feed a bundle of people is more than we want tempting us in the house, so smaller is better! Individual portions are becoming more popular as a way to control portion sizes, plus it looks prettier on a plate. Kids love a dessert made just for them. This is truly a dessert made in heaven with the slight crunch from the meringues, the mild almond liqueur flavor and the punch of flavor from the raspberries. Made in minutes, frozen within an hour or two so great for unexpected guests, and compatible with lots of different liqueurs and sauces. Don’t prepare it more than 1 week in advance as the meringues will lose their texture. Even if snow balls soften a little, they still taste wonderful and are like an Eton Mess, a recipe of whipped cream, meringues and strawberries.
Ingredients
- ¾ cup (180 ml) whipping or heavy cream
- 1–2 tbsp (15–30 ml) amaretto, or any almond-flavored liqueur you like. For a stronger almond flavor add 1 tsp almond extract to the liqueur.
- 1 tbsp (15 ml) sugar
- 3 oz store-bought meringues, or make meringues with 3 egg whites.
- Raspberries or strawberries.
Instructions
- Whisk cream, sugar and liqueur until stiff.
- Break meringues with your fingers into small pieces, but not crushed fine, and fold the pieces into the cream mixture. Taste and add more sugar if you prefer. Note: any frozen dessert tends to need more sugar than a room-temperature dessert.
- I used a number 12 scoop, roughly 1/3 cup, and made 6 balls from the mixture. Put them on a plate lined with plastic wrap or in paper cupcake liners and keep in the freezer for at least an hour or two. Note: they won’t freeze solid, and the snow balls will melt rapidly in the heat.
- Remove from freezer and peel the plastic wrap off the snow balls, or serve in cupcake liners.
- Decorate with raspberries, raspberry sauce, chocolate sauce, fresh strawberries or other fresh fruit.
Alternatives
- Try hazelnut liqueur to marry with the raspberries.
- Try a coffee or chocolate liqueur and serve this with my chocolate mousse recipe before whipping the mousse.
- Try orange juice concentrate, grated orange rind and orange liqueur.
- Liquor stores sell ¼ cup “nips” of liqueurs for a few dollars, so mix and match different liqueurs to see what you like best or to offer options for guests.
- If you are dairy free, try whipping the solid coconut milk cream from the top of a can of chilled full-fat coconut milk (not the “lite” Asian-style coconut milk).
About Chef Oonagh Williams
I have written a monthly recipe column for Beyond Celiac since January 2011. I have a Culinary Arts degree as well as celiac disease and other food allergies, so I know food and live this way daily. Remember that most real food is naturally gluten-free until manufacturers mess around with it, and only baking really needs changing. Real food is now being called clean eating.
Obviously talks and appearances are currently canceled, but you can connect with me on Facebook at Gluten-Free Cooking with Oonagh or on LinkedIn. I’ve just filmed recipes at home for New Hampshire’s ABC WMUR’s Cooks Corner and they are being aired. I am also being included in the nationwide library database of online presenters.
For new recipes and lots of advice, my e-cookbook Delicious Gluten-Free Cooking is only $20 and available to download at www.glutenfreecookingwithoonagh.com. It has tips, full-color photos, and recipes like grandma’s comfort soup, shrimp and crab bisque, English trifle, buffalo chicken, tiramisu, dinner party fare, and more. Follow the link to see the table of contents and thumbnail photos of the full-size photos in the e-book.
PERMALINKTAGS: DAIRY-FREE, DESSERT
Salmon with Shrimp in a Sweet-Spicy Pecan Sauce
May 3, 2021From Chef Oonagh Williams of Royal Temptations Catering
 Happy Cinco de Mayo, Happy Mother’s Day, Happy summer BBQ days.
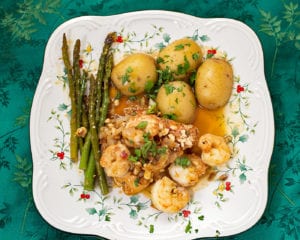
My local grocery store sells fresh salmon off cuts (from larger fillets) that are boneless and skinless and significantly less expensive than salmon fillets. I’ve made this recipe as a stir fry with other vegetables, pan-fried or grilled the fish with sauce on the side. I would love this sauce with lobster tail or even monkfish. Grill salmon, chicken, pork steak, scallops, shrimp on the BBQ for mom on Mother’s Day and serve with the sauce.
Sweet Spicy Pecan Sauce
Ingredients
Makes about 1 cup/8 fl oz/240 ml
- 2 Tablespoons (1 oz, 25 g) butter or oil
- 1 small onion, peeled and finely chopped
- 1 clove garlic, peeled and finely chopped
- ½ cup (2 oz, 50 g) chopped pecans
- 1/4 cup (3/2 oz, 40 g) firmly-packed light brown sugar
- 2 Tablespoons (30 ml) fresh lemon juice (lime might be great or even orange)
- 1 Tablespoon (15 ml) gluten-free Worcestershire sauce
- 2 teaspoons (10 ml) hot pepper jelly. You can add more to your taste when sauce is made. I like just a mild bite of heat, not enough to make your nose run and your lips and tongue tingle.
Ingredient Variations
- Made with butter it is wonderful but I am always conscious of the cholesterol in butter, plus it’s not fair on people who are lactose or dairy intolerant. So I have also made it with olive oil or avocado oil. Coconut oil, peanut oil or almond oil might also be good substitutions if you can tolerate them.
- I had run out of pecans one time and tried it with regular salted cashews, surprisingly cashews are not as good a marriage as pecans. Roasted hazelnuts were a good substitute.
- Think about adding zest of any citrus to match with different juice.
- Think about adding different fresh herbs, like parsley, cilantro, basil, lemon thyme, even lavender at the end for a very sophisticated taste sensation.
- I’ve served this sauce with various grilled meats as well as with corn Chex-crusted tilapia fillets served in soft, gluten-free corn tortillas with lettuce, tomato and avocado. Delicious.
Instructions
- Melt butter or oil in 1 quart (1 liter) saucepan over medium heat.
- Add onion and cook gently for 3-5 minutes or until totally cooked and tender. You could also use white parts of green onion (also known as scallion or spring onion).
- Add garlic and cook for another minute over gentle heat.
- Stir in the rest of the ingredients and cook, stirring constantly, until sugar is dissolved.
- Store in airtight container in fridge until required.
Salmon and Shrimp to Pair
As a Main
I cooked one 7 oz salmon fillet, lightly seasoned with salt and pepper. I bought a little over half a pound (250 g) of raw, butterflied, tail on, medium shrimp. When the salmon was nearly cooked, I put the shrimp into the same skillet as the salmon and spread it to one layer. When first side of shrimp was pink I flipped the shrimp and then added the pecan sauce to the pan and left the shrimp to cook in the sauce. If the salmon and shrimp produce a lot of juice, remove fish from sauce, thicken sauce lightly with cornstarch and water.
As an Appetizer
Depending on your pocket, raw shrimp available and how much you love your guests, you may buy smaller, medium shrimp. In this case I would cook shrimp in sauce as I said above, then put shrimp and sauce in a shallow bowl and serve with tooth picks.
If you buy the huge shrimp, I would grill either on skewer or individually and serve with pecan sauce as dipping sauce. I also like dusting shrimp with a slightly spicy rub to add to flavors. I like to leave tails on large shrimp as a handle, but virtually always pull tails off shrimp for most other recipes. Who wants to stop eating this salmon dish to pull a tail off shrimp and get messy fingers, even if those fingers taste good?
About Chef Oonagh Williams
I have written a monthly recipe column for Beyond Celiac since January 2011. I have a Culinary Arts degree as well as celiac disease and other food allergies, so I know food and live this way daily. Remember that most real food is naturally gluten-free until manufacturers mess around with it, and only baking really needs changing. Real food is now being called clean eating.
Obviously talks and appearances are currently canceled, but you can connect with me on Facebook at Gluten-Free Cooking with Oonagh or on LinkedIn. I’ve just filmed recipes at home for New Hampshire’s ABC WMUR’s Cooks Corner and they are being aired. I am also being included in the nationwide library database of online presenters.
For new recipes and lots of advice, my e-cookbook Delicious Gluten-Free Cooking is only $20 and available to download at www.glutenfreecookingwithoonagh.com. It has tips, full-color photos, and recipes like grandma’s comfort soup, shrimp and crab bisque, English trifle, buffalo chicken, tiramisu, dinner party fare, and more. Follow the link to see the table of contents and thumbnail photos of the full-size photos in the e-book.
PERMALINKTAGS: DINNER, LUNCH, DAIRY-FREE


