Gluten-Free Recipes for Thanksgiving
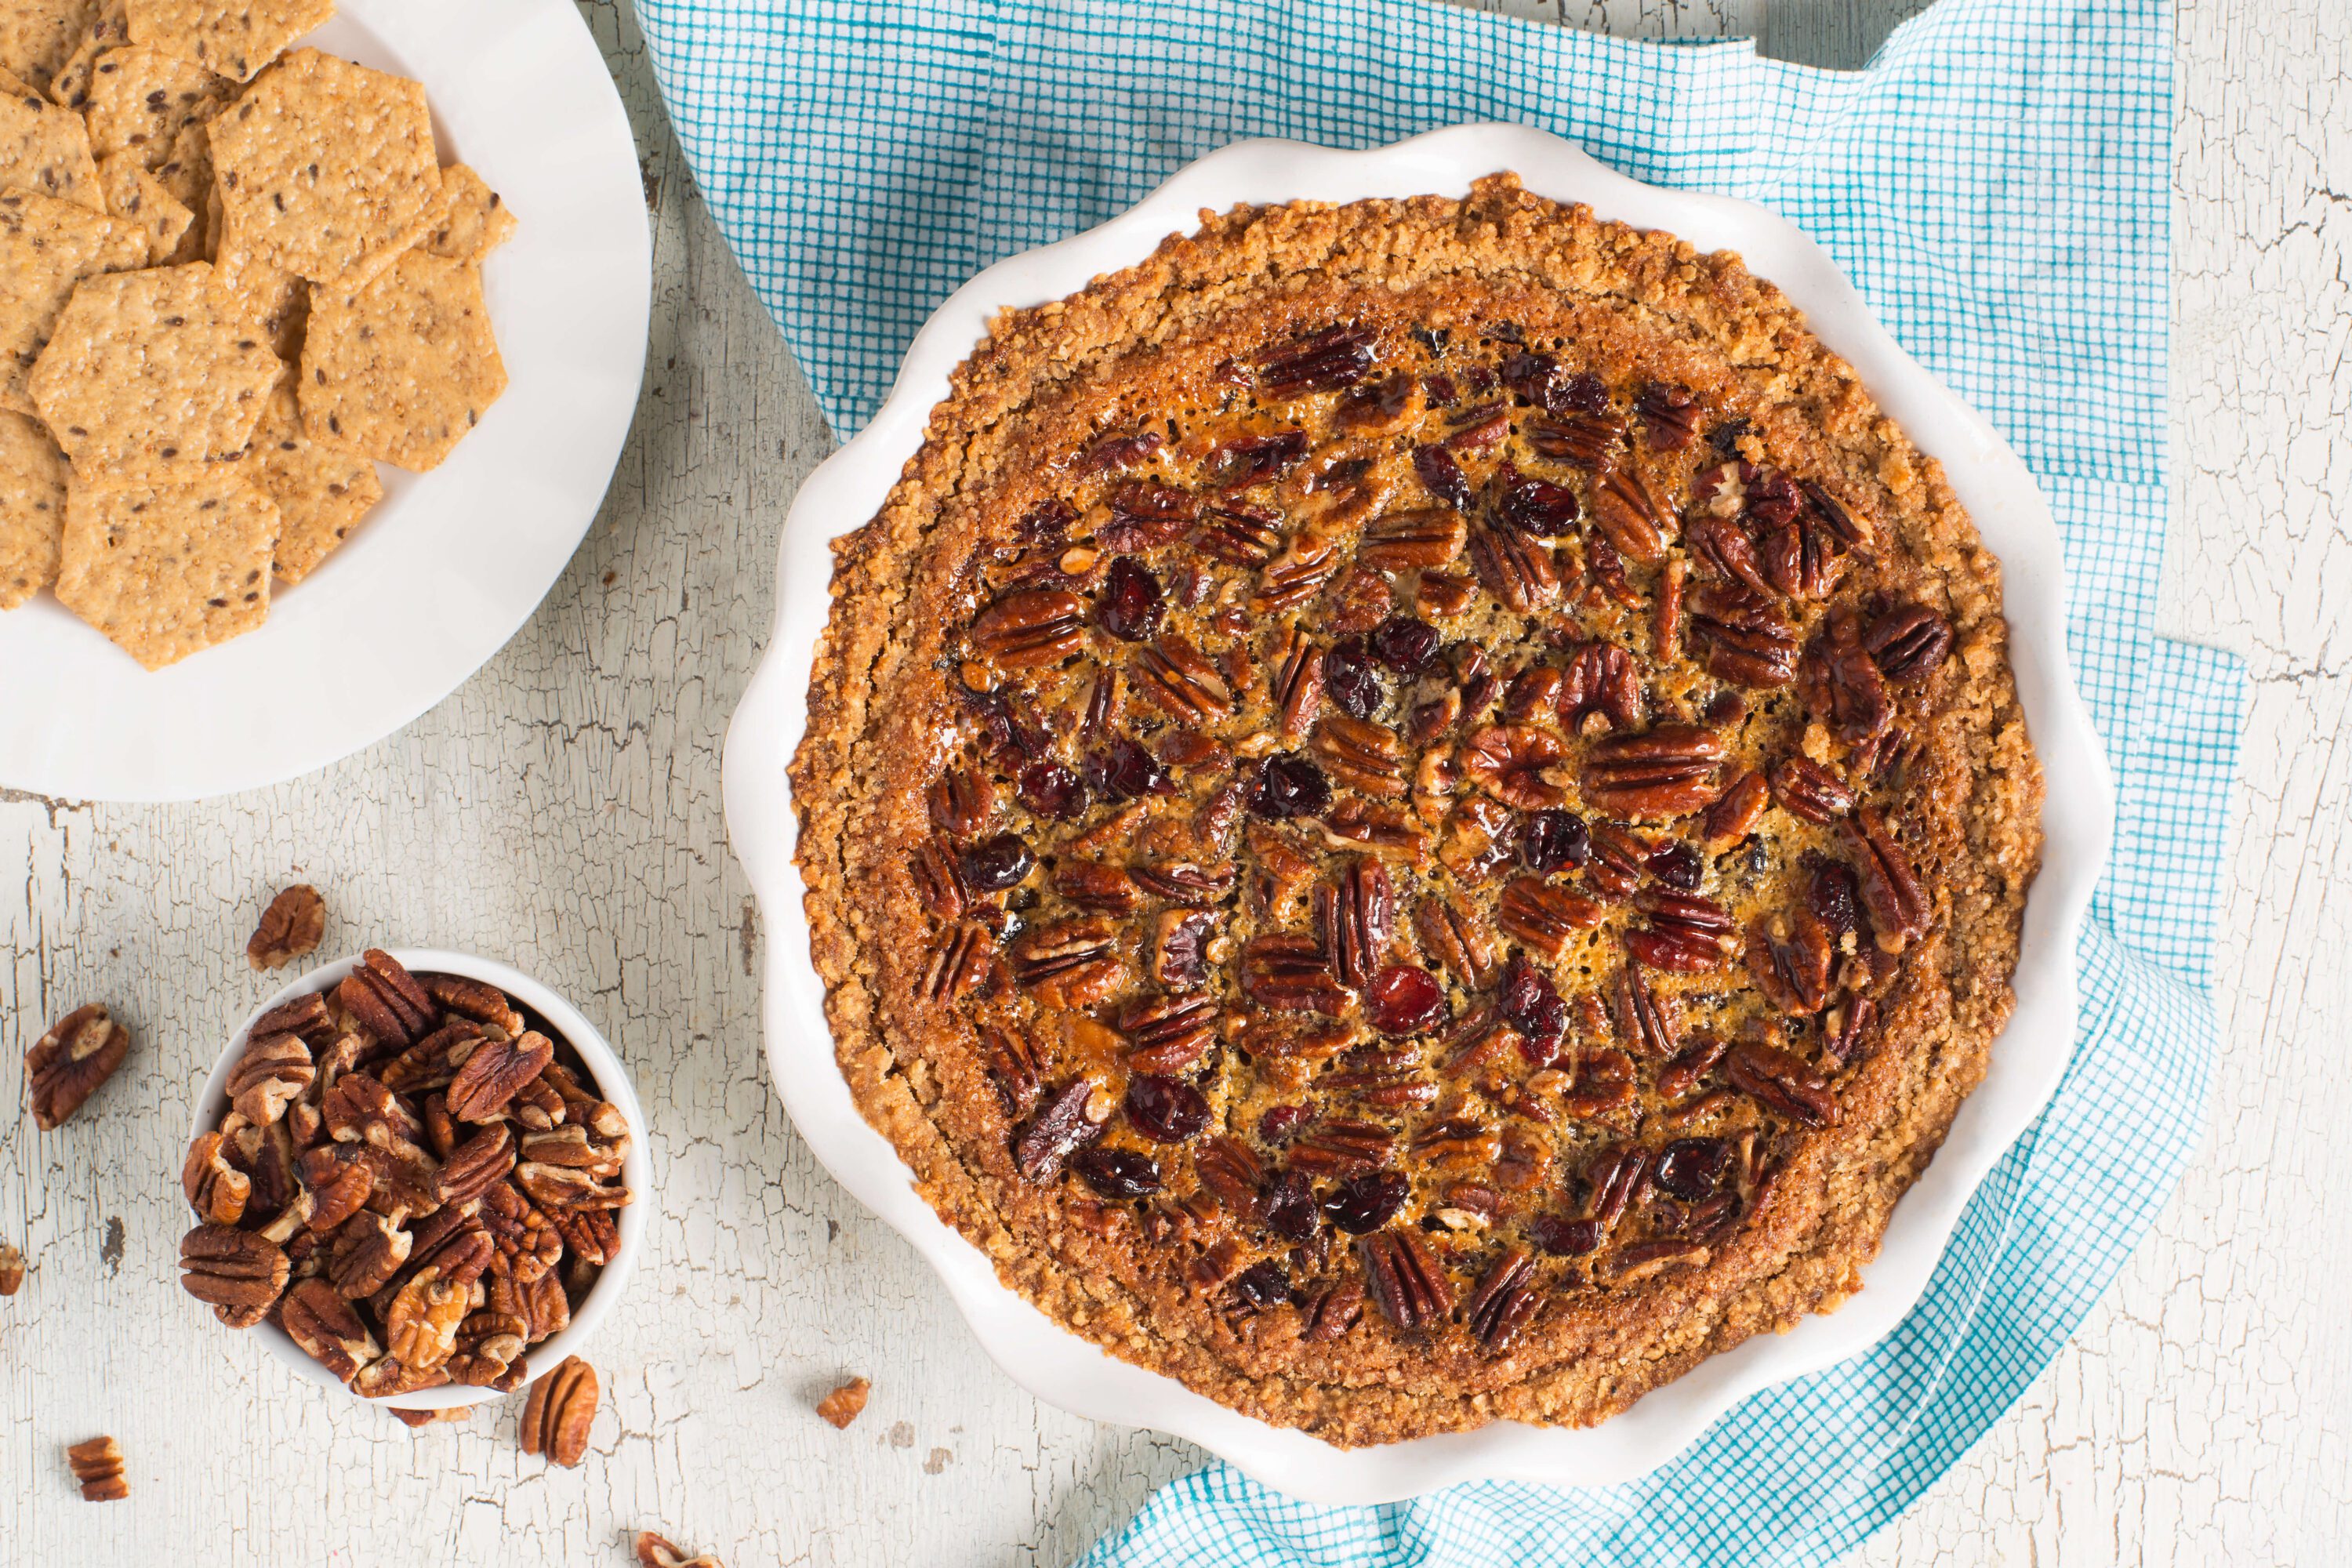
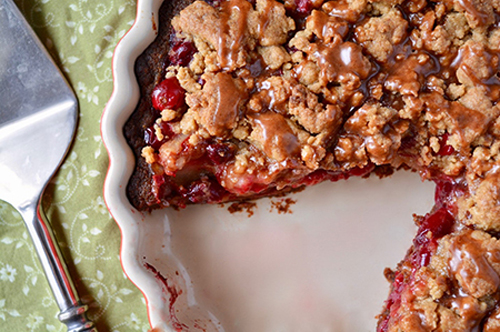
Pecan Cranberry Tart
January 7, 2019Pecan Cranberry Tart
Courtesy of Crunchmaster ![]()
Ingredients
Crust
- 1½ cup finely ground Crunchmaster® Original Multi-Seed Crackers
- 4 Tbsp sugar
- ¼ tsp salt
- 4 Tbsp butter, melted
Filling
- 1 ½ cup pecan halves, divided
- 2/3 cup sugar
- 1/3 cup dark corn syrup
- 2 tsp vanilla extract
- Pinch of salt
- 3 eggs
- 2 Tbsp cider vinegar
- 1 Tbsp butter, melted
- ½ cup dried cranberries, chopped
- 1 Tbsp tahini
Directions:
- Roast pecans 5-10 minutes at 350°F. Remove from oven and cool.
- Preheat oven to 350°F. Finely grind the Crunchmaster Original Multi-Seed Crackers in a food processor. In a large bowl, combine cracker crumbs, sugar, and salt. Mix until ingredients are well blended. Add melted butter and stir until the crumb mixture is thoroughly moistened.
- Press crumb mixture firmly into a 9” deep dish pie pan, distributing mixture evenly throughout the bottom and sides of the pie pan. Bake for 10 minutes.
- In another large bowl, combine sugar, egg, corn syrup, vinegar, butter, vanilla extract, tahini, and salt. Mix until smooth. Gently stir in dried cranberries and roasted pecans. Pour the filling mixture into the prepared crust, spreading evenly.
- Bake the tart about 30-35 minutes at 350°F. Filling will become golden.
- Cool before serving.
<< Back to Recipes
TAGS: DESSERT, THANKSGIVING, HOLIDAY
Sweet Slice Ham with Cranberry Chutney
December 19, 2018Sweet Slice Ham with Cranberry Chutney
Courtesy of Boar’s Head
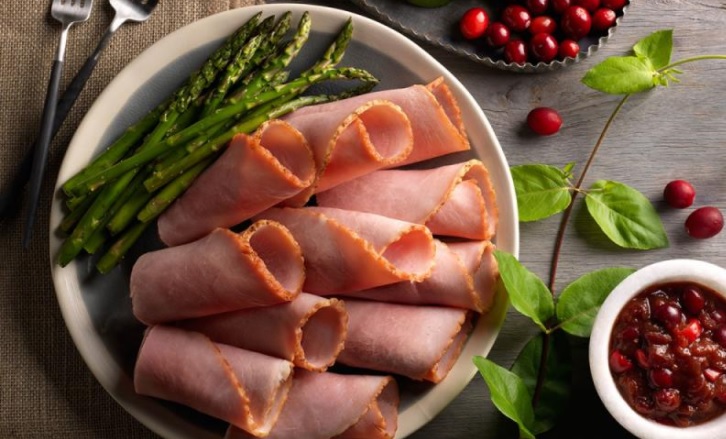 This sweet and tangy cranberry chutney perfectly complements the rich flavor of our Sweet Slice Boneless Smoked Ham for an elegant dish worthy of any holiday gathering.
Ingredients:
-
cup Cranberry-Pomegranate Juice
-
1 tbsp Red wine vinegar
-
2 tbsp Cranberries
-
¼ tsp Ground ginger
-
½ tsp Ground cinnamon
-
Sweet Slice Boneless Smoked Ham, Sliced
- Heat the juice in a small saucepan and add the red wine vinegar.
- Add the dried cranberries, cover and let steep 15 to 20 minutes.
- Stir in the spices, onion sauce, and mustard. The chutney can be cut into smaller portions if desired.
- Serve slightly warm along with ham slices, or store in the fridge until ready to use.
<< Back to Recipes
TAGS: THANKSGIVING, SIDE DISHES, LUNCH, HOLIDAY, DAIRY-FREE, APPETIZERS/SNACKS
Green Bean Casserole
December 17, 2018Courtesy of Crunchmaster ![]()

Ingredients
- 1/3 cup Crunchmaster® Roasted Vegetable Multi-Grain Crackers, finely crushed
- 1 large Vidalia onion, thinly sliced
- 1 clove garlic, finely chopped
- 2 cups button mushrooms, thinly sliced
- 1 pound fresh green beans
- 2 Tbsp olive oil
- 1 ½ cups 2% milk (or dairy-free milk)
- 1/4 cup (2 oz) goat cheese, crumbled
- ½ cup slivered almonds
Directions
- Preheat oven to 350°F.
- In a large skillet, sauté onions and garlic in oil for 20 minutes or until caramelized. Add mushrooms and milk.
- Meanwhile, steam green beans in a large pot over medium heat for 4 minutes; transfer to a bowl of ice water. Drain and set aside.
- Transfer green beans into prepared baking dish. Cover with onion mixture and crumbled goat cheese. Top with almonds and crushed Crunchmaster crackers.
- Bake for 15 minutes or until golden brown.
- Serve warm and enjoy!
TAGS: VEGETARIAN, THANKSGIVING, SIDE DISHES, HOLIDAY
Chocolate Yule Log
December 5, 2018Everything’s better with chocolate!
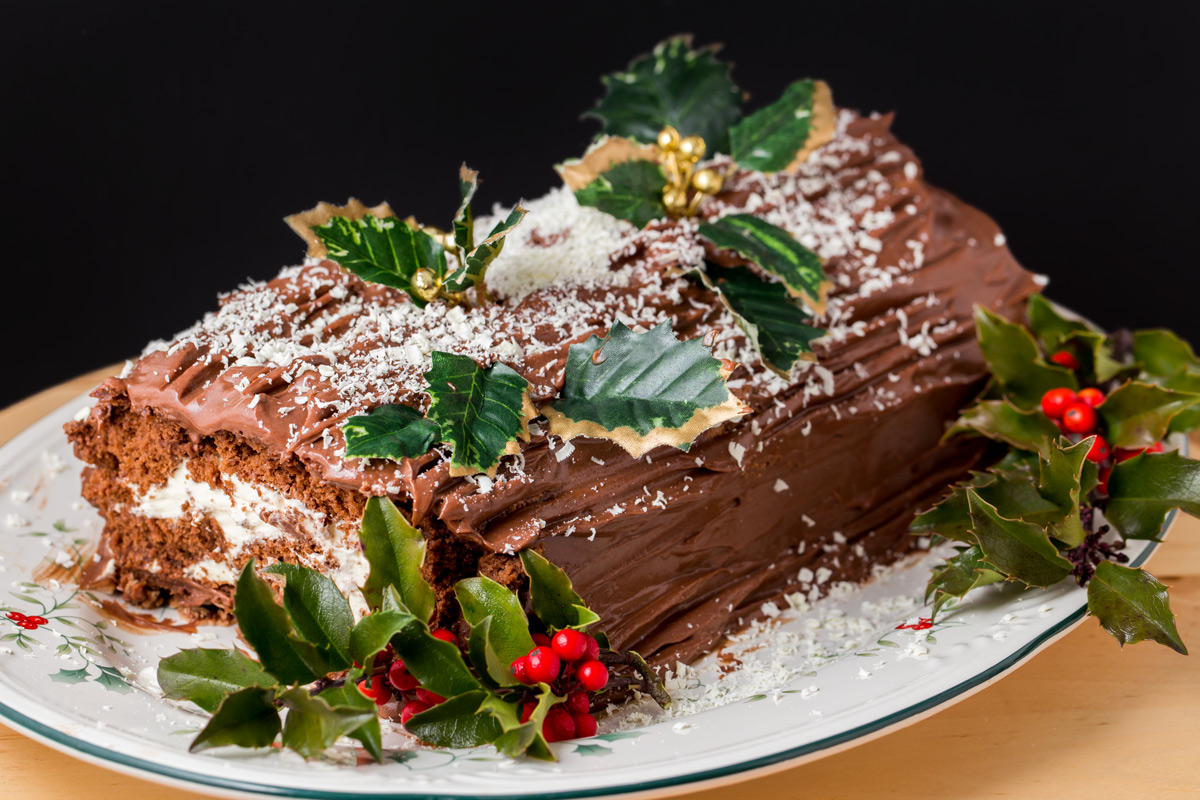
From Chef Oonagh Williams of Gluten-Free Cooking with Oonagh
When it comes to this chocolatey holiday recipe, my wheat-eating husband says you wouldn’t know it was gluten-free. At parties all the wheat eaters devour my gluten-free desserts. Don’t worry about amount of ingredients, it’s straightforward to make.
Ingredients:
Cake:
- 2/3 cup (112 g) semi-sweet chocolate chips
- ½ cup (120 ml) water
- 4 eggs separated into yolks and whites. Put the whites in clean, grease-free 8 cup (2 liter) bowl
- 1 cup and 2 tbsp sugar (224g) divided into two containers
- ¼ tsp (1.25 ml) xanthan gum
- ¾ cup (126 g) King Arthur all-purpose, gluten-free flour
- 2 Tbsp (30 ml) cocoa
- 1 tsp (5ml) baking powder
- Pinch of salt
Filling:
Choose whichever liqueur you like and a fruit that matches. Good options are orange, raspberry, coffee, hazelnut, plain rum or brandy. Or just plain cream and plain chocolate are delicious, too!
- ½ cup (120 ml) seedless raspberry jam
- 2 Tbsp (30 ml) brandy, rum, or raspberry liqueur
- 1 cup (240 ml) heavy cream
- 2 Tbsp (30 ml) powdered sugar
- Small container of fresh, sweet raspberries
Chocolate Topping, Option 1:
- 1 cup heavy cream
- 1 cup (168 g) semi-sweet chocolate chips
- 2 Tbsp brandy, rum, or raspberry liqueur
- White chocolate to garnish for snow
Chocolate Topping, Option 2 (quicker variation, no need to chill):
- 1 cup (168 g) semi-sweet chocolate chips
- ¼ cup cream (60 ml)
- 2 Tbsp (30 ml) liqueur
- 2 Tbsp (30 ml) powdered sugar
- 1 cup (224 g) lite sour cream
- White chocolate to garnish for snow
Directions:
Cake:
- Preheat oven to 350°F and line a 10×15 jelly roll pan with parchment paper. Make a single cut into the four corners of the paper so corners overlap.
- Melt chocolate and water together in microwave and stir until smooth. Leave to cool.
- In a clean bowl (glass or stainless steel), whisk egg whites until stiff (when the tips point up). Add half of the sugar (4oz) and whisk until very stiff and marshmallow-looking.
- In another bowl whisk the egg yolks with the second half of the sugar (4oz) until thick, creamy, and much lighter in color.
- Whisk the cooled chocolate mix into the egg yolks.
- Add flour, baking powder, cocoa, salt, xanthan gum and whisk until smooth.
- Slowly pour this mixture into bowl containing egg whites and gently whisk until smooth. Scrape down to bottom with spatula.
- Gently pour mix into lined jelly roll pan and cook for 22–25 minutes. Cake should be risen, softly firm and no wet batter in middle if you poke with a fork.
- Remove from oven and leave in pan for about 5 minutes, then turn it out onto a cooling rack.
- Tear off parchment paper liner in strips, then put a fresh piece of parchment paper on top and loosely roll up with parchment paper inside. Don’t worry if it cracks, the the cream filling will hold it together and the chocolate topping will hide any cracks. If you don’t feel confident rolling cake, then cut into 2 or 3 strips short or long and fill and frost as a layer cake when cold.
- Leave to cool for about 20 minutes and then unroll.
Filling:
- Put the cake on your serving plate.
- Warm raspberry jam with liqueur and spread onto cooled cake, right to the edges.
- Whisk cream with sugar and liqueur until stiff and spread on top of cake, right to the edges.
- Add fresh raspberries.
- Gently roll up with seam underneath.
- Make chocolate topping, then spread it on the cake all the way down the sides.
- For extra effects, drag the tines of a fork through the chocolate to give a bark effect; use a cheese grater make white chocolate shreds fall on top of chocolate; garnish with silk holly leaves or other Christmas décor.
- Chill until ready to eat. I usually cut the cake in half lengthwise first and then cut thick slices.
Chocolate Topping 1:
- Heat heavy cream in microwave, then stir in chocolate and liqueur.
- Wait a few minutes and stir again until totally smooth.
- Chill for at least four hours.
- Whisk until it is stiff enough to hold its shape and spread on cake.
Chocolate Topping 2:
- Heat chocolate and cream together and stir until smooth.
- Add liqueur and sour cream and stir well.
- Add powdered sugar to taste.
- It should be cool enough now to spread on top of cake.
TAGS: THANKSGIVING, DESSERT
EverRoast Chicken & Winter Squash Soup
November 19, 2018EverRoast Chicken & Winter Squash Soup
Courtesy of Boar’s Head.
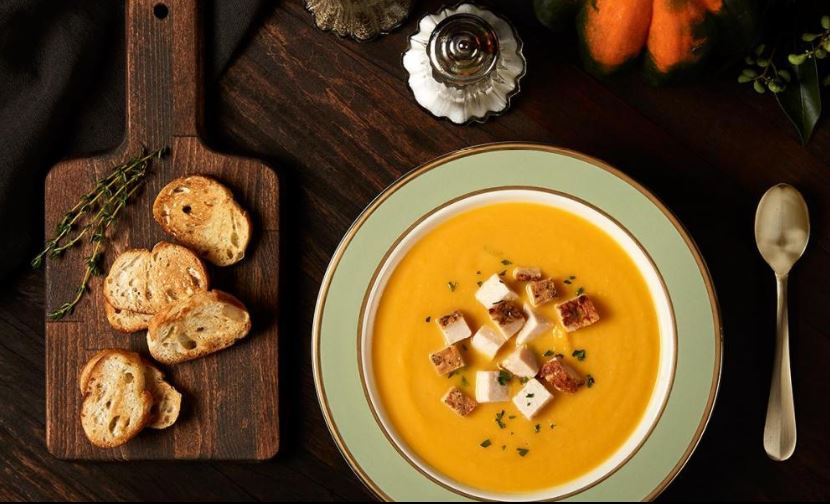 Delightful for frosty afternoons and evenings, this aromatic soup is full of flavor. The diced EverRoast Chicken, cubed winter squash and chopped vegetables blend wonderfully for a complex, distinctive taste.
Gluten-Free EverRoast Chicken & Winter Squash Soup
Ingredients:
- 4 Tbsp olive oil
- 4 Tbsp butter
- 2 cups onion, chopped
- 4 fresh thymes, chopped
- 4 cups winter squash, seeded and cubed
- 4 cups gluten-free chicken broth
- 3 cups EverRoast Oven Roasted Chicken Breast, finely diced
- 1/2 cup Fresh parsle stem, chopped
- 1/2 tsp salt
- 1/2 tsp pepper
Directions:
- In large saucepan, heat the olive oil and butter. Add the chopped onions and garlic and sauté until soft. About 10 minutes.
- Once garlic and onion are softened, add the cubed squash and chicken broth to the pan. Bring all ingredients to a boil.
- Reduce the heat and simmer until squash is very soft.
- Remove the saucepan from the cooktop, do not turn off stove.
- With a potato masher, mash the squash into the soup until pureed.
- Add the chicken and chopped parsley and stir to combine.
- Return the saucepan back to the stove and heat for 1-2 minutes.
- Serve hot and enjoy.
<< Back to Recipes
TAGS: THANKSGIVING, SOUPS/STEWS, HOLIDAY
Mini Quiches
November 7, 2018Mini Quiches
![]() Courtesy of Crunchmaster
Courtesy of Crunchmaster
Gluten-Free Mini Quiches
 Makes 24 mini quiches
Ingredients:
- 1 ¼ cups finely crushed Crunchmaster® Rosemary & Olive Oil Multi-Seed Crackers
- Gluten-free non-stick cooking spray
- ½ tsp. salt
- ½ tsp. black pepper
- ¼ tsp. grated fresh nutmeg
- 6 tbsp. unsalted butter, melted
- 1 cup shredded sharp cheddar cheese
- 1 cup milk
- Oils & Vinegars
- 2 tbsp. olive oil
- 1 cup finely chopped onion
- 1 – 10 ounce package frozen spinach, thawed
- 1 roasted red pepper, cut into 48 small slivers
- 2 large eggs
Directions:
- Preheat oven to 350 degrees. Spray a min muffin pan (24 tins) with non-stick cooking spray.
- Combine the cracker crumbs and melted butter. Divide crumb mixture among the prepared mini muffin cups and press down firmly. Bake for 7 – 8 minutes. Remove from oven and set aside.
- In a large skillet over medium heat, heat the oil and add the chopped onion. Cook the onions until very soft and starting to brown, about 10 minutes, stirring occasionally. Squeeze all the liquid out of the spinach, add to the onions along with the salt, pepper and nutmeg and cook, stirring, for 30 seconds. Divide the mixture evenly on the cracker crumbs. Divide the shredded cheese on top of the spinach mixture.
- Whisk the eggs and milk together and spoon into the muffin cups; do not fill all the way. Top with the roasted red pepper slivers and bake until set and browned, about 20 minutes.
<< Back to Recipes
TAGS: VEGETARIAN, APPETIZERS/SNACKS, BREAKFAST, FOR KIDS, HOLIDAY, LUNCH, THANKSGIVING
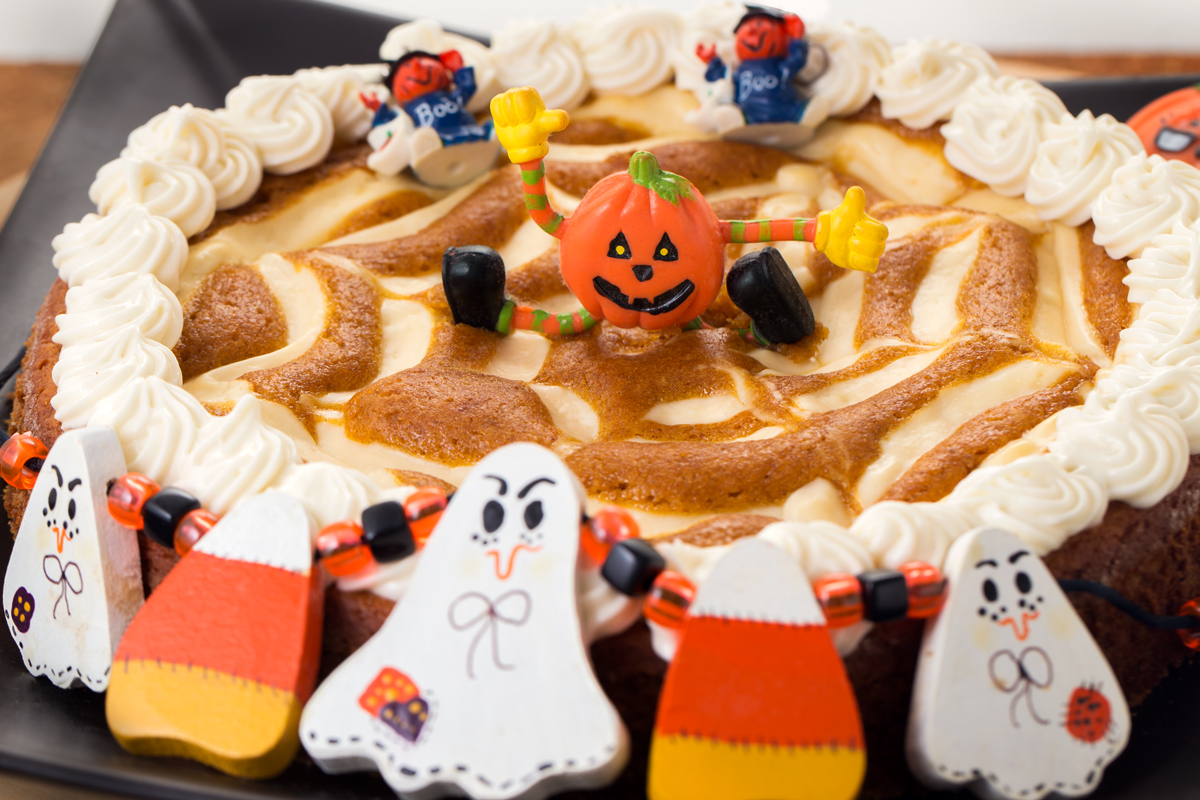
Pumpkin Cake with Cream Cheese Swirls – for Halloween or Thanksgiving
September 26, 2018A gluten-free pumpkin-y delight that’s perfect for Halloween and Thanksgiving meals!
From Chef Oonagh Williams of Gluten-Free Cooking with Oonagh
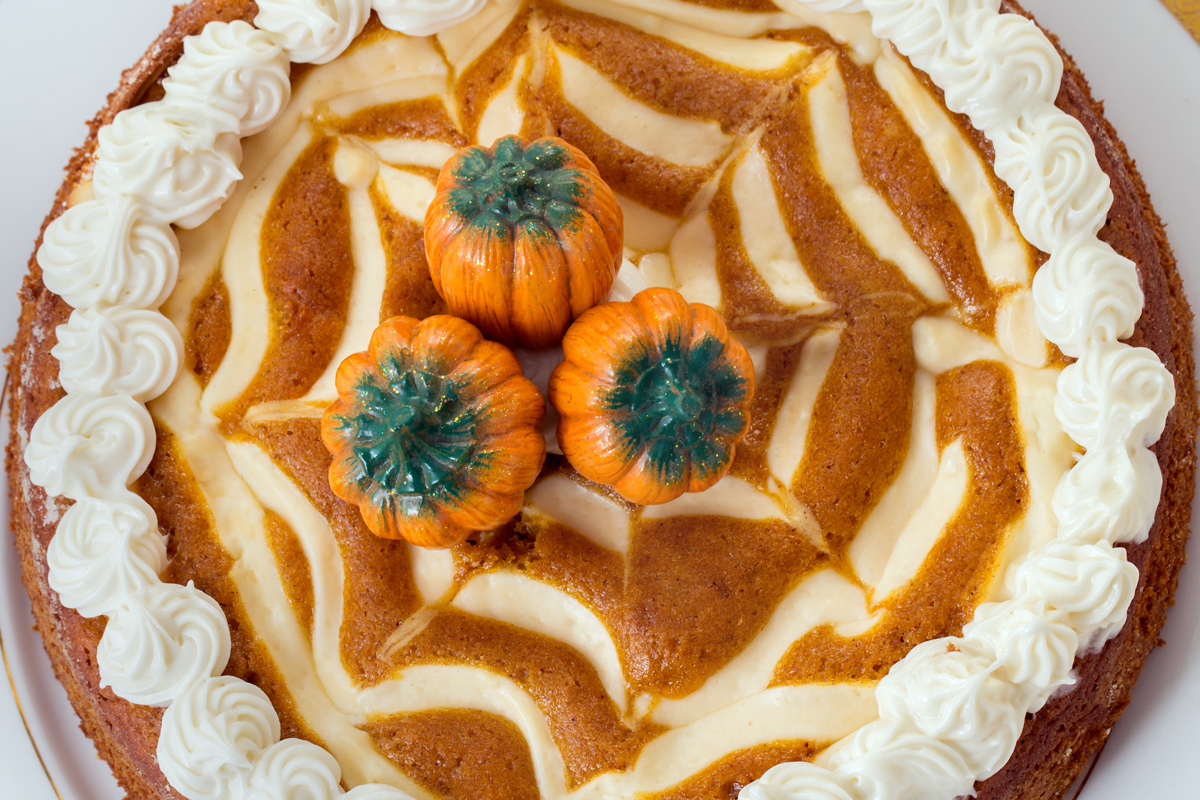
A friend told me this was a Libby’s’ recipe. I got it years ago at a potluck, made it often, and then adapted it to be gluten-free. Easy, moist and moreish. A 15 oz can of Libby’s solid pack pumpkin will make three times recipe, that is 3 cakes. And yes, there is no oil or butter in this recipe, pumpkin is used the way apple sauce can be used.
Ingredients
Cake
- 2/3 cup (or 5+1/2 oz, 160g) pumpkin from a can (not pumpkin pie filling). Don’t increase amount of pumpkin, cake won’t work
- 3 large eggs
- 1 cup (210g) sugar
- 1 teaspoon (5ml) vanilla extract
- 2 teaspoon (10ml) baking powder
- 2 teaspoon (10 ml) cinnamon or pumpkin pie spice or apple pie spice
- ½ cup (85g) gluten-free flour that doesn’t contain xanthan gum or baking powder, or ¾ cup (85g) my gluten-free flour blend (see below)
- pinch of salt
Cream Cheese Swirls
- 4 oz (112g) cream cheese softened
- 2 Tablespoon (30ml) powdered sugar
- 1 egg yolk or 1 Tablespoon liquid egg substitute
Mix together until smooth. These cream cheese swirls will top raw cake batter and become the “spider-web” pattern.
Frosting for Outside of Cake
- ½ cup (56 g) cream cheese softened
- 1 cup (112g) powdered sugar. I do sift the sugar as that’s quicker than trying to get frosting smooth with lumpy powdered sugar
- 1 teaspoon (5ml) vanilla extract
Mix together until smooth.
I don’t recommend using this frosting for the cream cheese swirls. The higher sugar content makes the cake far too sweet and sugar also caramelizes and sinks more into cake batter.
Instructions
- Preheat oven to 350°F (180°C). Spray springform pan and line base with parchment paper, dust with flour – I use white rice flour.
- Mix together pumpkin, eggs, vanilla and sugar and beat for 2 minutes to incorporate air.
- Add baking powder, spice, salt and flour and mix well.
- Pour onto lined springform pan, gently spread out.
- Spoon cream cheese into plastic bag, snip off corner and pipe concentric circles on top of raw batter. Don’t worry if it doesn’t look perfect. Take a small sharp knife or skewer and pull tip of knife/skewer through the cream cheese batter from center of cake to edge of cake to create the spider web design.
- Bake for 30-35 minutes until well-risen, springy but still soft to the touch. Stick a fork or toothpick into middle of cake to check that it’s cooked and taste a piece of cake. If it still has grainy flour taste, give it 5 minutes more.
- Once you’ve removed the cake from oven, let cool 10 minutes. Run a thin spatula around outside of cake to loosen and then remove springform ring.
- Allow to cool completely and then move to serving plate, lining paper should easily remove.
- Pipe frosting around outside of cake. Unless you use a huge pipe you should have leftover frosting that you can pipe on individual serving plate or freeze for another recipe.
I used various Halloween items to decorate as well as mini ceramic pumpkins for Thanksgiving.
My Gluten-Free Mix
I use for one cup of GF mix.
- ½ cup potato starch. Substitute arrowroot for nightshade allergy
- ¼ cup tapioca starch from Asian market, or Goya or Yoki brand in supermarkets
- 2 Tablespoon amaranth or millet flour
- 2 Tablespoon sorghum flour
Larger quantity:
- 1 x 14 oz bag potato starch (3+1/2 cups)
- 7 oz (1+3/4 cup) tapioca starch
- 4 oz (¾ cup plus 2 Tablespoons) amaranth or millet
- 4 oz (¾ cup plus 2 Tablespoons) sorghum
Makes about 7 cups total.
Watch me make this on NH’s ABC WMUR TV—recipe is still the same but I now leave out xanthan gum.
TAGS: THANKSGIVING, HOLIDAY, DESSERT
Wine and Mushroom Sauce for Roast Beef
November 28, 2017A savory gluten-free sauce that’s perfect for the holidays.
From Chef Oonagh Williams of Gluten-Free Cooking with Oonagh
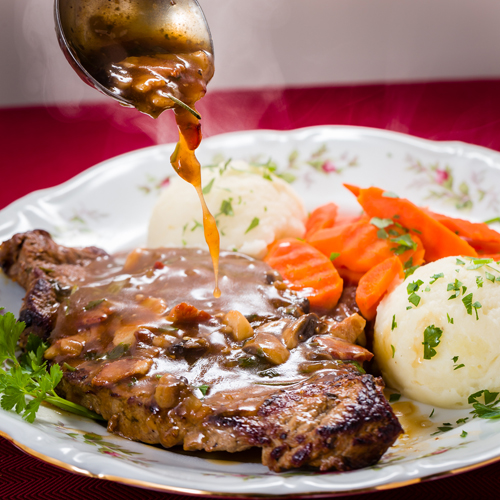 We have Beef Tenderloin (fillet) for Christmas Day with this sauce. Easily and best made in advance, refrigerate, slowly reheat and then thicken with cornstarch. If your family don’t mind rosemary leaves in a sauce, add some rosemary as you simmer it. A dash of gluten-free Worcestershire sauce also adds to the meatiness of the sauce. I’ve made this for years.
I made this sauce for a party with beef sirloin marinated for 24 hours in olive oil, balsamic vinegar, garlic and crushed rosemary. Then remove meat from marinade, sear in hot pan, cook in 350 degree oven for 15-17 minutes per lb until very rare. Chill overnight, then slice extremely thinly and place back in cold sauce and leave to marinate (24 hours is fine) until ready to slowly reheat in sauce and place in toasted rolls as sliders.
Gluten-Free Wine and Mushroom Sauce
Ingredients:
- 2-4 tbsp (30-60 ml) olive oil
- Large onion, peeled and finely chopped
- 2 cloves garlic, peeled and finely crushed
- 3 slices of gluten-free bacon, finely scissored
- 8 large mushrooms, cleaned and very finely chopped
- 1 c Marsala wine or favorite red wine. Do not use the cheapest wine you can find. If you don’t like the taste in a glass, you won’t like it in the sauce. But you don’t need to use an expensive wine
- 4 cups, 1 qt, 1 ltr gluten-free beef stock
- 2 tsps (10 ml) gluten-free Dijon mustard
- pepper
- 1/4 c (60ml) freshly chopped parsley
- 4 tsps (20 ml) gluten-free cornstarch (UK cornflour) mixed with ¼ cup/60 ml water.
Directions:
1. Use an 8 c/2 ltr saucepan. Cook onion and bacon together gently until onion is totally soft and nicely golden brown, not burnt.
2. Add mushrooms and garlic and cook until mushrooms are shrinking, giving up their juices and browning nicely. Don’t let garlic burn.
3. Add wine, stock, mustard, freshly ground black pepper, bring to a boil, simmer for 10 minutes. I don’t normally add salt since bacon, stock and mustard contain salt. Taste.
4. Either refrigerate once cool or thicken, add fresh parsley and serve with beef.
TAGS: THANKSGIVING, DINNER
Glazed-Snickerdoodle Fruit Tart
November 20, 2017
 Makes about 8 servings
Ingredients:
For the crust:
- 2 boxes Enjoy Life Foods Soft Baked Snickerdoodle Cookies
- 1 T. dairy-free milk
For the filling:
- 2 T. dairy-free buttery spread
- 1 medium sweet apple, suitable for baking (such as Cortland), cut into 3/4-inch pieces
- 1 medium pear, suitable for baking (such as Bartlett), cut into 3/40-inch pieces
- 2 C. fresh or frozen cranberries
- 2 T. brown sugar
- 1 1/2 t. ground cinnamon
- Pinch salt
- 1 T. Enjoy Life Foods All-Purpose Flour
- 1/4 C. water
- 1 t. lemon juice
For the crumble:
- 1/2 C. Enjoy Life Foods All-Purpose Flour
- 1/4 C. packed brown sugar
- 1/4 C. dairy-free buttery spread
For the glaze:
- 1/4 C. confectioners’ sugar, sifted
- 2 t. dairy-free milk
- 1 1/2 t. ground cinnamon
- 1 t. vanilla extract
- Pinch salt
Directions:
- Preheat the oven to 375˚F. Lightly oil a 9-inch tart dish
- To make the crust, combine 2 boxes of Soft Baked Snickerdoodle Cookies and the dairy-free milk in a food processor. Process until the cookies are finely ground and stick together when the mixture is squeezed.
- Scrape the mixture into the prepared dish, pressing it into the bottom and up the sides.
- To make the filling, melt the dairy-free buttery spread in a large skillet over medium-high heat. Add the apples, pears, and cranberries. Cook until the mixture begins to soften, about 7 minutes. Stir in the brown sugar, cinnamon, and salt. Cook until the sugar melts. Sprinkle with the All-Purpose Flour, mixing to coat. Pour in the water and lemon juice, stirring constantly, until the mixture is thick and glossy. Remove the pan from the heat and set aside.
- To make the topping, combine the All-Purpose Flour, brown sugar, and dairy-free buttery spread in the food processer. Pulse about 10 times until the mixture is in large crumbs.
- Scrape the fruit mixture into the prepared crust. Sprinkle the crumble topping over the fruit.
- Bake for 20 to 23 minutes, until the crumble topping is browned and the fruit is bubbling. Let cool 30 minutes.
- To make the glaze, put the confectioners’ sugar, dairy-free milk, cinnamon, vanilla, and salt in a small bowl. Mix to combine. Drizzle the mixture over the tart. Let stand 15 minutes to set.
- You can enjoy the tart warm, but the filling will continue to firm as it cools.
- Serve as desired, storing leftovers in an airtight container in the refrigerator for up to 3 days, and any other leftovers to the freezer.
TAGS: THANKSGIVING, DESSERT
Whipped Gingerbread Spice Butternut Squash
November 13, 2017Whipped Gingerbread Spice Butternut Squash
 Courtesy of Enjoy Life
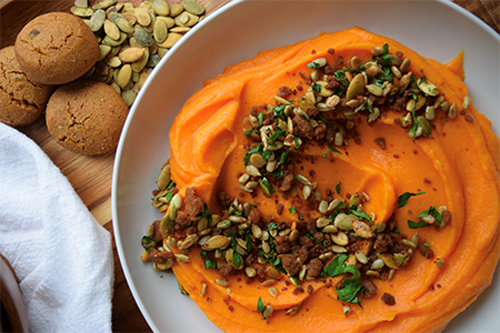 Serves 4 as a side
Ingredients:
- 2-pound butternut squash
- 2 T. melted vegan margarine
- 2 T. favorite dairy-free milk
- 1 T. maple syrup
- ½ t. salt
- olive oil, for coating squash
Gingerbread Spice Crumble
- 4 Enjoy Life Foods Soft Baked Gingerbread Spice Cookies
- 1 T. olive oil
- ¼ c. toasted pumpkin or sunflower seeds
- ¼ c. minced parsley
Directions:
- Preheat oven to 350˚F and line a small tray with parchment paper.
- Cut the top and bottom off the squash and slice in half lengthwise. Drizzle cut side with a little olive oil and lay cut side down on the parchment paper.
- Place in the oven for 40-50 minutes until the squash is very soft and bubbling around the edges.
- Let cool a few minutes. Scoop out the seeds and discard. Scoop the inside of the squash into the bowl of a food processor and puree until smooth.
- Add the vegan margarine, dairy-free milk, maple syrup and salt and continue to puree until super smooth, about 1-2 more minutes.
- Spoon into a bowl and set aside while you make the Gingerbread Spice Crumble.
- Using your hands crumble up the Gingerbread Spice Cookies.
- Warm a small nonstick pan and add the olive oil. Pour in the cookies and the toasted seeds. Sauté for 4-5 minutes until the cookie crumbs are lightly browned.
- Mix in the minced parsley and then sprinkle all over the butternut squash puree.
<< Back to Recipes
TAGS: THANKSGIVING, VEGETARIAN, VEGAN, SIDE DISHES, HOLIDAY, DAIRY-FREE