Gluten-Free Recipes for Dessert
Lemon Snowballs
January 30, 2020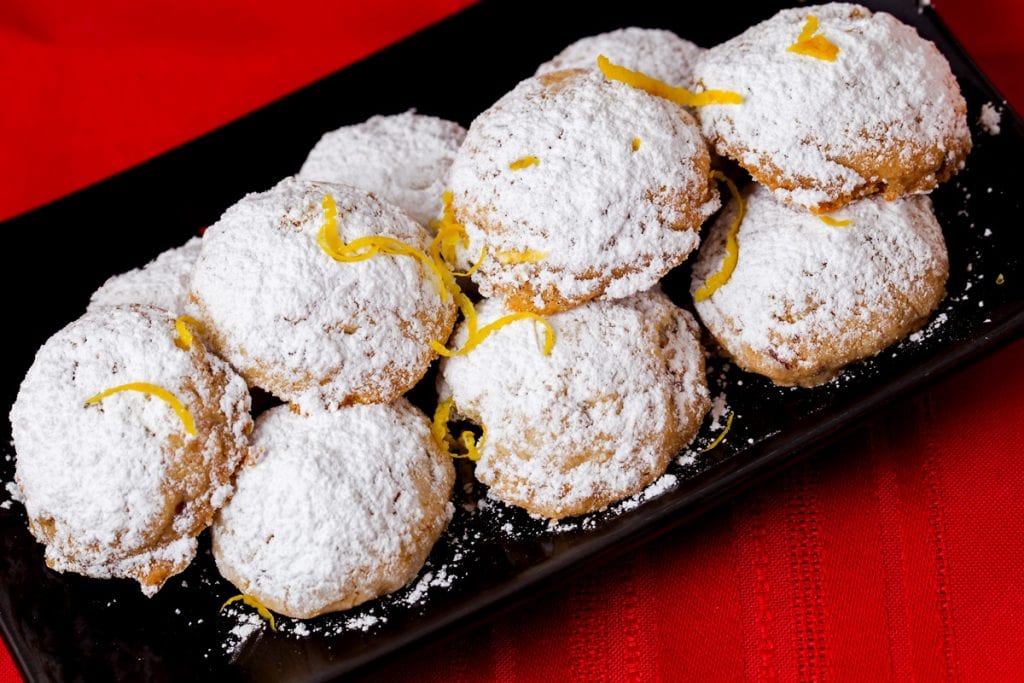 From Chef Oonagh Williams of Gluten-Free Cooking with Oonagh
No, this isn’t a Girl Scout cookie lookalike recipe. These lemon snowballs actually came from a 1997 Lithuanian Heritage magazine. They were originally made with wheat, and I made them gluten-free. These are delicious and easy to make!
Gluten-Free Lemon Snowballs
Makes 20
Ingredients:
- ¼ c powdered/icing/confectioner’s sugar
- 1/2 cup soft butter
- 1 tsp gluten-free vanilla extract
- 1 tbsp gluten-free cornstarch in one cup measure, add
- 5 oz (140 g) King Arthur all-purpose gluten-free flour blend to fill one cup. (this blend doesn’t contain xanthan gum or baking powder. Adding cornstarch is a way of softening the flour blend, more melt in the mouth and tender, and a substitute for cake flour.)
- ½ c finely chopped, toasted almonds, pecans or walnuts. Bake nuts for 10-15 minutes in 350 oven, watch they don’t burn. Let them cool before you add them to dough.
- ¼ tsp salt
- ¼ – ½ tsp xanthan gum.
- powdered sugar to finish
- Zest or orange or lemon for flavor, optional
Directions:
- Heat oven to 350*F.
- Beat 1/4 cup powdered sugar, butter and vanilla (and zest) together until light and fluffy.
- Add flour with cornstarch, xanthan gum, chopped nuts and salt and gently mix until soft dough forms.
- Shape into 1 inch balls. I use small pampered chef cookie scoop about 1+1/4 inch diameter, 1 Tbsp quantity. Number 60 should be carved onto circle that cleans cookie dough from scoop. Scoop, clean against side of bowl and drop cookie onto ungreased cookie sheet, two inches apart. I like to line cookie sheet with parchment paper. I don’t bother to roll cookie into ball shape. They flatten slightly on baking, refrigerating before baking doesn’t keep the ball shape.
- Bake in preheated oven for about 20-25 minutes until light golden brown on the outside, still almost white in the body of the cookie but set to the touch. Don’t cook until brown all over, tastes disgusting. This is meant to be like a melt in your mouth shortbread.
- Remove from oven, remove from cookie sheets, cool slightly and heavily dust with sieved powdered sugar. I find when hot they are far too fragile to pick up. Cool completely.
TAGS: HOLIDAY, DESSERT
Flourless Chocolate Cake
 From Chef Oonagh Williams of Gluten-Free Cooking with Oonagh
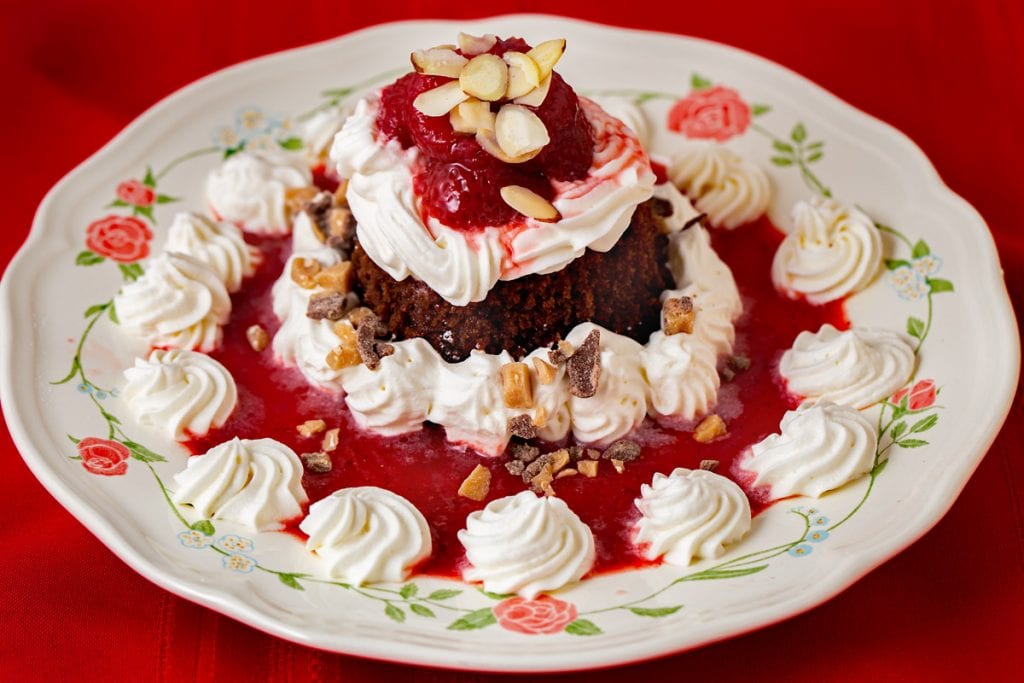
Over Christmas, we had dinner at one of our favorite restaurants. The menu had a flourless chocolate cake with strawberries, strawberry sauce and whipped cream. We bought one to bring home and share. The cake was bigger than a cupcake, but only tasted of bitter cocoa. Just cocoa doesn’t meet my criteria for a chocolate cake, so I made this version instead to satisfy our craving…
Flourless Chocolate Cake
Ingredients
- 1/4 cup soft butter or melted coconut oil
- 1/4 cup semi-sweet chocolate chips
- 1/2 cup sugar
- 1/2 cup almond flour
- 3 large eggs
- 2 Tablespoon cocoa
- 1 teaspoon almond extract
- 1 teaspoon baking powder
- Pinch of salt
Directions:
- Preheat oven to 350*F and spray pan—you can use a 1 x 9” springform pan or a cupcake pan. Line base with parchment paper or cupcake liners and dust with cocoa.
- Melt chocolate and butter/coconut oil together until the chocolate is totally smooth.
- Mix the rest of cake ingredients in a bowl, then add melted chocolate and beat for 2–3 minutes until fluffy.
- Spread mix in pan and bake for about 30 minutes for cake, 18–20 for cupcakes. Stick a toothpick or knife in the middle of the cake and if it comes out clean, it’s done.
- Remove from oven and let cake cool for about 10 minutes, then turn onto a cooling rack.
- Allow cupcakes to cool completely before removing paper liners and adding strawberry topping and sauce.
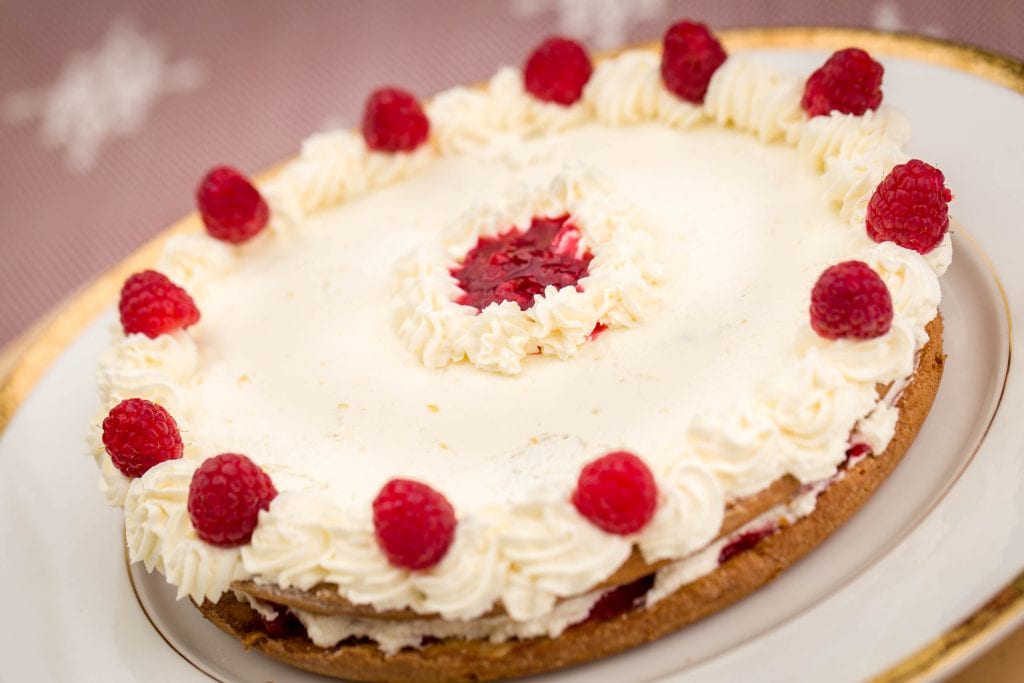
Strawberry Topping and Liqueur Sauce
Ingredients
- Strawberries
- Alternatives: fresh raspberries with raspberry jam, canned peaches (use the sauce from the can), can of pineapple (add brown sugar and rum to sauce)
- Sugar to coat strawberries
- 1–2 Tablespoon brandy, rum, amaretto, or orange liqueur (optional)
- 1 cup cream
- 2 Tablespoon sugar
- 1–2 Tablespoon liqueur
Directions:
- Wash and slice strawberries, then sprinkle with sugar and leave for a few hours to produce juices. You can add 1–2 Tbsp brandy, rum, amaretto, or orange liqueur to strawberries for a bit of a kick.
- Mix 1 cup of cream with 2 Tablespoon sugar and liqueur, then whip until stiff.
- Once cake is cooled, spoon some of the strawberries on top.
- Puree any remaining strawberries and juice. Drizzle this around the cake.
- You can spoon cream on top, or, for a fancier look, pipe with cream around the plate and around the cake (see photo above).
TAGS: RECIPES OF THE WEEK, HOLIDAY, DESSERT
Coffee Walnut Cake
December 2, 2019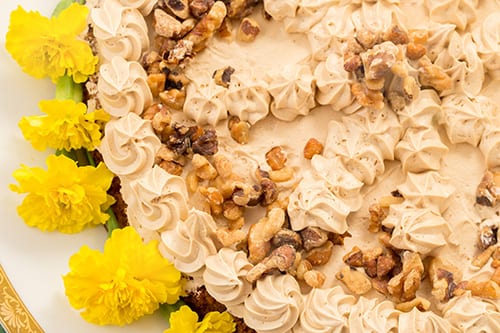
From Chef Oonagh Williams of Gluten-Free Cooking with Oonagh
This is the same almond flour base I made in wheat flour days. Almond flour cakes are very common in Europe and naturally gluten-free.
Gluten-Free Cake with Coffee & Walnuts
- Cake – single 8″ cake layer about 3/4 inch deep, with coffee butter frosting.
- 6 tbsp (3 oz, 84g) very soft butter or coconut oil. I use coconut oil as my butter substitute in baking and prefer it to margarine style subs.
- 1+1/4 cup (4oz, 112g) almond flour – almonds ground without skin (Trader Joe’s on line state that their almond flour -white – and almond meal – freckly – are gluten free and only $4.99/lb compared to other national brands except for Costco $4/lb for 3 lb bag, labeled gluten-free)
- 1/3 c (2oz, 56 g) toasted, chopped walnuts. I toast contents of a bag of chopped walnuts in 350 oven for about 10 minutes and then store them, ready to use. Toasting nuts really does make a difference, just don’t let them burn.
- 3/4 c, (6 oz, 180 g) sugar
- 2 Tbsp (30 ml) instant coffee powder dissolved in 1 tbsp (15ml) water – regular Folger’s
- pinch of salt
- 1+1/2 tsp (8 ml) gluten-free baking powder
- no xanthan gum needed
- 3 eggs
- Frosting/Buttercream:
- 1/2 cup/1 stick (4 oz, 112g) soft butter or butter substitute you like
- 1 tsp instant coffee powder dissolved in 2 tsp water.
- 2 c (8 oz, 224g) powdered (icing, confectioners) sugar
More toasted walnuts to sprinkle on top of frosting.
- Preheat oven to 350*F/170*C. Lightly grease and bottom line 8” pan with parchment paper circle, dust with rice flour.
- Place all the cake ingredients in a 4 cup, 1-litre bowl and beat for 1-2 minutes until smooth and creamy. Color will lighten slightly but will still be coffee-colored.
- Spoon raw batter into prepared pan and smooth out.
- Bake in preheated oven for about 30 minutes until cake has risen, softly firm is dark golden brown If you use almond meal/natural almond flour (almonds ground with skin still on) then cake will be even darker.
- Remove from oven, cool in pan for about 3 minutes, then turn out onto cake serving plate, remove paper lining and then turn right side up.
Frosting/Buttercream:
- I like to sieve the powdered sugar as it is often lumpy and it’s easier to sift first then try and beat little white lumps out of frosting.
- Slowly add powdered sugar to very soft butter and coffee. Be careful, the sugar has a tendency to explode up. Once all sugar is added, beat well for 1-2 minutes to make fluffy.
- This quantity of frosting is enough to generously top cake and pipe around edges. Then sprinkle with more toasted walnuts.
Variations:
- Whipped Cream. Whip 1 cup of cream with 2 tablespoons powdered sugar and 2 tablespoons of Kahlua or rum until stiff. This can be used to frost cake instead of buttercream frosting. Or just serve on the side.
- Regular chocolate ganache with Kahlua or rum added.
1 c (8 oz, 240 ml) heavy or whipping cream
1 c (6oz, 168g)) Nestle semi-sweet chocolate chips -labeled gluten-free.
2-4 tbsp (30-60ml) Kahlua or rum. Depending on the alcohol content of the chosen liqueur, this can taste quite strong.
Heat 1 cup of whipping or heavy cream to nearly boiling, add chocolate chips and stir. Let stand for a few minutes, then stir and microwave more if necessary until a totally smooth sauce is formed (looks like thick chocolate syrup). You can also use an immersion blender to make the sauce totally smooth.
Add alcohol and refrigerate for several hours until stiffer than set jello pudding.
I like to lightly whisk half of chilled ganache and gently persuade over top of cake and it will start drizzling down the sides. Then whisk remaining ganache and pipe on top of cake. Ganache is very soft if served immediately, piped chocolate will set up stiffer with refrigeration.
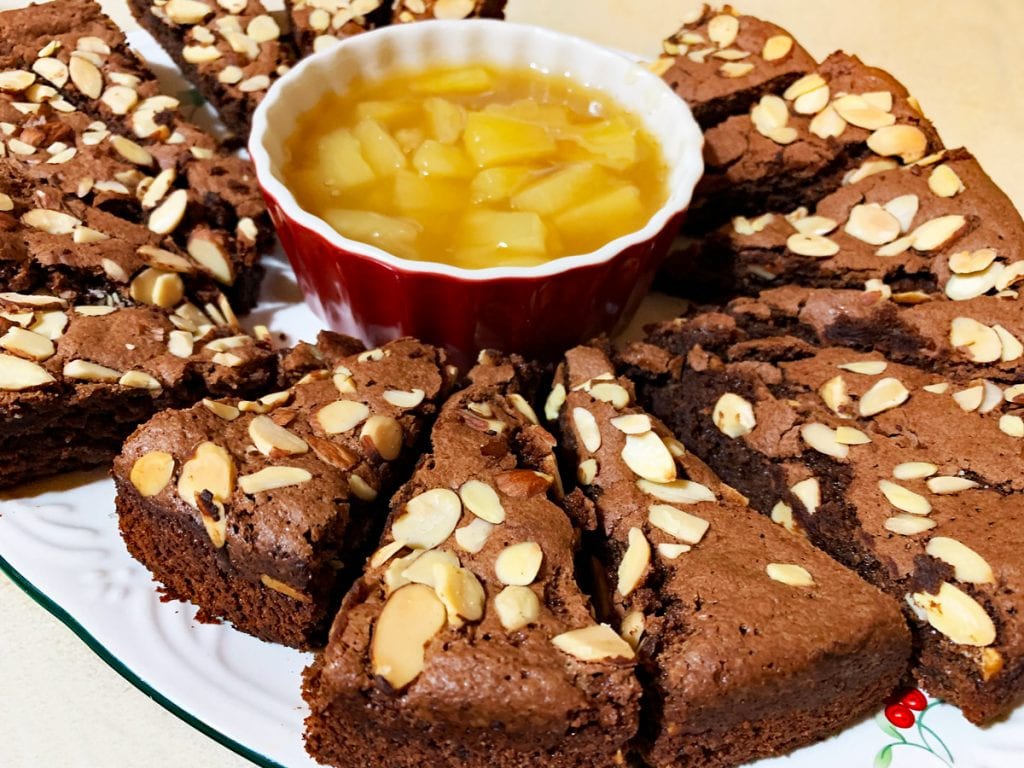
3. Fruit. Melt 2 tablespoons of butter with 2 tablespoons of light brown sugar, add slices of fresh or canned pineapple and gently fry until starting to brown on edges. Pour 2 tablespoons of rum into a measuring cup, then pour into skillet, allow to heat for about 20 seconds and use gas grill lighter to ignite the alcohol fumes. Make sure there are no children or animals around. Do not lean over pan, keep hair out of the way. Allow flames to die down and serve on side of cake. In the summer just grill some pineapple slices.
Read more »TAGS: THANKSGIVING, HOLIDAY, DESSERT
Pumpkin Snickerdoodle Cobbler
November 4, 2019From Chef Oonagh Williams of Gluten-Free Cooking with Oonagh
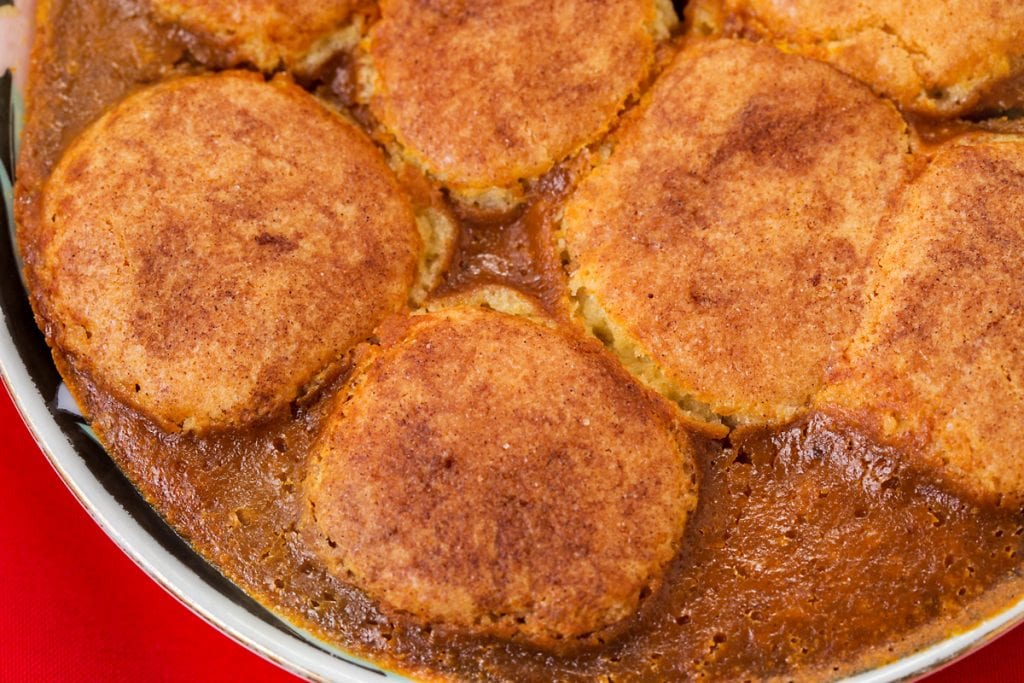
A tasty fall dessert, perfect for Thanksgiving!
Ingredients:
Pumpkin base:
- 2 eggs
- 1 x 15 ounce can pumpkin
- 1 c (8 fl oz, 240 ml) evaporated milk
- ½ cup (120 ml) granulated sugar
- 1/4 c (60ml) packed brown sugar
- 2 tsp (10 ml) pumpkin pie spice or more to your taste
- ¼ teaspoon salt
Snickerdoodle Topping:
- ¼ c (2oz, 56g) butter, softened
- ⅓ c (2+1/2 oz) sugar
- 2 teaspoon gluten-free baking powder
- ⅛ teaspoon salt
- 1 egg
- ½ c (2+1/2 oz, 70g) King Arthur all-purpose gluten-free flour.
- 1/8 tsp xanthan gum
To roll snickerdoodles:
- ¼ c (60 ml), granulated sugar
- 1 tsp (5 ml) ground cinnamon
- Whipped cream (optional)
Directions:
- Preheat oven to 350°F. Coat an 8×8” pan (2-quart baking dish) with gluten-free cooking spray; set aside.
- In a 4 cup bowl, combine eggs, pumpkin, evaporated milk, the 1/2 cup granulated sugar, the brown sugar, pumpkin pie spice, and salt. Whisk until thoroughly combined. Pour into prepared baking dish.
- Combine the 1/4 cup granulated sugar and the cinnamon. Shape chilled Snickerdoodle Topping into 16 balls. I used a one tablespoon scoop and can make just 16 balls. Roll balls in the cinnamon-sugar. Press balls to slightly flatten to 1+ 3/4-inch-diameter rounds. Place in 4 x 4 rows over pumpkin filling.
- Bake 40 to 45 minutes or until filling is set, edges begin to pull away from dish, snickerdoodles will have spread across custard, and a knife inserted near the center comes out clean. Cool 15 minutes on a wire rack. Serve warm and, if desired, with whipped cream.
Snickerdoodle Topping:
- In a medium bowl beat all topping ingredients together for 2-3 minutes until soft and fluffy. This is a very soft mix, not stiff cookie dough. Cover and chill dough 1 hour or until easier to handle, then scoop immediately into cinnamon sugar, roll into a ball in sugar, slightly flatten, and gently place on custard. They might look as if they are sinking a little into custard. Snickerdoodle topping bakes up like soft, fluffy cake, snickerdoodles cooked on their own on cookie sheet, are thin and crispy.
TAGS: THANKSGIVING, HOLIDAY, DESSERT
APPLE AND CRAISIN BREAD PUDDING
From Chef Oonagh Williams of Gluten-Free Cooking with Oonagh
A warm, fall-themed dessert to keep you feeling cozy as the nights start to turn cold!
Ingredients: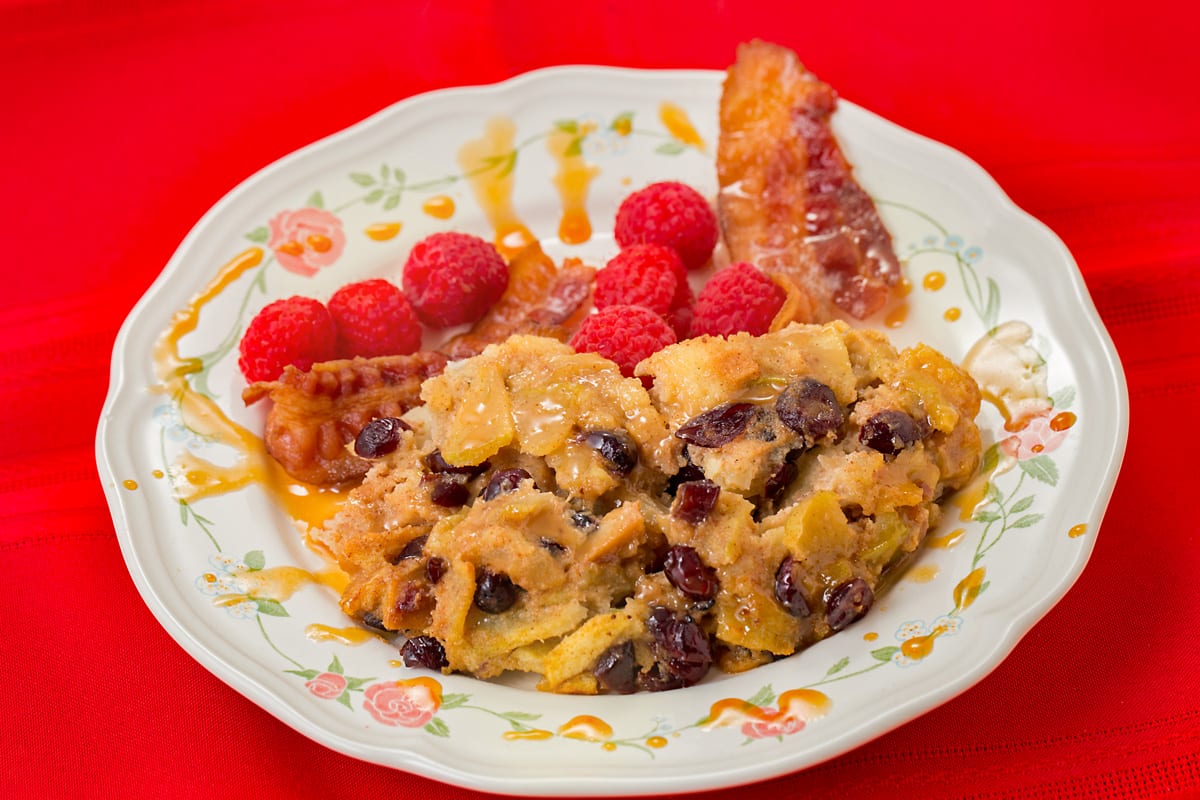
- 2 gluten-free plain bagels cut into small cubes. Don’t use soft white bread, it cooks up too mushy. I’ve made this with Udi’s and Canyon Bakehouse plain bagels.
- 3 Granny Smith apples, peeled, cored and cut into small pieces, like shredded cheese. Large chunks will make pudding fall apart when cooked.
- ¾ c brown sugar
- ½ stick (2 oz, 60 ml) butter
- 2 teaspoons pumpkin pie or apple pie spice or 1 tsp cinnamon plus ½ tsp powdered ginger plus ½ tsp ground nutmeg.
- ½ c craisins
- 2 tsp gluten-free vanilla essence
- 2 tbsp rum – optional, but gives lovely flavor
- 2 cups half and half or whole milk
- 5 large eggs
- brown sugar for top
Directions:
- Melt butter in a 6 cup saucepan, add apples, sugar and spices and cook over gentle heat until the apples are nicely soft without becoming apple sauce. They don’t really cook much more in the bread pudding. I also mix this and cook in microwave in m/w safe bowl, add rest of ingredients and then refrigerate covered.
- Add craisins, vanilla and rum to pan, stir in bread cubes. Adding bread cubes should be sufficient to cool the mix to add eggs and milk.
- Beat eggs and milk together – I tend to use my immersion blender so I don’t have ‘threads’ of egg still showing. Gently mix into bread mix.
- Pour into greased 8 x 8 brownie pan or equivalent sized pan and allow to soak for at least 30 minutes. The large quantity of liquid should be absorbed leaving a small quantity of excess liquid around the edges. Insufficient liquid will leave the bread hard and dry in places.
- Sprinkle the top with brown sugar for a crusty topping. Place on a baking sheet in case of spills as it is a very full baking dish.
- Bake in a preheated 350* oven for about 45 minutes. The bread pudding will have risen up, the top will be set, crusty and light brown and if you dig into the center it should be soft and moist but not wet with loose liquid. If you’re cooking it cold from the fridge, it will probably need
- Remove from oven and cool for about 10 minutes before serving with caramel sauce. Reheats well.
Caramel sauce:
- ¾ cup sugar
- 1 tbsp water
- 3/4 cup heavy cream
- 4 tbsp butter
- 2 tbsp rum – optional
- Put sugar in an 8” skillet with water. Cook, covered, over low heat until sugar dissolves. Covering pan while dissolving sugar stops formation of sugar crystals on side of pan.
- Remove lid, increase heat and cook until syrup turns a deep gold color, swirling pan will mix light and dark syrup. You will notice burnt sugar smell and a smoke above pan if overcooked. Undercooked is tasteless. Be very careful as boiling sugar gives a nasty burn. Don’t stir mix as it will crystallize.
- Remove from heat, carefully add cream and butter, it will spit and bubble and harden. Return to low heat and stir until sauce is smooth again. Add rum if wanted. Thickens slightly on cooling.
Read more »
TAGS: FOR KIDS, RECIPES OF THE WEEK, THANKSGIVING, HOLIDAY, DESSERT
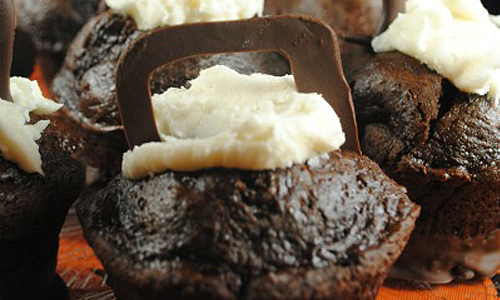
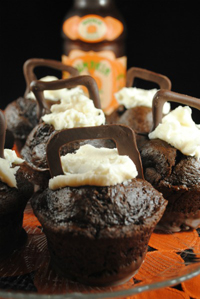
Cauldron Cakes for Halloween
October 29, 2019Cauldron Cakes for Halloween
A gluten-free Halloween treat from Diane Eblin of The W.H.O.L.E. Gang
Ingredients:
- Your favorite gluten-free chocolate cupcake and icing recipe
- Your favorite gluten-free chocolate chips
Directions:
- Make gluten-free cupcakes.
- Melt your favorite gluten-free chocolate.
- Dip the cupcake bottoms into melted chocolate and place onto parchment paper to set. Place 4 chocolate chips on the sheet so when you set them down it will make it look like cauldron feet under the cupcakes.
- Core out the center of the cupcakes with a spoon or one of those cool corers.
- Fill the hole with icing and let it spill out the top.
- Make the handles by melting chocolate. Put it into a plastic baggie and snip the corner to make a piping bag. Draw the handles onto parchment paper and let them harden. Gently push the handles into the cupcake.
TAGS: HOLIDAY, FOR KIDS, DESSERT
CRÊPES
October 1, 2019From Chef Oonagh Williams of Gluten-Free Cooking with Oonagh.
A recipe for soft, delicious gluten-free crepes, which can be layered with any sauce or flavoring.
Ingredients: 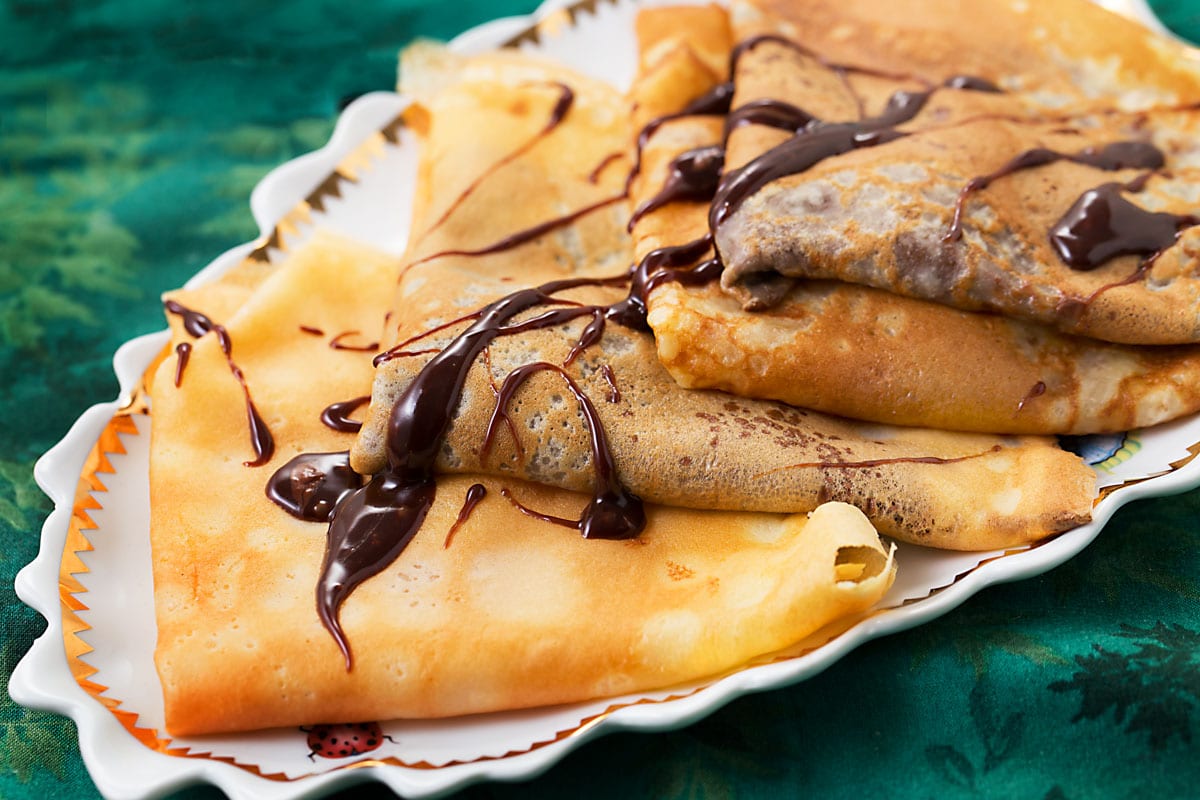
- 3 large eggs
- ½ c half and half
- ½ c fat-free milk I used ¾ c fat-free milk and ¼ c heavy cream – use coffee creamer instead of cream for sweet crêpes or 1 c whole milk
- 1 tsp gluten-free vanilla extract
- ¾ c cornstarch, I use Argo labeled gluten-free, Non-GMO and aluminum-free. You can add a little more cornstarch for a stronger crêpe.
- Salt
- 1 tbsp sugar for sweetness
Directions
- Put milk and eggs in a bowl, then add rest of ingredients and whisk with an electric hand mixer, immersion blender or put in a blender and run until smooth. If you put cornstarch in bowl first, it tends to be more difficult to blend.
- I use a Caphalon crêpe pan that is 8” across the base. Most skillets etc are sold quoting measurement across the top edge not the cooking base, which can make quite a difference to size and quantity of crêpes based on that measurement. Heat pan on medium high heat until you can drip a few drops of water on pan and they ‘dance’ across the surface. Smear with a tiny bit of butter on paper towel. Pour in 2 tbsp batter into the center of the pan and tilt and swirl the batter to cover the base. Try not to get batter up the sides because it makes for less attractive crêpe, plus if you have bolts on the inside of the pan, batter will cook around bolts. Also batter around sides, cooks into a very crisp edge. But once stacked all the crêpes go soft. It does take practice to make visually perfect crêpe, first one is known as cooks perk in England, but they all taste good.
- Cook until the top is drying and the edges are turning a golden brown. About 20 seconds. I use a very thin plastic spatula to lift side of crêpe to see color and if cooked, the spatula loosens all the edges, making it easier to flip crêpe. I flip it with my fingers, you can also use the spatula. Cook for a further 10 seconds. First side of crêpe should look an even golden brown, second side will look ‘freckly’. If you overcook, it becomes very dry and crisp and difficult to roll or fold.
- Invert crêpe onto a large plate and repeat with rest of batter. Depending on filling you will use, you can fill crêpes as they are made. Sometimes it is easier to fill them all at one time so you divide filling evenly amongst crêpes. Stir batter with each crêpe as cornstarch will sink to bottom.
For the fall, after you’ve gone apple picking with the kids, cook some cored and chopped Gala, Fuji, Braeburn or similar apples in butter, add some maple syrup, sugar, or apple cider and serve as a sauce over the crêpes.
Read more »TAGS: DESSERT, BREAKFAST
Candy Corn Mini Muffins
September 30, 2019Candy Corn Mini Muffins
Courtesy of Enjoy Life 
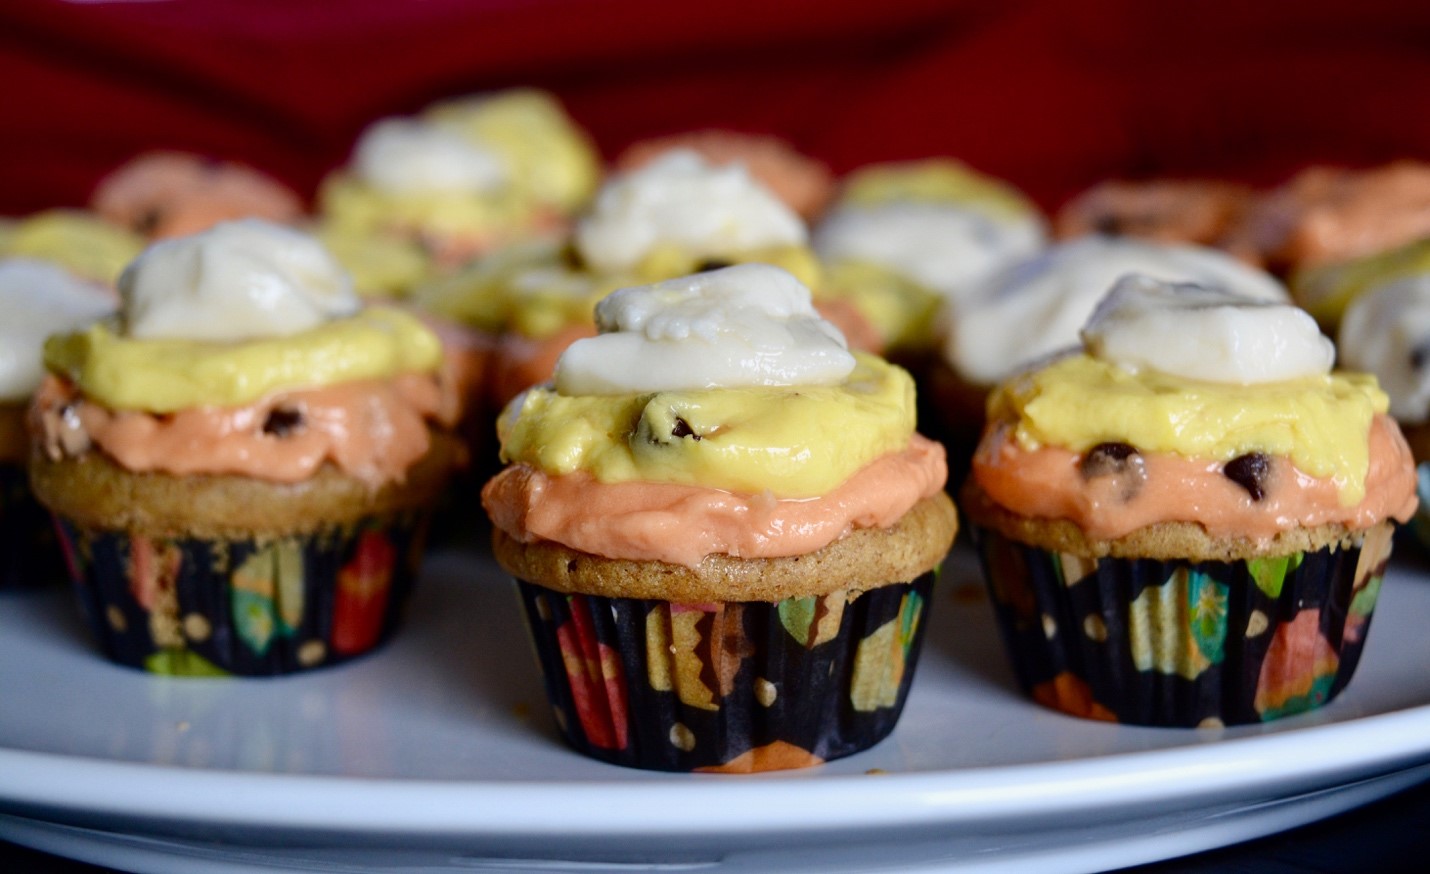 An allergy-friendly, gluten-free Halloween treat!
Makes 30 mini muffins
Ingredients:
For the muffins:
- 1 box (14.5oz/411g) Enjoy Life Foods Muffin Mix
- 1 cup + 2 tsp cold water
- 1/4 cup olive oil or grapeseed oil
- 2 tsp vanilla extract
- 3/4 tsp ground cinnamon
For the frosting:
- 1/2 cup dairy-free buttery spread
- 2 cup powdered suger
- 1 tsp vanilla extract
- 1 tbsp dairy-free milk, plus more as needed
- 1/3 cup Enjoy Life Foods Mini Chips
Directions:
- Preheat the oven to 350° F. Line a mini muffin tin with liners or oil well.
- Put the Muffin Mix in a large bowl. Add the water, oil, vanilla extract, and cinnamon. Stir to combine.
- Divide the mixture into the prepared pan, filling each one about half full.
- Bake for 10 to 13 minutes, until golden brown on the edges and a toothpick inserted slightly off-center comes out clean.
- Let the muffins cool in the pan for 10 minutes, then transfer each one to a wire rack to cool completely before frosting.
- To make the frosting, put the dairy-free buttery spread in the bowl of a stand mixer or a large bowl. Using the stand mixer or a hand mixer, beat on high speed for 1 minute, until the mixture begins to lighten.
- Add 1 1/2 cups of the powdered sugar. Beat for 2 minutes until smooth, light, and fluffy. Add the remaining powdered sugar, 1 tablespoon of the nondairy milk, and the vanilla extract. Beat for an additional minute until smooth and creamy, adding a teaspoon of dairy-free milk at a time if needed. Stir in the Mini Chips. Divide the mixture into three portions to create orange and yellow (the frosting itself will be the white layer).
- To make the orange frosting using food dye, mix 1 drop yellow food dye and 12 drops red food dye into one of the portions, adjusting by one drop, at a time until desired color is reached. To make orange frosting naturally, grind gogi berries into a fine powder and mix it into the frosting, adding as much as needed until desired color is reached.
- To make the yellow frosting using food dye, mix 20 drops yellow food dye into one of the portions, adjusting by one drop, at a time until desired color is reached. To make yellow frosting naturally, sprinkle turmeric into the frosting, adding as much as needed until desired color is reached.
- To frost the muffins, pipe the orange frosting each muffin, covering the top of the muffin completely. Top with a round of yellow frosting, then the white frosting.
- Serve, storing leftovers in an airtight container at room temperature for 2 days, moving any others to the freezer for up to 3 months.
<< Back to Recipes
TAGS: DAIRY-FREE, VEGETARIAN, HOLIDAY, FOR KIDS, DESSERT
Coconut-Rum Chocolate Pie
August 29, 2019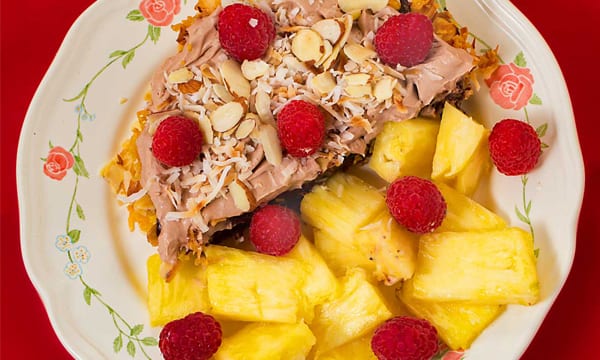 From Chef Oonagh Williams of Gluten-Free Cooking with Oonagh
Gluten-Free Coconut-Rum Chocolate Pie
Ingredients:
Crust:
- 1 cup regular sweetened, flaked coconut
- 2 c corn chex or honey nut chex (perhaps try chocolate chex) crushed to make one cup of crumbs. (Crush just in a Ziploc bag with rolling pin, but not to a powder)
- ½ c sliced almonds
- 6 Tbsp butter, earth balance or coconut oil
Filling:
- ½ c cream or Asian style coconut milk or coconut coffee creamer. Check coconut milk ingredients. Piña Colada style coconut milk is high in sugar, ‘lite’ coconut milks are thickened with ‘gums’ and other ingredients to make thick and creamy. Dairy coffee creamer or coconut coffee creamer that you use for coffee is easier for a small quantity
- 11-12 oz (~ 2 cups packet) gluten-free semi sweet chocolate chips
- 1-2 tbsp rum or other liquor you can tolerate. Remember that ordinary rum and brandy should be gluten free, it is normally the flavorings added that can contain gluten. You don’t have to add alcohol but it does raise the flavor nicely.
- Sliced bananas, fresh pineapple, mango,
- Bought or home made caramel sauce.
- Trader Joe’s make a jar of caramel sauce that is labeled gluten free, but not dairy free. Optional
- Whipped real cream or coconut cream whipped. Optional
- Some toasted coconut or sliced almonds to garnish. Optional.
Directions:
- Preheat oven to 350*. Melt butter, earth balance or coconut oil. Mix together coconut, crushed chex and almonds and add melted butter or coconut oil to bind dry ingredients.
- Press into base and sides of 9” pie place and bake in preheated 350* oven for 10-20 minutes until looking more golden brown. Remove from oven and allow to cool.
- Heat cream in 4 cup microwave-safe bowl in the microwave for about 40 seconds. Stir in chocolate and let sit for 1-2 minutes. Stir well, microwave a bit more, stir well, microwave until chocolate forms a smooth, thick, shiny mass. I tend to use my immersion blender to get mix smooth. Stir in alcohol. Depending on cream and chocolate used and whether you added any alcohol, taste the chocolate mix and decide if it needs some sugar. Remember you might be drizzling it with caramel sauce and adding fresh fruit, all adding to sweetness.
- Pour chocolate sauce into cool shell and refrigerate for several hours or overnight.
- Remove from fridge. You can arrange fruit on top and drizzle with caramel sauce, or cut into portions and add fruit and sauce to individual plates depending on what people can eat or tolerate.
- Whip cream with some sugar and rum, pile on top of chocolate or pipe. Scatter toasted coconut or almonds on top of cream.
Note: I read a recipe where the writer whipped cream with powdered hot chocolate mix. It gives a light, sweet chocolatey taste.
Read more »
TAGS: DESSERT
Master Almond Cake
July 29, 2019From Chef Oonagh Williams of Gluten Free Cooking with Oonagh
 This is a variation of my English Bakewell Tart with shortbread pastry crust, raspberry preserves layer, almond cake and sliced almonds. One of my son’s most favorite desserts so the first one I made completely gluten-free. If you can only eat other nuts, then weigh (roughly eyeball from packet) nut you can eat, add sugar and process together in food processor until nuts are very finely ground. Sugar helps stop nuts from turning into a paste.
This is what I make for those times we’re asked to bring something to a meeting. Throw it all in a bowl and beat. I get into trouble with friends at conferences if I don’t bring it with me. Including flying from Boston to Atlanta to speak at a GIG conference. I was on a four page cover wrap for Blue Diamond Almonds for National Food and Wine magazine.
Gluten-Free Almond Cake
makes 1 x 8×8 or 1 x8″ cake pan. About 1 “ deep.
Naturally gluten-free, easily dairy-free, paleo, can be made egg-free.
Ingredients:
- 1/2 stick (2oz) very soft butter
- ½ c (4 oz) ordinary sugar
- 2 large eggs
- Pinch of salt
- 1+1/4 cup (4 oz, 115g) of almond meal/flour slightly rounded
- 1/2 tsp gluten-free baking powder – I use Rumford’s, labeled gluten-free
- 2 tsp gluten-free almond extract – I use Penzey’s that they say is gluten-free. Optional but adds to flavor.
- Topping: powdered sugar, ¼ – ½ c sliced almonds
Note: Different brands of almond flour or almond meal will often give a different weight to volume measure. For best results weigh.
Directions:
- Preheat oven to 350*F/ 170*C.
- Place all ingredients in 4 c (1 ltr) mixing bowl and beat until well blended and fluffy- 2 minutes. Mix will go lighter in color as you beat it.
- Spread mix in greased and gf floured 8×8, or one 8” cake pan. Sprinkle with sliced almonds.
- Bake in 350* oven for about 25-30 minutes until well risen, golden brown and set but still soft in the middle. The texture should be similar to rolls of almond paste when cut, but cooked throughout.
- Remove from oven, serve warm or cold, sprinkled with powdered sugar.
Variations:
- Cut into wedges and serve with raspberry sauce.
- Cook in 8×8 pan and cut into tiny squares for a buffet table.
- Cook in 8×8 and cut into large squares and then cut large squares into 4 triangles or 2 larger triangles.
- Divide mixture between 2 holes of Wilton Giant Whoopie pie pan or 2 x 8 inch cake pans to make thin layer cake.
- Divide mixture in 12 holes of Wilton mini whoopie pie pan, watch for temperature as dark lined pan browns rapidly underneath. Use as base for individual Baked Alaska, different strawberry shortcake, ice cream sandwiches.
- Top with chocolate ganache, raspberry, mango couli, fresh berries.
- Spread cooled cooked cake with Nutella and top with more almonds, make a chocolate ganache with either equal quantities of heavy cream and semi sweet chocolate or with Sodelicious vanilla or hazelnut creamer mixed with gf, cf chocolate. Serve in puddle of raspberry sauce or with a mix of fresh berries slightly sweetened, add some Amaretto.
- Whip 1 cup cream until nearly stiff, whip in 1/2 c Nutella and chill to stiffen. Use as filling or topping.
- If you don’t use almond extract, you really do need to add the zest of 1-2 lemons or 1-2 oranges if you eat the cake plain. You can also add 1-2 tbsp poppy seeds and make a melted lemon juice/sugar glaze to drizzle on top of baked cake.
TAGS: DESSERT, DAIRY-FREE