Gluten-Free Recipes for Holiday
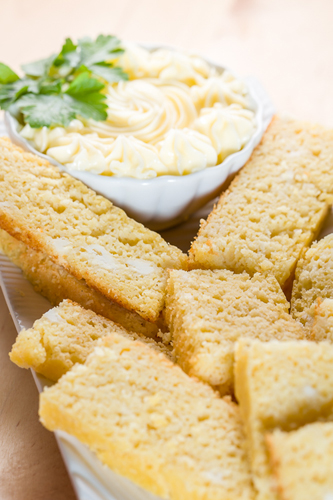
Moldavian Corn and Feta Cheese Bread
September 27, 2016Courtesy of Chef Oonagh Williams of Gluten Free Cooking with Oonagh
 I taught Lithuanian cooking classes for about 10 years and spent a month studying at the University in Vilnius, Lithuania. This recipe is adapted from one in the English language cookbook Please to the Table by Anya von Bremzen, which is available in U.S. I normally use Arrowhead Mills gluten-free cornmeal, as it has the texture I prefer. I’ve also used Bob’s Red Mill gluten-free cornmeal, which is finer than Arrowhead Mills. Depending on the brand of cornmeal you use, you might need more liquid. The coarser the cornmeal, the more liquid it will absorb. Note that Bob’s Red Mill cornflour to me is just a finer grind of Bob’s Red Mill cornmeal. In the U.K., cornflour is the thickening agent called cornstarch in U.S.
The bread is about 1” deep when baked in 8×8” (20×20 cm) pan. This is a very mild tasting bread apart from the tang from the feta cheese. I would also try cooking a chopped onion until very soft to add flavor and moisture. You can also add herbs to the batter. The bread is nicest served warm and is quite tender, so it can be easily sliced and microwaved. You can cut into croutons and pan fry to top soup, chili, salad, etc. Or cut into 3” squares and halve the squares for sandwiches with smoked ham.
Ingredients:
- 1 cup (4 oz., 112 g.) crumbled Feta cheese
- ¼ cup (2 fl. oz., 60 ml.) sour cream OR ¼ cup vanilla Greek yogurt (it may be too tangy with the sour cream)
- 1 egg
- 1 cup (240 ml.) milk
- ½ stick (2 oz., 56 g.) melted butter
- 1 cup (about 5 oz., 140 g.) cornmeal (1 cup of coarser cornmeal will probably weigh more than fine and absorb more liquid)
- ¼ cup King Arthur gluten-free flour blend (You could probably use any gf flour you like that doesn’t contain xanthan gum or baking powder)
- 1½ tsp. gluten-free baking powder
- ¼ tsp. baking soda (bicarbonate of soda)
- No xanthan gum
Directions:
- In a 6 cup (1½ l.) bowl, stir together the feta cheese, sour cream or yogurt, eggs, milk and melted butter.
- Stir dry ingredients together and stir into wet mixture. Blend well. It’s quite a wet batter now, but thickens during the 15 minute standing.
- Turn oven on to preheat to 375°F (190°C) and leave the batter to sit for 15 minutes. This allows time for cornmeal to swell and absorb liquid. Pour into a greased 8×8″ pan.
- Bake in preheated oven until light golden brown and firm to the touch, about 30-40 minutes.
TAGS: HOLIDAY, APPETIZERS/SNACKS
German Style Beef or Pork Rouladen
Courtesy of Chef Oonagh Williams of Gluten Free Cooking with Oonagh
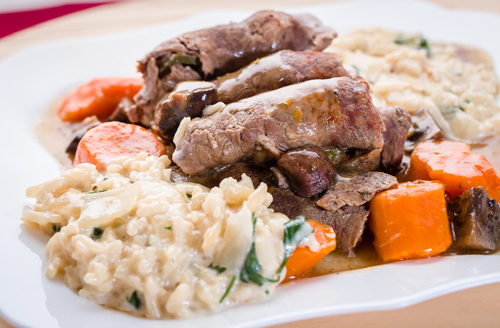 One of my students used my recipe for Italian Beef Braciole and turned it into the German recipe of Beef Rouladen. The new recipe was better than she had eaten in some German restaurants, according to Maureen. Then by coincidence, Maureen saw in a paper a recipe for Rouladen from a German restaurant in Massachusetts which was very similar to the one she had created from my original recipe.
If using beef, you will need 8 large slices of top or bottom round beef. I buy 1½-2 lb. (750-1000g) beef and have the meat department slice it thinly (about ½” thick) as if for scallopini. Choose a piece of beef that doesn’t have the silver strip of gristle running through it. You want a piece that’s roughly the size of a man’s hand before you pound it. Have it cut to give slices of roughly 4×6” not 4×4”.
Ingredients:
- 8 large slices of top or bottom round beef OR 8 boneless pork sirloin steaks
- 1 or 2 slices of gluten-free bacon, depending on size of bacon and beef slices
- 1 tsp. (5 ml) gluten-free mustard (German, Dijon, whole grain, and honey mustard are good)
- Slice of dill pickle (Use the “Stackers” that come pre-sliced. I like bread and butter pickles, as they are not so vinegary, but Cains were the only gluten-free bread and butter pickle “chips” that I could find locally. Dill pickles are not noticeable once cooked.)
- Finely chopped raw onion, optional
- 2 Tbsp. (30 ml.) oil or butter
- 1 large onion, peeled, quartered and sliced
- 1 lb. (500 g.) carrots, peeled and cut in chunks
- For beef version, 4 cups (32 fl. oz., 1 l.) low sodium gluten-free beef broth
- For pork version, 1 12 oz. (360 ml) bottle gluten-free hard apple cider (I like Woodchuck Amber) and 2 cups (16 fl. oz., 480 ml.) gluten-free chicken stock
- Pepper
- Smoked paprika
- I don’t add salt because the bacon, mustard, pickles and stock normally all contain salt.
- 2 Tbsp. (30 ml.) cornstarch mixed with 2 Tbsp. water
- ½-1 cup (4-8 fl. oz., 120-240 ml.) sour cream
Directions:
- Even though the meat has been cut by the meat department, put it between 2 sheets of plastic wrap and pound it with a mallet to flatten further without tearing the meat. Meat won’t roll if too thick, and the filling will come out.
- Preheat oven to 425°F (220°C)
- Put pounded slices of meat to one side. Sprinkle plastic wrap with pepper and paprika and lay the beef/pork slices flat in a single layer so evenly seasoned, spread top of each slice with mustard, top with bacon slices and pickle slice (or 4-8 pickle “chips”) and sprinkle with about 1 tsp. chopped raw onion.
- Roll up meat into a jelly roll. Don’t use string or skewer, but turn the rolls carefully in oil or melted butter and place seam side down in skillet. Add onions and carrots to skillet. Place skillet in oven for 5-10 minutes until meat is browned. You can use string or skewer if you want. I find if rolls are close together and you leave them alone, they don’t need tying.
- Turn down heat to 350°F (180°C), remove skillet from oven, add stock or cider.
- Cook covered (put a layer of foil between lid and skillet if lid isn’t tight fitting) in a preheated 350°F oven for 45-90 minutes, or until beef/pork is tender. Check that the stock covers the meat at all times. Timing depends on thickness of meat at time of rolling, quality of meat and how gently it is cooked. I normally cut off a piece of meat to check for tenderness because just prodding with a knife doesn’t work for me.
- Remove from oven and remove rolls to a plate. Add cornstarch mix to pan, bring to boil, turn down to medium and simmer for 3 minutes until slightly thickened and no raw flour flavor is apparent. Add sour cream, adjust seasoning and serve with noodles, potato pancakes or spaetzle.
TAGS: HOLIDAY, DINNER
Tortilla Tower
August 30, 2016Courtesy of Chef Oonagh Williams of Gluten Free Cooking with Oonagh
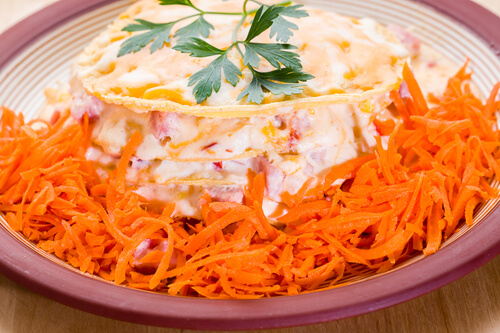 The Tortilla Tower (a.k.a. lazy quesadilla) is great for a quick back-to-school dinner because it requires almost no cooking. Standing making quesadillas for a family is a pain, so I make a tortilla tower instead. Use your favorite corn or gluten-free flour tortillas for this recipe. I use Mission or Ole corn tortillas that are labeled gluten-free. Add as many vegetables as you like. Zucchini and summer squash cut into small pieces are tasty additions. You can easily leave out meat to make it vegetarian. This tortilla filling is also excellent served warm as a dip with tortilla chips or served over rice with cilantro, avocado, sour cream, cheese and salsa
There are quite a few varieties of pepper jelly on the market. Remember that a spoonful of pepper jelly will taste far hotter than once it is mixed with other ingredients. Adjust the amount of pepper jelly you add according to your taste. If you want more heat, you can also add Tabasco or another hot sauce. I use Trappist brand pepper jelly, which is made by monks in MA.
Watch Chef Oonagh make this on ABC’s Cook’s Corner.
Ingredients:
- 10 crêpes or 5” (12 cm) corn tortillas
- 1 lb. (500 g) Ricotta cheese, whole milk or skimmed. I use Galbani, which is very firm.
- 6 Tbsp. (90 ml) hot pepper jelly
- 1 Tbsp. (15 ml) butter or oil
- 1 small onion, peeled and finely chopped
- 1 red bell pepper, deseeded and cut into small pieces
- 11 oz. (300 g) can of corn, drained, or fresh corn sliced from 1 cob
- ¼ cup (60 ml) fresh parsley, chopped
- Cilantro to taste, optional
- ½ lb. (250 g) finely chopped ham. Do not use thin deli slices. I use a 7 oz. Jones pre-cooked ham steak, and you could also try with leftover cooked chicken, pork, shrimp, etc.
- 1 cup (4 oz., 125 g) of Mexican cheese blend for filling and to sprinkle on top, optional
Directions:
- Use a 8-cup microwave safe bowl to cook the onion and bell pepper in 1 Tbsp. butter or oil in the microwave for about 3 minutes.
- Add corn. If you use fresh corn, then cook for a few more minutes. Add pepper jelly and let melt.
- Add ricotta cheese, parsley and ham. Taste and see if you want any salt and pepper or additional heat added.
- Get two microwave safe or oven safe dinner plates, depending on whether you want to use the microwave or oven.
- Put one tortilla on each plate, scoop some filling on top and spread out. Repeat with 4 more tortillas and filling on each plate, dividing the filling up as evenly as you can, and topping off the stack with a tortilla.
- Sprinkle with Mexican cheese. Cover dish. Bake in 350°F oven for 15-20 minutes until filling is heated through. There is nothing in the filling that actually needs cooking, so don’t overcook. OR to make it simpler, just zap the tortilla stack in microwave. If the filling oozes out of the sides, you can just scoop it up.
TAGS: LUNCH, HOLIDAY, DINNER
Pecan and Chocolate Fudge Ring
Courtesy of Chef Oonagh Williams of Gluten Free Cooking with Oonagh
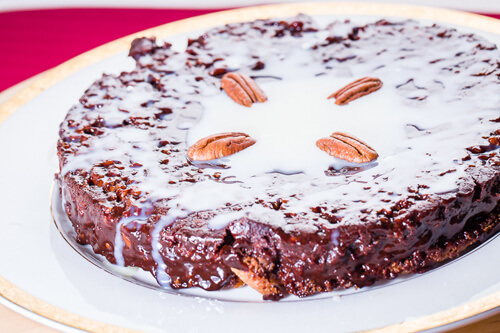 This delicious cake is gluten-free, paleo and can be dairy-free. The original gluten-containing version of this recipe came from one of my English cookbooks. I adapted it to be gluten-free, dairy-free and less sugary. The sauce resembles toffee—chewy and almost hard on the outside, but soft and creamy on the inside. You must turn the cake out of the pan within a few minutes of removing it from the oven, or the sauce hardens like caramel, and the cake won’t turn out. Too much sauce sticks to a tube or Bundt pan, so I use an 8” cake pan or my 9½” springform pan. The 9½” springform pan makes a 1” deep cake that is very rich.
Fudge Sauce Ingredients:
- 3 Tbsp. butter or coconut oil. With coconut oil, sauce on its own is boring, but tasty eaten with cake.
- ½ cup (3 oz., 84 g) light brown (soft brown) sugar. You can use less if it is too sweet.
- 2 Tbsp. (30 ml) milk
- 1 Tbsp. (15 ml) unsweetened cocoa, regular Hershey’s
- ¼ cup (1.5 oz., 40 g) gluten-free semi-sweet chocolate chips
- ½ cup finely chopped pecans or other nuts. You can leave nuts out, but I like the texture.
Cake Ingredients:
- 6 Tbsp. (3 oz., 84 g) very soft butter or coconut oil
- 1½ cup (6 oz., 180 g) almond flour (made from almonds ground without skin)
- ¾ cup (6 oz., 180 g) sugar
- 1 Tbsp. (30 ml) gluten-free vanilla extract
- Pinch of salt
- 1 tsp. (5 ml) gluten-free baking powder
- 3 eggs
Directions:
- Preheat oven to 350°F. Lightly grease and line the bottom of an 8” cake pan or 9½” springform pan. You need a cake pan that will allow you to turn out the cake.
- Place the butter or coconut oil, sugar, milk and cocoa in a small pan. Heat gently until the butter and sugar melt without burning and the mix is smooth.
- Stir in chocolate chips and stir until chips melt. This does take some time. Do not increase the heat to melt the chocolate. Stir in chopped nuts.
- Pour the sauce into the bottom of the pan and set aside to cool. You can’t put metal pan with almost boiling sauce in fridge.
- Place all the cake ingredients in a 4 cup (1 liter) bowl and beat for 1-2 minutes until smooth and creamy.
- Carefully spoon cake mixture over sauce. Don’t pour cake mix onto sauce, as this will push the sauce to the edges of the pan. It will seem like not enough batter, but is fine.
- Bake in preheated oven for about 30 minutes until cake has risen, is softly firm, has a light golden-brown color, and the sauce shows around the edges. I have cooked it for almost 50 minutes in different pans, so keep checking it after 30 minutes.
- Remove from oven, cool in pan for about 3 minutes, then turn out onto cake serving plate. If you leave cake in the pan, as the sauce cools, it will set hard and not turn out.
TAGS: HOLIDAY, DESSERT
No-Bake White Chocolate Raspberry Cheesecake
July 27, 2016Courtesy of Chef Oonagh Williams of Gluten Free Cooking with Oonagh.
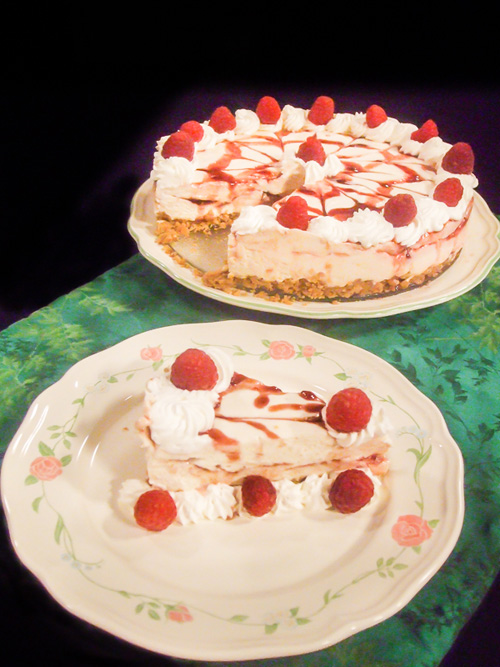 Makes 12 generous portions.
Click here to watch Chef Oonagh create this cheesecake on New Hampshire’s ABC WMUR Cooks Corner.
Crust Ingredients:
- About 5-6 oz. (125-150 g) gluten-free graham crackers, Oreo look-alikes or shortbread cookies, crushed (Use your favorite gluten-free cookies, check weight on the box and do the math.)
- ½ stick (2 oz., 56 g) of butter, melted
- I don’t add sugar since the cookies are sweet
Filling Ingredients:
- 1 lb. (500g, 2 bricks) of cream cheese at room temperature (I use the lite version, but it sets softer.)
- ⅓ cup powdered sugar
- ½ lb. (2 4 oz. bars, 2 125 g bars, 1⅓ cup) good quality white chocolate (Bakers white chocolate and Guitard white chocolate are gluten-free.)
- 1 tsp. (5 ml) gluten-free almond extract, optional
- 1½ cup (12 fl. oz., 375 ml) whipping or heavy cream
- 1 packet (11 g) of Knox gelatin
- 2 Tbsp. (30 ml) water
- 2 Tbsp. (30 ml) raspberry liqueur (I tend to use traditional liqueurs like Chambord or Grand Marnier and trust them to still be gluten-free.)
Raspberry Design Ingredients:
- ½ cup (10 ml) seedless raspberry jam (I used Trappist)
- ¼ cup (60 ml) raspberry liqueur
- 1 cup (8 fl. oz., 250 ml) whipping or heavy cream, whipped with 2 Tbsp. (30ml) sugar and 1 tsp. (5 ml) gluten-free vanilla extract for garnish
- Fresh raspberries for garnish
Directions:
- Mix together crushed cookies and melted butter. Press into bottom of 9-10” (20 cm) greased springform pan. Bake in preheated 350°F (180°C) oven for 10 minutes, remove from oven and cool completely. Instead of baking, you can let set in the fridge.
- Pour ½ cup (120 ml) cream in a 4 cup (1 l) microwavable bowl and heat in microwave for about 1 minute. Add chopped chocolate, let stand for 2 minutes, then stir until chocolate mix is smooth. If necessary, heat in 10 second increments and stir until there are no lumps left. You have to treat white chocolate very carefully, as it has a tendency to harden (seize) if overheated.
- In a separate 6-8-cup bowl, beat together cream cheese, sugar, almond extract and 2 Tbsp. raspberry liqueur until smooth and creamy. Don’t try this with cold cream cheese—it must be soft.
- Slowly beat chocolate mix into cream cheese mixture and beat for about 1 minute to increase fluffiness.
- Put 2 Tbsp. water in small microwavable cup, pour in gelatin and stir together until it thickens. Leave to stand for 2 minutes then microwave for about 11 seconds until mixture turns into a golden colored liquid that is completely liquid with no pieces of gelatin still visible. If you don’t completely melt gelatin, then it will set into chewy, rubbery lumps. Beat into cream cheese mix.
- Pour remaining 1 cup (240 ml) cream into bowl that was used for melted chocolate and beat cream until stiff.
- Gently beat cream into cheese and chocolate mix. Pour into chilled crust
- Melt ½ cup raspberry jam and add ¼ cup of liqueur. Make sure it is completely melted, or it clogs the Ziploc bag. Put about 2 Tbsp. of mix into small Ziploc snack bag. Snip a ¼” hole in one corner. Gently squeeze mix onto top of cheesecake in a spiral pattern, starting at center and spiraling out. Take a knife and, starting at the center, draw knife to outside of pan. Repeat to form a pattern. Then draw knife from outside of pan to center alternating between first series of lines. This forms a spider’s web. It doesn’t matter how accurate you are, because it still looks stunning.
- Refrigerate for at least 4 hours or until firm.
- Once chilled, run a thin plastic spatula around edge between cheesecake and pan, release springform side and remove. Gently run a thin knife between cookie base and bottom of pan, and slide cheesecake onto serving plate.
- Decorate with piped whipped cream, top with a fresh raspberry and carefully brush tops of raspberries with sauce of jam and liqueur. Or you can use rest of jam mix in raspberry sauce below.
Straight from the fridge, this cheesecake is firm, and at room temperature, it becomes like mousse. I have a glass base springform pan, so I don’t have to move the cheesecake.
Note: I found that, covered, this cheesecake (without cream garnish or additional sauce on top) was still good from the fridge after one week. I tried freezing it and found it thawed fine. Obviously the graham/cookie crust goes softer on either storage or thawing.
Raspberry Sauce Ingredients:
- 12-16 oz. bag frozen raspberries, no need to thaw first
- ¼ cup water
- ½ cup sugar
- Remainder of jam and liqueur mix
Raspberry Sauce Directions:
- Put raspberries, water and sugar in a 4 cup non-stick pan. Gently heat until raspberries are thawed and sugar is dissolved. Cook gently for a few minutes until raspberries are soft and breaking up slightly.
- Stir in jam mix and taste for your level of sugar preference. Adding the raspberry jam helps to sweeten the sauce and intensifies the flavor. Different brands of frozen raspberries and jam vary in sweetness, so you have to adjust the sauce to your preference. Don’t make it too sweet, since you will serve it with a sweet cheesecake.
TAGS: HOLIDAY, DESSERT
Coconut Crusted Salmon, Chicken or Pork
Courtesy of Chef Oonagh Williams of Gluten Free Cooking with Oonagh.
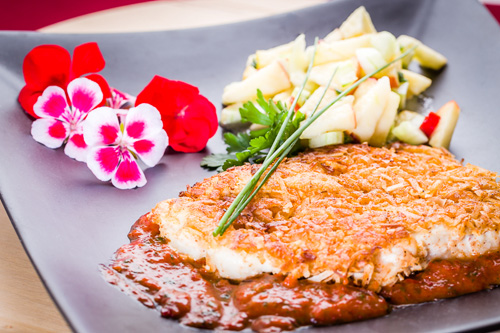 Coconut crusted shrimp are wonderful, but they’re such a pain to keep the coconut on and to deep fry. We preferred this coconut crust on salmon, but I’ve also made it with tilapia for tacos and with chicken and salad. Increase the ingredients for the amount of food you’re cooking.
Ingredients:
- 2 4-6 oz. (125-180 g) pieces of salmon fillet, without skin
OR boneless, skinless chicken pounded thin
OR boneless pork sirloin pounded thin
OR tilapia in small fillets - 1 cup (150 g) of your favorite gluten-free flour blend, salt and pepper added
- 1 egg OR ¼ cup (60 ml) liquid gluten-free egg substitute (I normally use egg substitute for a recipe like this, since you can just use 1-2 Tbsp. rather than wasting whole egg.)
- 1-2 cups (120-240 g) sweetened, flaked coconut (Not English desiccated coconut, known as Macaroon coconut in U.S. Start with 1 cup of coconut so you don’t waste it.)
- ¼-1 tsp. pepper flakes, chili powder and Arizona seasoning (optional, you just want an idea of heat)
- Oil for frying (I tend to use coconut oil, please don’t use canola oil.)
Directions:
- Put flour, egg and coconut in 3 separate wide, shallow cereal bowls.
- Preheat a wide 10-12” (30 cm) skillet over medium heat.
- Dip salmon fillets in flour on both sides, then egg on both sides, then coconut. Use one hand for flour and egg and other hand to press coconut. Throw away any leftover flour, egg, coconut.
- Put oil into preheated pan, wait a minute until the oil heats, add crusted salmon and cook over medium heat for about 4 minutes. Flip and cook on other side. Timing depends on thickness of piece of fish or meat and temperature of pan. Do not cook on high heat, as coconut will burn and look and taste horrible. You can cut the salmon and chicken in half to check that it’s cooked.
- Serve with apple cucumber salad or coleslaw, or in tacos. (See my Apple and Cucumber Salad recipe here.)
TAGS: HOLIDAY
Apple and Cucumber Salad
Courtesy of Chef Oonagh Williams of Gluten Free Cooking with Oonagh.
I saw this recipe combination in an online magazine and did my own thing. Their recipe had raw onion and raw jalapeño, which I don’t like and substituted with green onions and melted hot pepper jelly. Hot pepper jelly gives you the heat of jalapeño, but is mellowed by the sweetness of the jelly and is infused throughout the jelly so you don’t bite on a piece of raw jalapeño. This is a crisp, fresh salad with inexpensive ingredients available year-round. Try as a side dish with grilled meat, part of a taco instead of slaw or topped with feta cheese and nuts for a vegetarian meal with bread. It’s a nice counterpart to salmon in coconut crust (see my recipe here). The lime juice helps stop the apple from browning, so you can make the salad in advance.
Makes 4-6 servings.
Ingredients:
- 1 large Gala, Fuji or Braeburn apple quartered, cored, and cut into small dice with peel left on for fiber and color
- ½ English cucumber, peeled, quartered lengthwise, deseeded and cut into small dice
- 4 tsp. (20 ml) hot pepper jelly (I use Trappist brand. Make sure it says hot pepper jelly on the label, otherwise it’s just sweet. To me, hot pepper jelly gives a bite of heat mellowed by cooking and the sugar. We tried it with 6 tsp., and it was overpowering for the apple and cucumber.)
- 2 Tbsp. (30 ml) olive oil, not extra virgin, as it will overpower
- 2 Tbsp (30 ml) lime juice
- Salt and pepper
- About 2 Tbsp. greens of green onions (also called scallions or spring onions), scissored
Directions:
- Melt pepper jelly in the microwave for about 10 seconds.
- Stir in lime juice, salt and pepper and green onions.
- Add apple and cucumber, stir well into dressing and let sit for about half an hour for flavors to blend.
TAGS: HOLIDAY, LUNCH
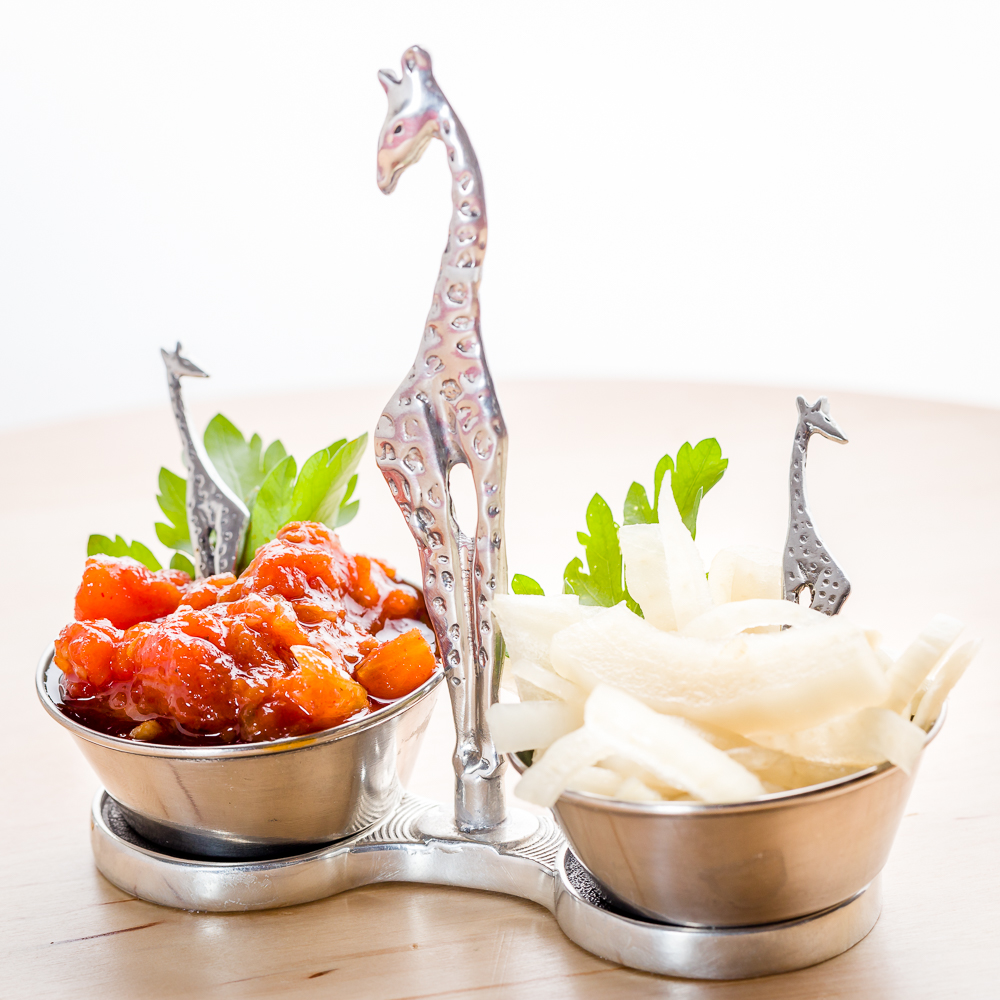
Quick Pickled Onions and Fresh Tomato Marmalade
June 28, 2016Courtesy of Chef Oonagh Williams of Gluten Free Cooking with Oonagh
 Quick Pickled Onions
In the UK, we always had jars of malt vinegar pickled onions to go with bread, cheese and meats, which is often known as a Ploughman’s lunch. In New Hampshire, before I could buy jars of imported pickled onions in malt vinegar, I would peel all those little white onions, salt them, then pickle them well in advance as a Christmas present for my husband, along with a selection of cheeses. Since I now eat gluten-free, and malt vinegar is made from barley, I use red wine vinegar of apple cider vinegar.
This is a recipe a friend gave me. She makes it with red onions, as she likes the pink color. I make it with Vidalia or other sweet onions. I find that Vidalia onions are as crisp as red onions in the vinegar, but more tender and less chewy then red onions. Make these onions overnight so that they are ready for next day, and use a 2-3 cup (16-24 oz.) Ball jar with plastic lid. If you use old jam jar, sterilize it and put plastic wrap between glass jar and metal lid. They will last a few months in the fridge.
Remember that your taste for sugar, salt and vinegar may be different to mine, so you can play with the measurements according to your taste. Pickled onion on its own will taste very different than when put on bread and cheese. Different vinegars will give a different tastes. The salt helps to bring water out of the onions, so they will shrink down in the jar. Sugar tempers the sourness of the vinegar and is also a preservative. You could use some of the vinegar mixture in a homemade vinaigrette after the onions eaten. Do not use the vinegar mixture in the jar to make another batch, because too much water will have come out of the onions and will weaken the strength needed for pickling. You could add dried hot chili pepper or some pickling spice and mustard seeds to the jar.
Ingredients:
- 1 Vidalia onion, peeled, quartered and very thinly sliced (make sure to separate the slices)
- ¾ cup (6 fl. oz., 180 ml.) red wine vinegar (made from wine or grapes) or apple cider vinegar (made from apples or cider)
- 1 tsp. (5 ml.) salt
- ¼ cup (2 fl. oz., 60 ml.) sugar
Directions:
- Fill jar with prepared onion slices. Push the slices down and fill right to the top of the jar.
- Mix vinegar, salt and sugar together and pour over onions. Shake a few times during the day. It doesn’t seem like enough liquid at first, but the onions shrink down overnight. Taste and add more salt if you want.
- Eat and enjoy with bread, cheese and sliced meats or on a burger.
Fresh Tomato Marmalade
Makes 1 12 oz. jam jar
I had this as an appetizer for a party when I spoke at the 40th Annual Gluten Intolerance Group Conference in 2014. I spoke with the chef at one meal, and he wrote out this recipe, which is very similar to a sundried tomato jam that I make.
Ingredients:
- 1½ lbs. (750 g.) tomatoes (I like Campari tomatoes that I cut, unpeeled, into small dice. I’ve also made this with the soft squishy tomatoes reduced at the market or leftover at home. I do peel the larger tomatoes by cutting an “X” in stem end, putting in boiling water for a few minutes, then cold water, then peeling and taking out the core from the stem end. Cut into small dice, keep seeds and juices to add to pan.)
- 1 medium yellow onion, peeled and finely diced
- 6-8 stems of fresh thyme (Bought dried thyme often smells earthy and tastes moldy, so I don’t use it. I use my own fresh thyme and pull leaves off the stem because it’s a real pain trying to find just the stems in the marmalade once cooked.)
- 2-3 Tbsp. (30-45 ml.) olive oil
- 1 bay leaf
- Salt and pepper to taste (I used ½ tsp. salt)
- ⅓ cup (80 ml.) sugar
- ¼ cup (2 fl. oz., 60 ml.) apple cider vinegar, wine vinegar or sherry vinegar. Please use vinegar that says made from apples, cider, wine or grapes.
- 2-3 cloves garlic, peeled and finely crushed
- 1 tsp. (5 ml.) smoked paprika for a very slight bite, optional
Directions:
- Use a 4 cup (1 liter) pan to cook onion in the olive oil until softened and starting to brown and caramelize at the edges.
- Add tomatoes, thyme, sugar, bay leaf, vinegar, garlic and smoked paprika. Cook covered over low heat until very soft, liquid is reduced and almost gone and a line is left in tomatoes when you draw wooden spoon through.
- Leave the lid on and stir every now and again. Cook until liquid has evaporated. You can smell the sugar when it’s ready. Larger quantities will take longer.
- Remove from heat, remove bay leaf and thyme stems and pour into a sterilized glass jar. Let mellow for a day and then eat.
Serving Suggestion: You can serve with small pieces of smoked chicken on top of a slice of peeled European cucumber and topped with tiny squiggle of avocado cream.
TAGS: HOLIDAY, APPETIZERS/SNACKS
Lobster, Shrimp or Crab Dip
Courtesy of Chef Oonagh Williams of Gluten Free Cooking with Oonagh
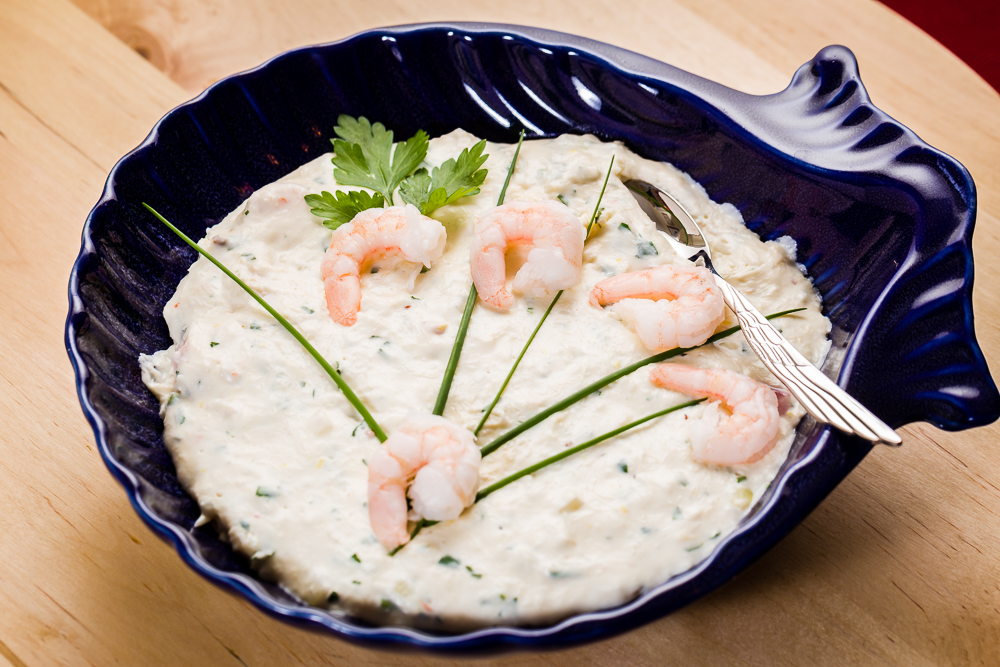
I came up with this dip after tasting the normal crab dip made of cream cheese, crab and garlic. I make outstanding crab stuffed mushrooms, so I adapted that recipe to a crab dip. This makes a truly addictive crab dip suitable for any type of party. For a formal party, bake the dip and then put beautifully formed scoops of dip on individual plates and serve with points of toast. For a game day snack, just put it on the table and watch it disappear. You can also use this dip to fill cream cheese pastry tarts or to bake on top of cod, haddock or fresh salmon.
Ingredients:
- 1 8 oz. (250 g.) block of cream cheese, softened (lite is fine)
2 6 oz. cans of crab, well-drained (Choose a decent brand of crab, preferably better quality not the cheapest. Do not use imitation seafood, as most is not gluten-free)
OR 8 oz. fresh or frozen thawed crab
OR 8 oz. cooked salad shrimp, not from a can
OR 8 oz. cooked lobster - 1 medium onion, peeled and finely chopped
- 2 cloves of garlic, peeled and finely crushed
- 2 Tbsp. (30 ml.) butter or oil
- 2 Tbsp. (30 ml.) gluten-free ranch or Italian dressing (gives flavor without fuss)
- ½ cup (2 oz., 56 g.) finely shredded Swiss cheese or smoked Gouda (store brand is fine)
- Zest and juice of ½ lemon or less (optional, it gives a definite lemon flavor, which I love, but my husband notices)
- ½ cup fresh parsley, chopped
- A few drops Tabasco or other hot sauce
- Paprika for color
- Parsley to garnish
- Note that no salt is added
Directions:
- Melt the butter or oil in a small non-stick pan and gently cook onion and garlic, covered, until they are soft and colorless. This can also be done in the microwave in the same bowl you mix the dip in. I use a 4 cup (1 liter) Pyrex jug.
- Chop parsley and then mix all ingredients together in a bowl. You can use the food processor, but it makes a very smooth dip.
- Place into an attractive container with 1 quart (1 liter) capacity.
- Sprinkle with paprika and bake in preheated 350°F (180°C) oven for about 20 minutes, until the dip is bubbling. OR just serve cold.
- Remove from oven, let cool for about 5 minutes, garnish with more chopped or whole parsley and serve with crackers. Use a small knife for spreading. The dip is also good once it cools down, so people will still keep eating it. It does stiffen on cooling.
Tips:
- Since everything is cooked once you have cooked the onion and garlic, you can cheat and zap dish in microwave until bubbling, stir well and then sprinkle on paprika and parsley.
- I like to add about 1 Tbsp. of melted hot pepper jelly to give a slight bite without the crunch of raw jalapeño.
- You can also add some chopped basil, mix in ready-made pesto, a few chopped artichokes or cooked fresh asparagus tips.
- Leftovers, if there are any, can be melted with some milk as sauce for fish, rice or pasta.
TAGS: HOLIDAY, APPETIZERS/SNACKS
Carrot Cake Jelly Roll (Swiss Roll)
May 26, 2016Courtesy of Chef Oonagh Williams of Gluten Free Cooking with Oonagh
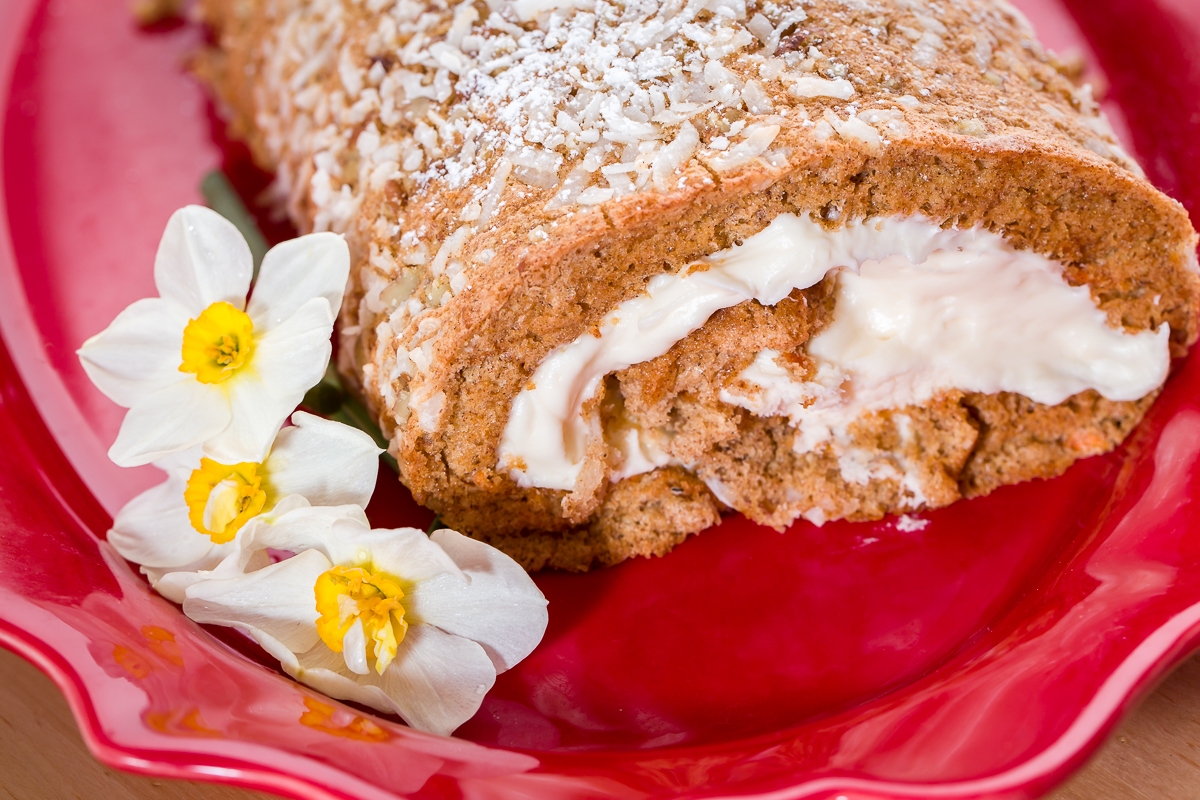 I’ve made regular carrot cake for years. I always had to make one for my friend Rick’s parties. He always gets the carrot cake, even at Christmas. I know! My friends tell me what dessert to bring to a party, and it doesn’t matter that it’s gluten-free and they’re wheat-eaters, it still gets demolished. I was tweaking this recipe and took it to a chamber of commerce luncheon, as I really don’t need a full size jelly roll in the house. One of the young men came back for seconds, said I could make it for him anytime and had no idea it was gluten-free.
Don’t worry about length of recipe. It’s easy, and I try to give as much advice as possible to help you. I always try and simplify my recipes, as none of us have time for involved methods and lots of dirty dishes. I saw one recipe that cooked the carrot and puréed it, but that just didn’t work for me. I also tried cooking a shredded carrot in the microwave, but it didn’t make a difference, took more time and dirtied another dish. I prefer shreds of raw carrot because they give texture and do cook in enough time. I prefer the finished cake served at room temperature so the filling softens and the whole jelly roll melts in your mouth.
Cake Ingredients:
- ⅓ cup and 1 Tbsp. (2¼ oz., 65 g.) King Arthur gluten-free flour blend of rice flour, potato starch and tapioca starch
- ¼ tsp. xanthan gum
- ¼ tsp. salt
- 1 large carrot, peeled and shredded like shredded cheese (about 1 cup or 4 oz. shredded)
- 1 tsp. (5 ml.) gluten-free baking powder
- 1 tsp. (5 ml.) cinnamon
- 1 tsp. (5 ml.) pumpkin pie or apple pie spice OR 2 tsp. cinnamon
- 3 large eggs
- ⅓ cup (2 oz., 60 g.) packed light (soft) brown sugar
- ⅓ cup (2¾ oz., 75 g.) granulated sugar
- 1 tsp. (5 ml.) gluten-free vanilla extract
- ¼ cup (60 ml.) chopped pecans or macadamia nuts
- 3 Tbsp. (45 ml.) shredded, sweetened regular coconut
Filling Ingredients:
This is a large amount of filling, really evil, but even more delicious.
- 8 oz. (250 g.) cream cheese, softened to room temperature (I use lite Neufchatel.)
- 4 oz. (125 g.) butter, softened to room temperature
- 1 tsp. (5 ml.) gluten-free vanilla extract (Don’t be heavy handed, as it overpowers.)
- 2 cups powdered/icing sugar
- 1 can (8 oz., 250 g.) crushed pineapple in juice, drained well
Cake Directions:
- Preheat oven to 350° F (180° C).
- Spray a 10×15” jelly roll (swiss roll) pan and line with greaseproof parchment paper, pushing paper into the edges, corners and up the sides for overflow. Spray paper as well.
- Put eggs, both sugars and vanilla in large bowl (or stand mixer) and whisk for several minutes until mix is fluffy, increased in volume and whisk leaves trail in the egg mix.
- Mix flour, xanthan gum, baking powder, spices and salt with shredded carrots.
- Gently fold flour and carrot mix into whisked eggs, taking care not to deflate.
- Spoon mix into jelly roll pan, gently spreading it to the corners and edges. Sprinkle with chopped pecans and coconut. These give a different texture and prevent cake from sticking to dish towel when cooked and turned out.
- Bake in preheated oven for 15 minutes, checking at 12 minutes. Cake should have risen almost level with top of pan, have a nice light golden color and feel cooked, but soft fluffy.
- Remove from oven and place lint-free towel on top of cooling rack. Place rack with towel on top of cake, flip and remove pan. Tear small pieces of the parchment paper off the cake. If you try and tear large pieces, cake can be caught and tear.
- Loosely roll cake with lint-free towel caught inside to make a short, fat roll. I wait only about 15-20 minutes to cool down. If you leave cake for 45-60 minutes, it cracks when you unroll.
- If you don’t feel confident rolling cake, then cut it into 2 or 3 strips in either direction and stack like a layer cake. It will taste just as good.
Filling Directions:
- Beat really soft butter and cream cheese together. If they are hard, you won’t get smooth mouth feel and little blobs of hard butter and cream cheese will be visible.
- Beat in powdered sugar and vanilla extract. Taste.
- Unroll jelly roll after 15-20 minutes. It won’t lie flat. If it is still quite warm in the middle, let it cool for another 15 minutes. Gently spread filling to edges, trying to make filling reasonably even. Make sure you spread to the edges, because there is nothing worse than a bite without filling.
- Spread drained crushed pineapple (there isn’t that much).
- Re-roll with seam underneath, place on serving plate and refrigerate or serve immediately. If refrigerating, remove from fridge before serving so the filling can soften (butter causes it to stiffen to piping consistency).
- Dust with powdered sugar. I find it easiest to cut in half lengthwise down the middle and then cut bigger chunks, rather than trying to cut pretty and thin slices.
TAGS: HOLIDAY, DESSERT