Gluten-Free Recipes for Holiday
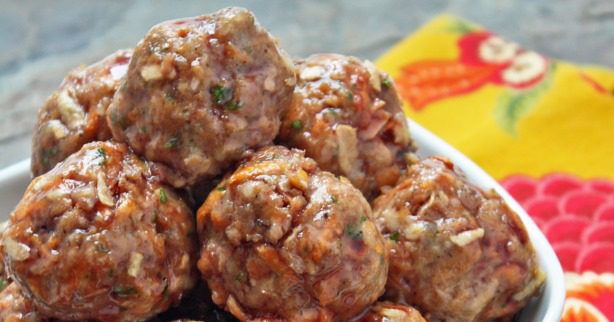
Cranberry-Glazed Sausage, Apple & Sweet Potato Meatballs
November 15, 2021Recipe courtesy of Jones Dairy Farm ![]()
The best meatball appetizers deliver the right blend of sweet and savory, and these tasty treats fit the bill.
This recipe is made with a certified gluten-free Jones Dairy All Natural Sausage Roll.
Meatball Ingredients:
- 1 pound ground turkey
- 1 (12 oz) Jones Dairy Farm All Natural Pork Sausage Roll
- 1 cup sweet potato, shredded
- 1 cup apple, shredded
- 1 egg
- 2 tablespoons fresh parsley, chopped
- 1 tablespoon dried onion flakes
- 1/8 teaspoon pepper
- 1/8 teaspoon salt
Glaze Ingredients:
- 4 cups cranberry juice cocktail
- 1/3 cup sugar
Directions:
- Preheat oven to 375°F. Grease baking sheet and set aside.
- In medium bowl, combine all meatball ingredients and mix thoroughly.
- Form about 25 cocktail-sized meatballs and place on prepared baking sheet.
- Bake meatballs for 18 minutes or until cooked through.
- While meatballs are baking, prepare sauce: in medium saucepan over high heat, combine cranberry juice cocktail and sugar. Bring to a boil, then reduce heat and simmer until reduced to a syrupy consistency that will coat the back of a spoon.
- Pour sauce over cooked meatballs and stir, coating meatballs completely with the sauce.
- Serve with toothpicks.
TAGS: DINNER, APPETIZERS/SNACKS, HOLIDAY, THANKSGIVING, RECIPES OF THE WEEK
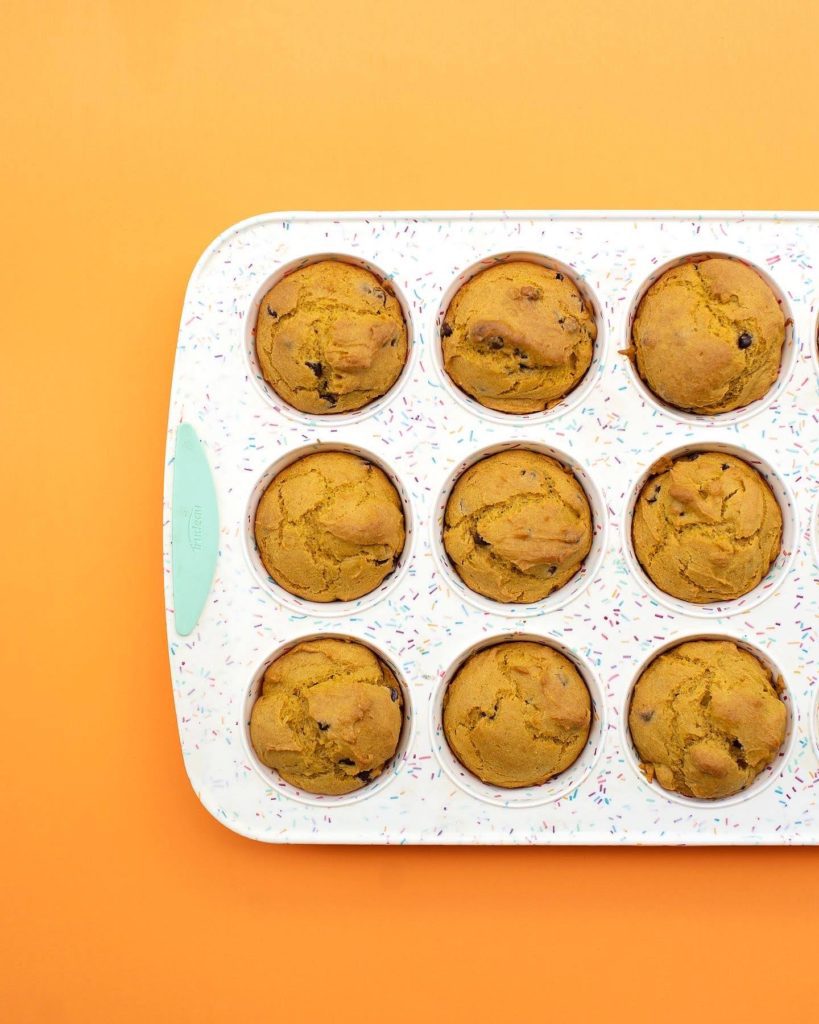
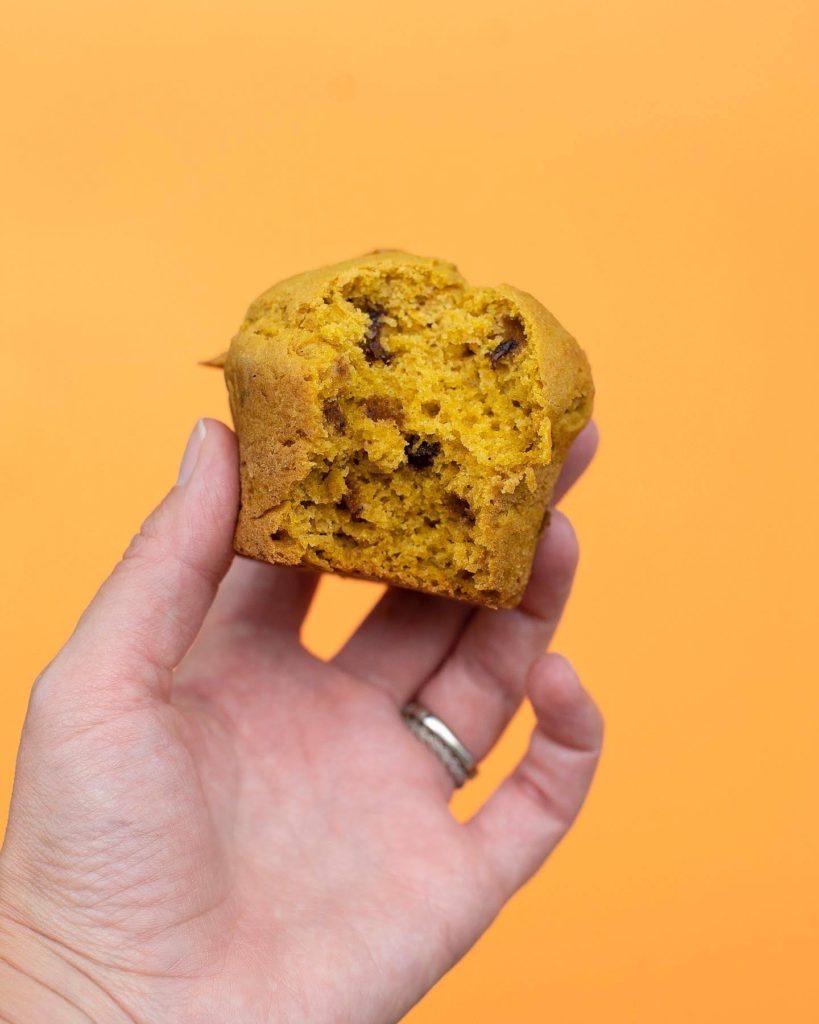
Pumpkin Chocolate Chip Muffins
November 2, 2021This recipe earned an honorable mention in the 2021 Beyond Celiac Gluten-Free Holiday Recipe Contest!
Recipe by Katie Blauser
Gluten-Free Pumpkin Chocolate Chip Muffins by Katie
Ingredients:
- 1 cup canned pumpkin (not pumpkin pie)
- 1/2 cup brown sugar
- 1/2 cup oil (coconut or olive)
- 2 eggs
- 2 cups Josie’s Best Muffins & More Gluten-Free Mix
- 1 teaspoon baking powder
- 1 teaspoon baking soda
- 1/4 teaspoon salt
- 2 tablespoons maple syrup
- 1/2 cup gluten-free chocolate chips
Directions:
- Preheat the oven to 350°F. Grease or line a muffin tin.
- Mix the wet ingredients together well.
- Gradually add the dry ingredients and mix until there’s no lumps. Gently stir in the chocolate chips.
- Spoon the batter into the prepared muffin tin.
- Bake for 22–24 minutes.
TAGS: BREAKFAST, DESSERT, FOR KIDS, HOLIDAY, THANKSGIVING
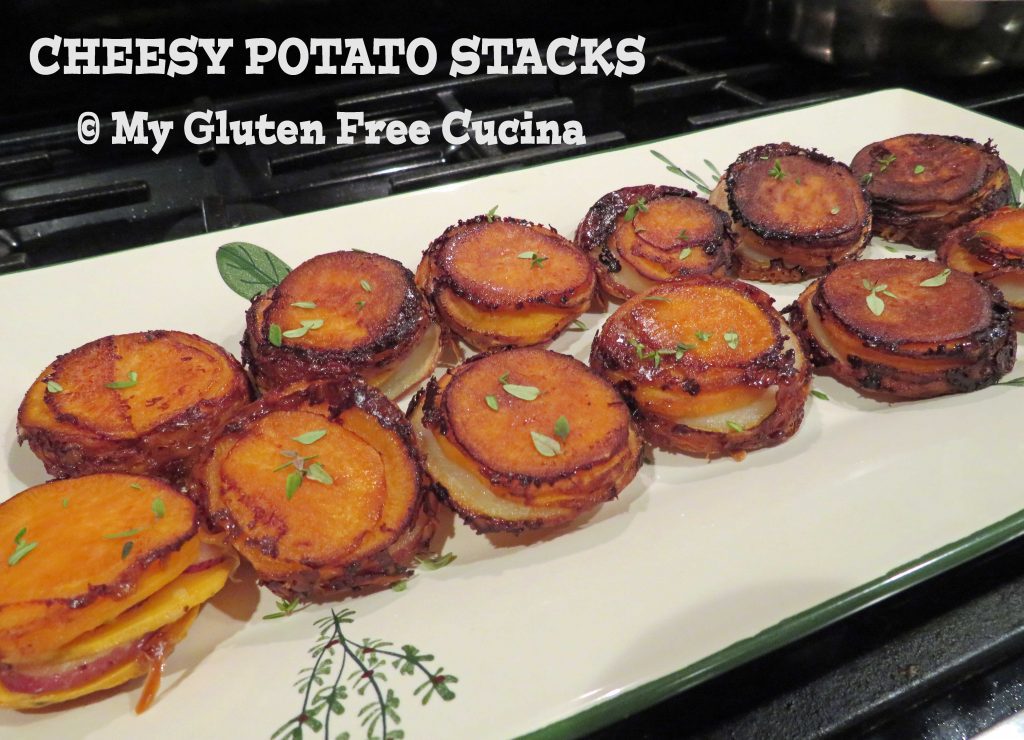
Cheesy Potato Stacks
 This recipe earned an honorable mention in the 2021 Beyond Celiac Gluten-Free Holiday Recipe Contest!
Recipe by Leslie Benson/My Gluten Free Cucina
Gluten-Free Cheesy Potato Stacks by Leslie (My Gluten Free Cucina)
Ingredients:
- 1 large sweet potato, peeled
- 4 small red potatoes, skin on
- Cooking spray
- 4 tbsp. unsalted butter, melted
- 1/3 cup 1% milk
- Seasoned salt, to taste
- 2 cups shredded Gruyere cheese (I used Red Apple Smoked Gruyere)
- Fresh thyme for garnish
Directions:
- Grate the cheese and slice the potatoes very thin, using a mandoline or sharp knife. Leave some of the skins on the red potatoes for more color and texture.
- Heat the butter, milk and seasoned salt, whisking together well.
- Preheat the oven to 400ºF and coat a 12 cup muffin pan with cooking spray.
- Begin layering the potatoes in the muffin cups, alternating red potato and sweet potato slices until the cups are half full. Use the smaller slices on the bottom for the best fit.
- Drizzle one tsp. of the butter mixture over each stack and top with half of the grated cheese.
- Continue layering the potatoes, mounding them to just a little higher than the top of the muffin cups (they will cook down).
- Once the cups are full, finish off the remaining butter and cheese by drizzling it over the top of the stacks. Sprinkle more seasoning over the top as well.
- Bake for 40–45 minutes, until the edges are nicely browned and the cheese has melted.
- To serve, use a spoon to carefully remove each stack and invert onto a serving platter. Garnish with fresh thyme.
TAGS: HOLIDAY, SIDE DISHES, THANKSGIVING
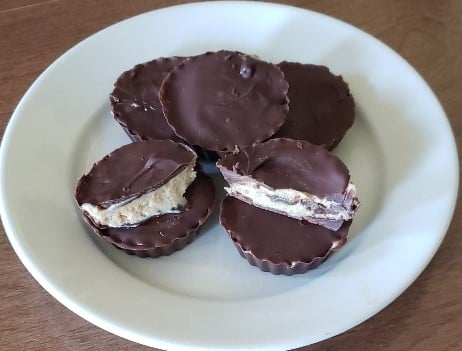
Peanut Butter Cups

This recipe earned an honorable mention in the 2021 Beyond Celiac Gluten-Free Holiday Recipe Contest!
Recipe by Tammy Aiken
Gluten-Free and Dairy-Free Peanut Butter Cups by Tammy
Ingredients:
- 1/3 cup gluten-free smooth peanut butter
- 1/8 teaspoon sea salt or table salt
- 1 tablespoon confectionery sugar (powdered sugar)
- 1 cup Enjoy Life Semi-sweet Vegan chocolate chips
- Peanut butter cup mold. I use the Palksky chocolate almond peanut butter cup mold.
Directions:
- In a glass measuring cup mix the peanut butter, salt, and sugar. Set aside.
- In another glass measuring cup or a microwavable bowl, add 1 cup of chocolate chips.
- Melt the the chocolate chips in the microwave in 30 seconds intervals until smooth, mixing as you go.
- Warm the peanut butter mixture in the microwave for 15 to 20 seconds until melted and smooth. Mix.
- Add 1 full teaspoon of chocolate to each mold section. Spread over the bottom and up the sides of the mold.
- Add 1/2 tablespoon of the peanut butter filling to each section and spread over the bottom.
- Add 1/2 tablespoon of chocolate over the top and spread to cover.
- Put into the refrigerator for 25 to 30 minutes and allow them to set.
- Remove the mold from the fridge, pop each cup out and enjoy.
TAGS: VEGETARIAN, DAIRY-FREE, DESSERT, HOLIDAY
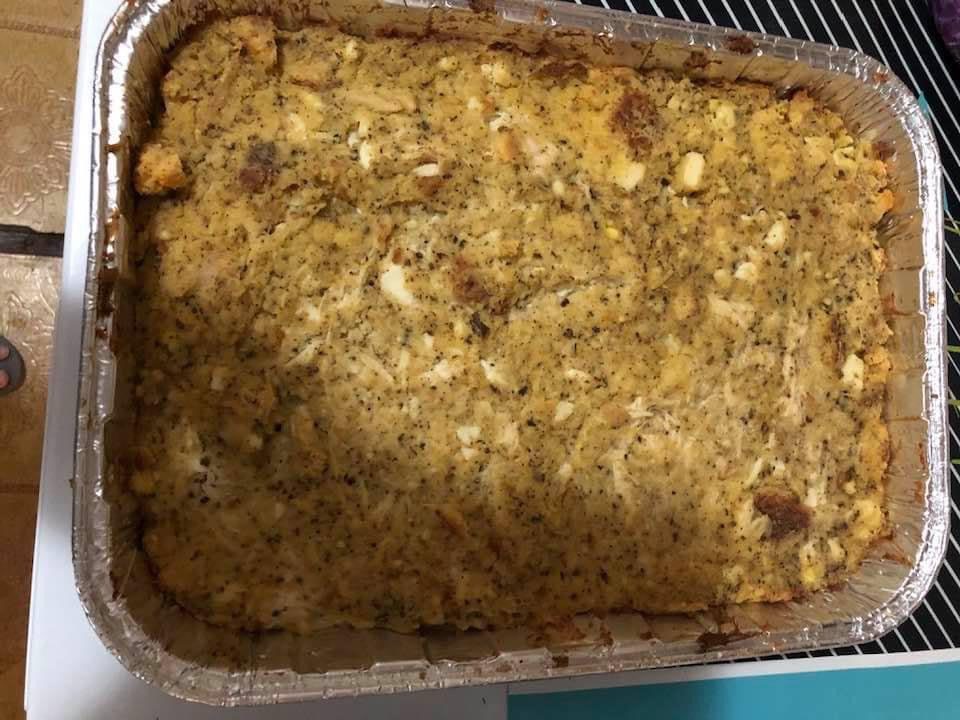
Chicken and Cornbread Dressing (or Stuffing)

This recipe was the second-place winner of the 2021 Beyond Celiac Gluten-Free Holiday Recipe Contest!
Recipe by Caron Hoffman
Gluten-Free Chicken and Cornbread Dressing (or Stuffing) by Caron
Ingredients:
Yields 2 large aluminum baking pans. This recipe can be halved to feed fewer people, but the recipe as listed will feed up to 10 people.
- 2 pans of gluten-free cornbread (I make my own; Beyond Celiac has a recipe here)
- 1/2 dozen boiled eggs
- 1 large onion (I use sweet yellow)
- 1 whole chicken, boiled and deboned
- 1 can gluten-free chicken broth or broth from your boiled chicken
- 1 can evaporated milk
- 1 can gluten-free cream of chicken soup
- 1 Tbsp celery salt (or you can use 3 stalks)
- Salt and pepper to taste
- 1/2 stick butter
- Sage to taste (I like a lot)
Directions:
- Mix all ingredients except the butter.
- Spoon the mixture into large baking pans.
- Cut up the butter and spread over the top of the mixtures.
- Bake in an oven at 350°F for 30–45 minutes (ovens vary).
TAGS: HOLIDAY, SIDE DISHES, THANKSGIVING
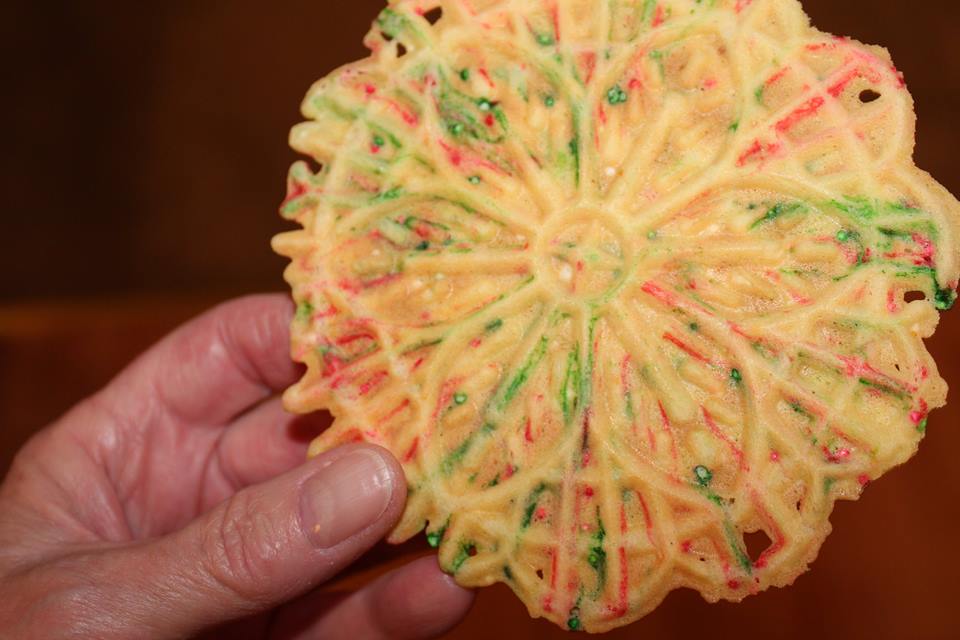
Pizzelles

This recipe was the grand prize winner of the 2021 Beyond Celiac Gluten-Free Holiday Recipe Contest!
Recipe by Deb Graham
Gluten-Free Pizzelles by Deb
Ingredients:
Yields 30 cookies
- 2 cups gluten-free baking mix (flour)
- 3 large eggs
- 1/3 cup granulated sugar
- 1/2 cup (1 stick) butter, melted
- 2 tablespoons gluten-free vanilla extract
- Anise pizzelles: 2 tablespoons anise extract and 2 tablespoons anise seeds
- Orange pizzelles: 2 tablespoons gluten-free orange extract (or Grand Marnier) and 2 tablespoons orange zest
- Coconut pizzelles: 2 tablespoons coconut extract and 2 tablespoons lemon or orange zest
- Chocolate orange pizzelles: add ¼ cup unsweetened cocoa powder and 2 tablespoons orange zest
Directions:
- Add the vanilla (or other flavored extract) to the melted butter and set aside.
- Whisk together the eggs and sugar in a separate bowl until well-combined.
- Add the melted butter and vanilla in a slow, steady stream while continuing to whisk until well-blended.
- Add the baking mix and various spices or seeds, orange zest, etc., and using a rubber spatula stir everything together until just combined, but don’t over mix.
- Important—let the batter sit for 10 minutes before baking. This will create a better texture.
- Drop a rounded teaspoonful of batter into the center of a pizzelle iron.* Close lid and bake for 60–75 seconds, depending on your pizzelle iron. Check for doneness often.
- Let cool on a wire rack.
TAGS: FOR KIDS, HOLIDAY, THANKSGIVING, DESSERT
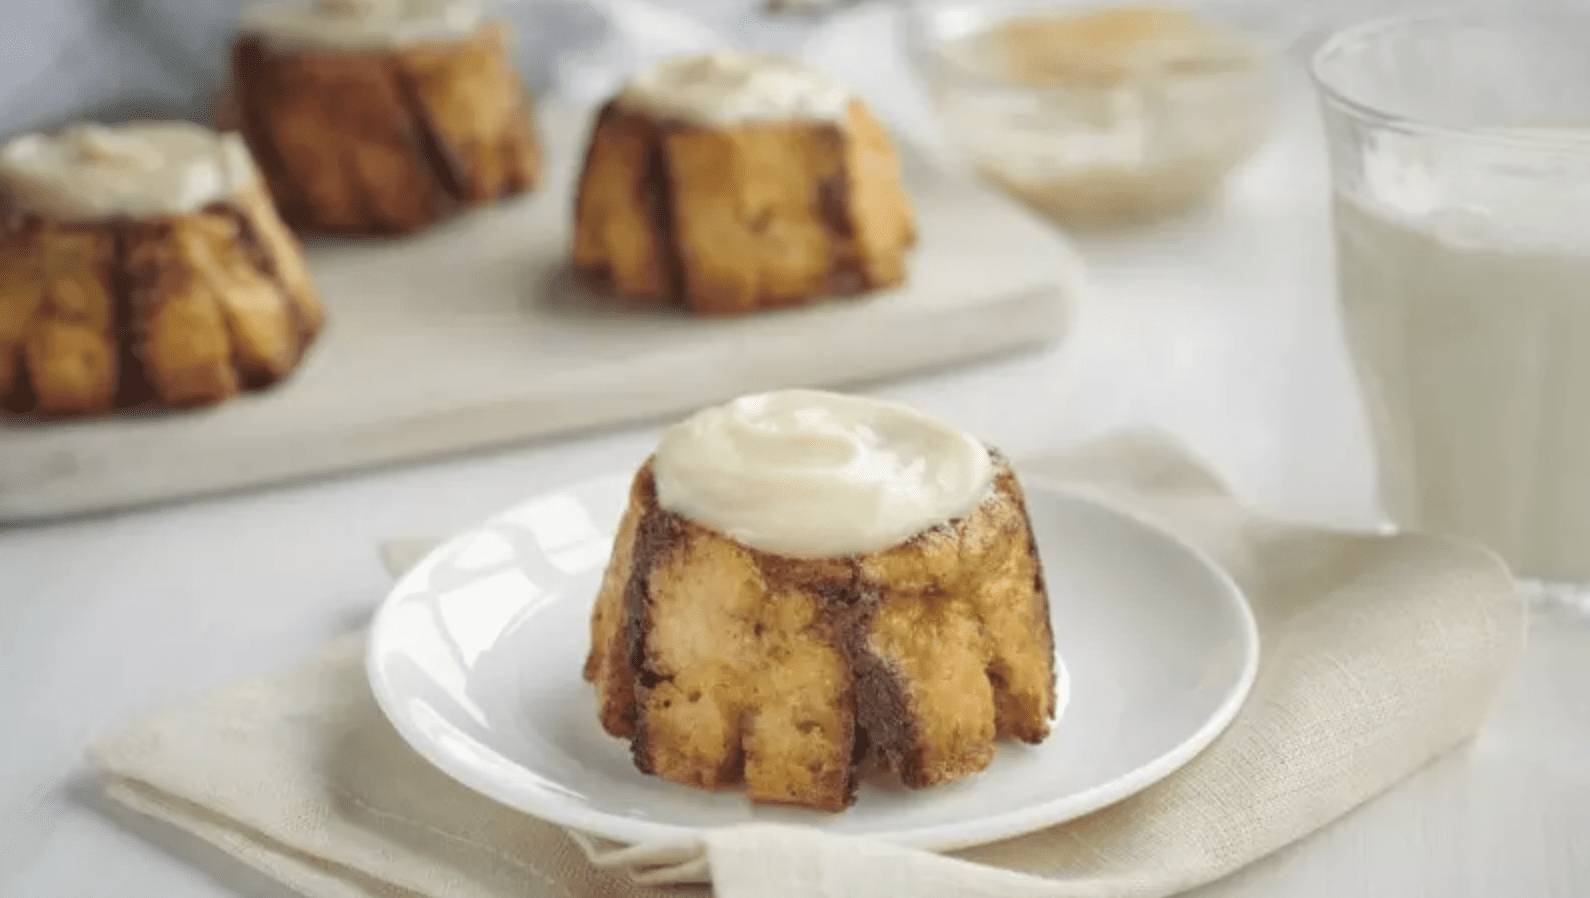
Cinnamon Roll Cupcakes
November 1, 2021![]() Recipe courtesy of our sponsor Schär
Recipe courtesy of our sponsor Schär
These mouth-watering Cinnamon Roll Cupcakes will delight your friends and family. We top them with Cream Cheese Icing so they look and taste just like the classic cinnamon rolls of your dreams!
Ingredients
- 10 slices Schär Gluten-Free Artisan Baker White Bread
- 4 tbsp brown sugar
- 3 tbsp butter
- 3 tsp cinnamon
- 3 eggs
- 1 cup cream
- 2 tsp divided vanilla extract
- 2 tbsp cream cheese, softened
- 1 tbsp butter, softened
- 1/4 cup powdered sugar
Directions:
Make the Cinnamon Roll Cupcakes:
- Preheat oven to 375 degrees F.
- Grease a 12-cup nonstick muffin/cupcake pan.
- Trim crusts from bread. Arrange bread slices on large cutting board.
- Mix brown sugar and cinnamon in small bowl.
- Spread each bread slice with butter.
- Evenly sprinkle cinnamon-sugar mixture on top of buttered bread slices.
- Stack 2 bread slices together with cinnamon-sugar sides facing each other. Repeat to make a total of 5 sandwiches.
- Using a serrated knife, gently cut each bread stack into 8 to 10 strips, then cut each strip crosswise in half.
- Carefully line the muffin cups with the strips, in a circular pattern, dividing the slices evenly to fill all 12 cups.
- Place the eggs, 1 teaspoon vanilla extract and the half & half in a medium bowl. Whisk to blend.
- Use a small measuring cup to pour the egg mixture over the bread strips, dividing the mixture evenly among the muffin cups. Let rest 5 minutes.
- Bake for 25 minutes or until cupcakes spring back to the touch. Cool pan on wire rack for 3 to 5 minutes.
- Use a knife to loosen the edges of the cupcakes, and then carefully invert muffin pan to release cupcakes onto a platter.
Make the Cream Cheese Icing:
- Combine powdered sugar, cream cheese, butter and remaining 1 teaspoon vanilla extract in a small bowl. Stir until smooth.
- Spread 1 teaspoon icing evenly on top of each cupcake.
- Serve warm!
TAGS: BREADS, DESSERT, FOR KIDS, HOLIDAY, RECIPES OF THE WEEK
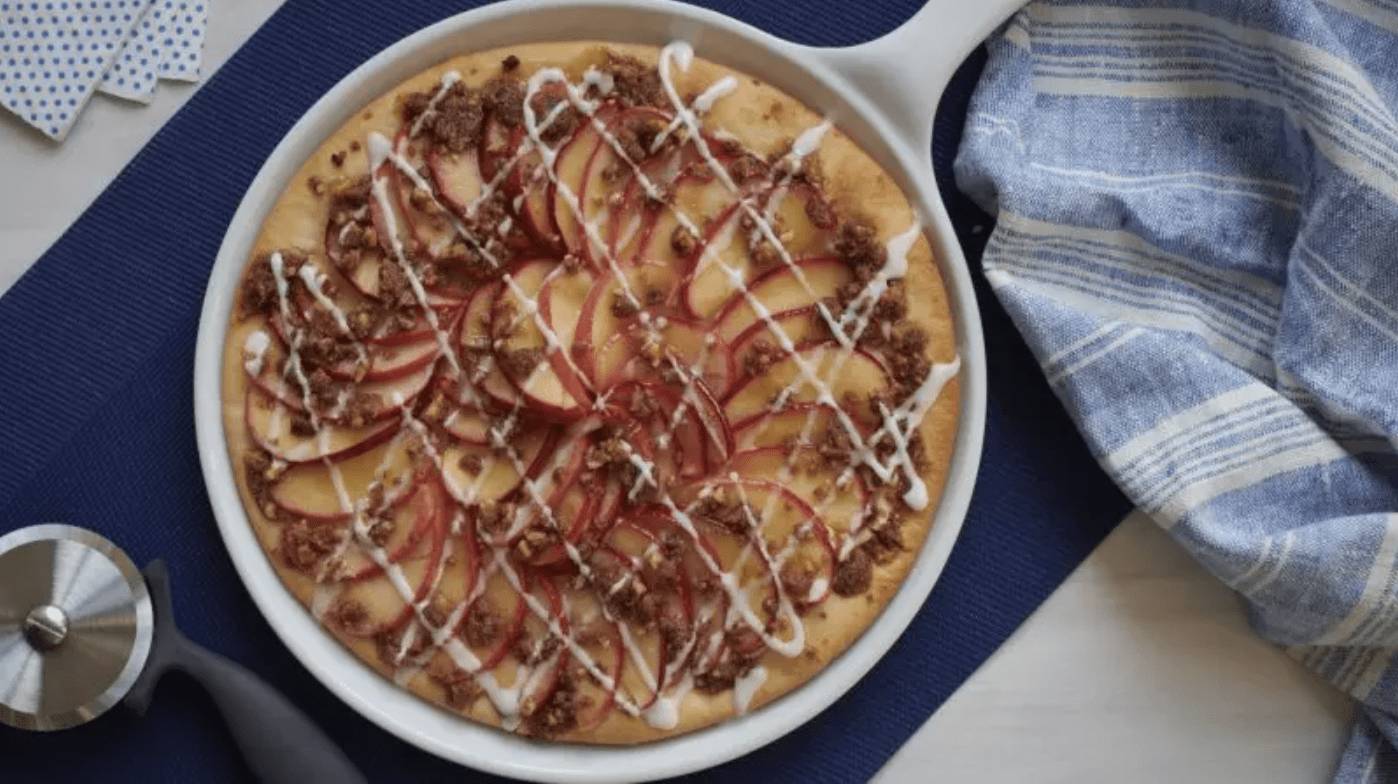
Apple Walnut Streusel Dessert Pizza
August 23, 2021![]() Recipe courtesy of our sponsor Schär
Recipe courtesy of our sponsor Schär
This gluten-free Apple Walnut Streusel Dessert Pizza offers all the sweet goodness of coffee cake in a unique easy-to-serve treat!
Ingredients
| 1 package | pizza crusts |
|---|---|
| 1 tbsp | bread crumbs |
| 1 tbsp | brown sugar |
| 1 tbsp | walnuts, coarsely chopped |
| 2 tbsp | powdered sugar |
| 1 tbsp | melted butter |
| 2 tbsp | cold butter |
| 2 tbsp | cream cheese, softened |
| 3 tbsp | sugar |
| 2 small | apples, very thinly sliced |
| 1/4 tsp | cinnamon |
| 1 tsp | lemon juice |
| 1 tsp | whole milk |
Preparation
- Preheat oven to 400 degrees F.
- Combine the bread crumbs, brown sugar, walnuts and cinnamon in a small bowl. Add 1 tablespoon of melted butter and stir well. Set this streusel topping aside.
- Melt the 2 tablespoons of cold butter in a medium skillet over medium heat. Add the apple slices, white sugar and lemon juice.
- Cook and stir frequently for five minutes or until the apples are tender and the mixture is thick and bubbly. Remove from heat and let cool for three to five minutes.
- Spread cream cheese evenly over pizza crust.
- Arrange apple slices on the cream cheese, overlapping them shingle style, in a circular pattern.
- Drizzling any remaining juice from the pan over the apple slices.
- Sprinkle the reserved streusel topping mixture evenly over the pizza.
- Bake the pizza 8 to 10 minutes or until crust is slightly golden brown.
- While the pizza is baking, make the glaze by combining the powdered sugar and milk in a small bowl. Stir until smooth.
- Remove pizza from oven. Cool for five minutes.
- Using a teaspoon, drizzle glaze over the pizza.
PERMALINK
TAGS: DESSERT, FOR KIDS, HOLIDAY
No-Bake Red, White and Blue Lemon Cheesecake Mousse
July 6, 2021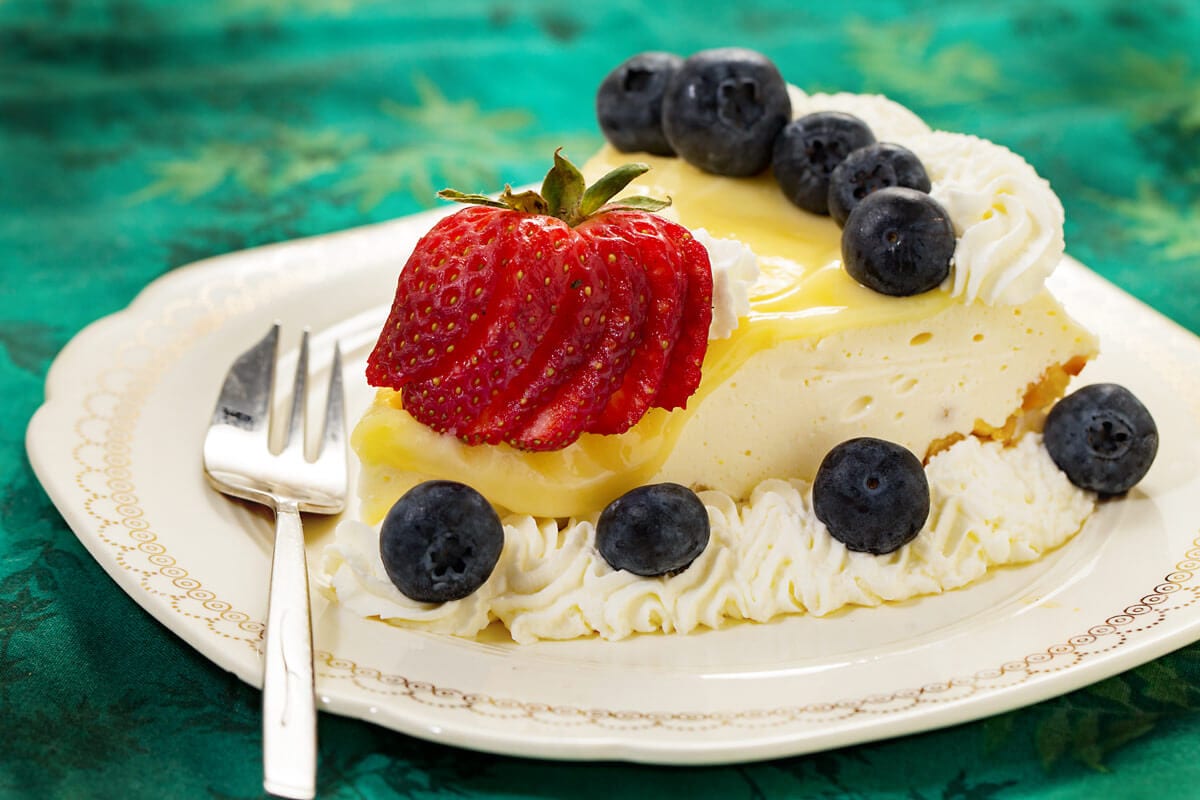 Recipe courtesy of Chef Oonagh Williams of Royal Temptations Catering
This is not a baked custard cheesecake. It is a gelatin-set cheesecake that I first made in England and continue to make. There is no baking (apart from the crust, which some prefer cooked but it is not necessary), no worrying if you’ve overcooked the custard, no cracking of cheesecake, no overnight cooling, etc. It is very popular with my students and clients and you can vary the flavors with different chocolates and liqueurs. It is stiff when you remove it from the fridge but softens to more of a mousse consistency when it’s been out of the fridge for half an hour. Gelatin stops it from melting in the heat. “Lite” cream cheese makes a softer-set cheesecake than 100% cream cheese, but I’ve used lite cream cheese for years.
I added my homemade, microwave-cooked lemon curd to cream cheese mix. Homemade lemon curd (made of butter, sugar, lemon, and eggs and can be used to top scones, cakes, bagels, etc) is delicious. Yes, you could substitute store-bought lemon curd, but the brands I’ve seen use lemon oil, pectin to thicken, palm oil, lemon concentrate, cornflour, citric acid, acetic acid, sodium citrate, color, egg powder, water and then call it authentic. Not in my book!
I’ve made variations of this cheesecake for years, from when I lived in London, including versions with Kahlúa coffee, chocolate peanut butter, white chocolate raspberry, dark chocolate orange, margarita, and white chocolate hazelnut praline. Play with flavor variations using these quantities as a guide.
Gluten-Free No-Bake Cheesecake Mousse
Ingredients:
- Crushed crumbs of gluten-free graham cracker, cookies, or shortbread crust. Schar gluten-free shortbread cookies, 7 oz bag, makes a generous crust
- 6 tbsp butter
- 1 packet of powdered gelatin. An orange box of Knox gelatin in the grocery store is 2 and 1/4 tsp (11g)
- 2 tbsp cold water
- 1 lb room temperature cream cheese
- ¾ cup powdered sugar
- 1 cup, roughly 8 oz lemon curd
- 1 cup of liquid heavy or whipping cream
- ½ cup cream with 2 tbsp sugar (whip these together to make whipped cream for decorating)
- More lemon curd, if you like your cheesecake tangy
- Fresh blueberries and/or fresh strawberries
Directions:
- Melt butter in the microwave in 15 second intervals and then add to cookie crumbs when liquid.
- Press the butter and crumb mixture evenly into a 9” pie plate or springform pan and either bake for 10 minutes or just refrigerate. With current temps being 100°F, I microwave cookie crumbs and butter in a microwave-safe bowl for about a minute or two, then press into the pan and refrigerate.
- Sprinkle gelatin over cold water, stir in and leave to stand for 2–3 minutes. The gelatin will set in a rubbery lump but will dissolve with microwaving.
- Mix cream cheese, powdered sugar and lemon curd. Beat for a few minutes, until light and fluffy.
- Melt gelatin mix in the microwave for about 15 seconds. It will stay the same light brown color but should have melted, no granules left. It is important to melt it thoroughly otherwise it will set into little nuggets of gelatin.
- Beat gelatin mix into the cream cheese mix.
- Beat 1 cup of cream until stiff and gently beat into the cream cheese mix.
- Pour mix into pan, over the crust, and refrigerate for several hours.
- Once chilled, run a thin plastic spatula or knife around edge between cheesecake and pan, release springform and remove. Leave in pie plate or brownie pan.
- Cut a tiny sliver of set cheesecake and taste it to see if it’s lemony enough. You can hide the absent sliver with whipped cream before serving. I often spread more lemon curd on top of the cheesecake to make it really tangy. Whipping cream and adding 50% lemon curd folded in is also delicious for a topping or on it’s own with fresh fruit.
- Pipe whipped cream rosettes around top edge of cheesecake, and top with fresh blueberries and strawberries.
You can also make this in 8×8 brownie pan, then arrange blueberries and strawberries in flag pattern.
About Chef Oonagh Williams
I have written a monthly recipe column for Beyond Celiac since January 2011. I have a Culinary Arts degree as well as celiac disease and other food allergies, so I know food and live this way daily. Remember that most real food is naturally gluten-free until manufacturers mess around with it, and only baking really needs changing. Real food is now being called clean eating.
Talks and appearances are currently canceled, but you can connect with me on Facebook at Gluten-Free Cooking with Oonagh or on LinkedIn. I’ve just filmed recipes at home for New Hampshire’s ABC WMUR’s Cooks Corner and they are being aired. I am also being included in the nationwide library database of online presenters.
For new recipes and lots of advice, my e-cookbook Delicious Gluten-Free Cooking is only $20 and available to download on my website. It has tips, full-color photos, and recipes like grandma’s comfort soup, shrimp and crab bisque, English trifle, buffalo chicken, tiramisu, dinner party fare, and more. Follow the link to see the table of contents and thumbnail photos of the full-size photos in the e-book.
PERMALINKTAGS: DESSERT, FOR KIDS, HOLIDAY, RECIPES OF THE WEEK
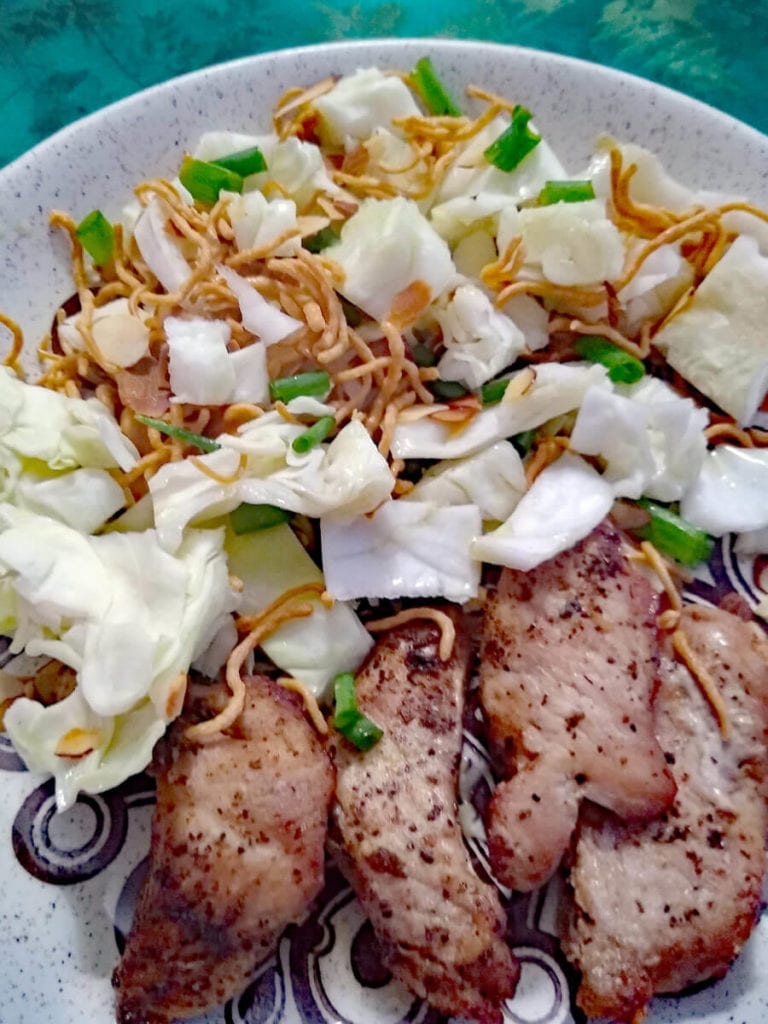
Asian Slaw
 Recipe courtesy of Chef Oonagh Williams of Royal Temptations Catering
This is a very tasty, crunchy salad. It’s great for a summer BBQ party. In the winter it is a far cheaper way of having fresh salad than buying salad greens in New Hampshire. You can extend it by adding shredded carrots or broccoli, which also adds to the color for a party.
This recipe came from my friend Debi. She served it at one of the many summer get-togethers, many years ago. I love it. You can serve it as a side dish or add a protein (teriyaki chicken, beef, garlic cooked shrimp, whatever you like) and serve it as a complete main course. The recipe is also on my website in my downloadable ebook. You can watch an old video of me making this, but remember that the video was made during my wheat days, so the method is the same but ingredients have changed.
Coleslaw
- ½ head of green cabbage, finely shredded—use slicing blade of processor—all you want is the ordinary coleslaw cabbage not the more expensive Savoy cabbage. The grating/shredding blade makes an incredibly fine coleslaw—your choice. Or you can quarter the cabbage, cut out core, cut through each quarter of the cabbage 3 times from core end to point and then finely slice in the opposite direction.
- 3–4 green (spring) onions, rinsed, trimmed and scissored into thin pieces (use green of green onions for salad and cut the 2–3 inches of the white of the green onions into green onion fan).
- 2 tbsp sesame seeds toasted. This is optional, for crunch. You could also try roasted sunflower seeds or pumpkin seeds.
- ½ cup (2oz) coarsely chopped almonds, toasted, or peanuts or other nuts. I’m lazy and buy lightly salted peanuts or cashews (since peanuts are an allergy nut). Also bought nuts are normally already roasted so that’s one less step to do. Remember that salted nuts will add to salt content.
- 2 bricks of rice ramen noodles crumbled and toasted. I cook them in air fryer for about 5 minutes until crispy and light golden brown. You do not cook the noodles in water, just crumble the raw noodles straight from the packet. (As of June 2021, Lotus Foods’ GF rice ramen noodles, organic, 30 oz bag of 12 bricks for $8.99 in Costco. Target quoting $1.79 for 2.8 oz)
Toast the sesame seeds, almonds and noodles separately as they all brown at different times. I like to bake these in a 350°F oven when the oven is in use, and store separately in a Tupperware. Baking times will vary depending on whether your food is spread out on a large cookie sheet or clumped together in a cake pan. Check after 10 minutes and stir each one. If you smell them cooking, they could be burning.
I’ve also added corn, raw red bell pepper and chickpeas to coleslaw.
Dressing:
- 2 tbsp white wine vinegar or apple cider vinegar (labeled made from grapes, wine, apples or cider).
- 3 tbsp sugar.
- 2 tsp of chicken stock concentrate dissolved in 1 tbsp water. I use Orrington Farms’, about $4/lb, labeled gluten-free.
- ½ cup oil. Preferably use toasted peanut oil (brown in color, not clear), as ordinary vegetable oil makes a very bland dressing. I haven’t used canola oil in years. I used to buy Loriva brand peanut oil and miss it for flavor. Now with avoiding peanuts I buy Stony Brook butternut squash seed oil, available direct at Whole Hearted Foods in NY, labeled nut-free and gluten-free, but gives a nutty taste like peanut oil.
Instructions:
- Mix sugar, wine vinegar and chicken stock concentrate together until the sugar dissolves.
- Add oil to the mixture and shake well.
- Just prior to serving, mix together cabbage, green onions, nut mix, noodles and re-shake dressing and serve. Use as much dressing as you want.
Unless I am making this for a large group of people, I just shred enough cabbage for that night and add sufficient nut mix and dressing for that amount of cabbage. This is because the nut mix goes soggy when left mixed with the cabbage and I don’t care for the taste of day-old coleslaw.
Note: Peanut oil is just as dangerous for people with peanut allergies as whole peanuts, so clearly mark the salad as containing peanut oil if you take it to a large gathering.
About Chef Oonagh Williams
I have written a monthly recipe column for Beyond Celiac since January 2011. I have a Culinary Arts degree as well as celiac disease and other food allergies, so I know food and live this way daily. Remember that most real food is naturally gluten-free until manufacturers mess around with it, and only baking really needs changing. Real food is now being called clean eating.
Obviously talks and appearances are currently canceled, but you can connect with me on Facebook at Gluten-Free Cooking with Oonagh or on LinkedIn. I’ve just filmed recipes at home for New Hampshire’s ABC WMUR’s Cooks Corner and they are being aired. I am also being included in the nationwide library database of online presenters.
For new recipes and lots of advice, my e-cookbook Delicious Gluten-Free Cooking is only $20 and available to download on my website. It has tips, full-color photos, and recipes like grandma’s comfort soup, shrimp and crab bisque, English trifle, buffalo chicken, tiramisu, dinner party fare, and more. Follow the link to see the table of contents and thumbnail photos of the full-size photos in the e-book.
PERMALINKTAGS: SIDE DISHES, HOLIDAY