Gluten-Free Recipes for Holiday
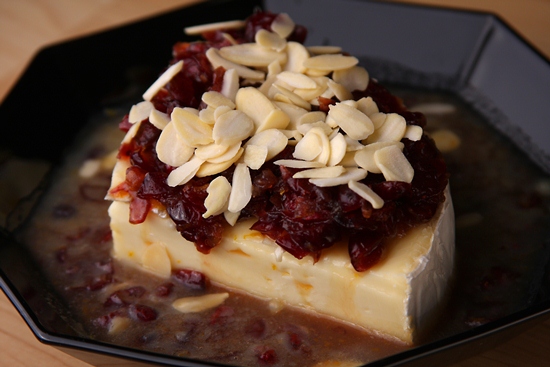
Baked Brie with Orange Maple Craisin Sauce
November 10, 2015Baked Brie with Orange Maple Craisin Sauce
From Chef Oonagh Williams of Royal Temptations Catering
Ingredients:
- 2 Tbsp. orange juice
- Zest of half an orange
- 2 Tbsp. maple syrup
- 1 Tbsp. butter
- 2-4 Tbsp. dried cranberries
- 1 Tbsp. orange liqueur (optional)
- 2 Tbsp. chopped nuts oven toasted for 10 minutes at 350 degrees or chopped cashews, peanuts, etc. (optional)
- 1 x 4” round (8 o.z) of Brie that is not soft/squishy to the touch. It needs to be quite firm for baking.
Directions:
1. In a small pan (or microwave safe jug, if you prefer to use the microwave), melt butter and stir in orange juice, zest of orange, maple syrup and dried cranberries. Add liqueur if using. Adjust seasonings to your taste. Sauce will mellow and develop as it stands.
2. Remove Brie from box, unwrap plastic covering. Cut off top rind of Brie, more like shaving. Place Brie on oven proof plate you intend to serve from, that is about 2” bigger on either side of Brie and has a lip.
3. Pour orange mix and nuts on Brie. Bake in a preheated 325 degree oven for 10-20 minutes (or microwave) until Brie has clearly melted (Brie will start losing shape as walls collapse when nicely melted). Nuts will be browning and syrup will be caramelizing where it touches the plate. Test the Brie with a spoon to see if it has melted.
4. Serve with my French bread croutes, made with a gluten-free bagel. For Thanksgiving I had ‘kettle’ variety of Popcorners popped corn chips that are slightly sweet and labeled gluten-free. You can also serve with Riceworks gluten-free cinnamon chips, as they are also a good combination with the Brie.
Preferably serve with small coffee style spoon for guests to spoon up very soft Brie. I had some of the leftover sauce with my turkey as well.
Tips & Alternatives:
- Add caramelized onions with dried cranberries.
- Add peach or apricot preserves with almonds.
<< Back to Recipes
TAGS: APPETIZERS/SNACKS, VEGETARIAN, THANKSGIVING, HOLIDAY
Homemade Nut Butter
November 5, 2015From Chef Oonagh Williams of Royal Temptations Catering
With peanut allergies on the rise, there is now a variety of other nut butters available, but some are quite expensive. I was told to stop eating peanut butter (due to inflammation) at the same time a girlfriend said she made homemade nut butter.
Far too many of the nut butters available are made from hydrogenated oils, which means they include transfats or they use soy oil. When you make your own, you can control the amount of sugar, choose a quality oil and make what your family will like and eat. Please don’t use canola oil, agave nectar or fake sugars unless you really have no choice. Far too many recipes claim to be healthy yet quote the same quantity of agave nectar as honey, maple syrup or even corn syrup. They’ve been told that agave nectar has a lower glycemic index (yes it does) and to use it instead. What they don’t say is that agave is 50% sweeter than honey etc., so you should use less, despite what the recipe says.
This recipe will be smoother and creamier, depending on whether you use an immersion blender, large blender, food processor or Vitamix. It’s easier to start with a nut flour. Make a small quantity to start with and see what oils and sweeteners you like. I enjoy using coconut oil, but it does make nut butter firm at room temp and harder from the fridge. Olive oil (regular, not extra virgin) also firms up in fridge. You can also use the nut oil that matches the nut you use. La Tourangelle Roasted Almond Oil is a good choice. Many specialty stores sell food grade nut oils for salads, etc. Almond extract with almonds intensifies the flavor of almond butter – it tastes like almond paste. I also have a gluten-free hazelnut extract. I like maple syrup for sweetness and flavor and we always have at least a quart of maple syrup in the fridge. Only make a small quantity at a time as it can smell fermented if not refrigerated. If you want it runnier, add some water rather than extra oil or sugar. So far, the oil has not separated out like “natural” jars of nut butter you can find in the market.
Ingredients:
- 1 cup (4 oz., 112 g) almond flour or almond meal. Almond meal has the skin on, so it’s more fiber but a darker colored butter. I buy Trader Joe’s almond meal and Bob’s Red Mill sells almond flour and hazelnut meal. You can buy roasted unsalted sealed bags of cashew, sunflower seeds, etc. Roasting does add to the flavor.
- 2-3 Tbsp. (30-45 ml) maple syrup or honey, depending on your family’s sweet factor. Also when you spread almond butter on bagel etc., it doesn’t taste as sweet.
- 3 Tbsp. (45 ml) nut oil, coconut oil or olive oil. I haven’t tried avocado oil and won’t use canola or soy oil.
- Pinch of salt
- 1 tsp. (5 ml) gluten-free almond extract (optional, but gives it more flavor)
Directions:
- I just put everything in my food processor and let it work, scraping down sides, until it’s the consistency I like. Will your kids like it? It depends how passionate they are about any certain brand of nut butter. I certainly like it and like knowing it’s fresher and healthier than many commercial brands. I haven’t tried baking with it yet.
TAGS: HOLIDAY, APPETIZERS/SNACKS
Homemade Chocolate Nut Butter
From Chef Oonagh Williams of Royal Temptations Catering
There must be very few people who haven’t tried Nutella. It is delicious yes, but healthy, no.
Original ingredients listed are sugar, palm oil, hazelnuts, cocoa, skim milk, whey, soy lecithin, artificial vanilla. Sugar and palm oil in larger quantities than hazelnuts. If you google homemade Nutella, there are loads of recipes, including ones with melted chocolate, cream and condensed milk. Again, delicious I am sure, but indulgent, not everyday, more like a chocolate fondue and more perishable. Most chocolate nut butters have a milk chocolate taste. To get that sweeter taste from cocoa, you need to add more sugar and then more oil to make it creamy. You could try substituting one of the drinking chocolate sachets that are sweetened and contain powdered milk. Plus, consider if you are making this adult or kid taste.
I find that it is difficult to get a smooth nut butter if you start with whole hazelnuts or any whole nut in a food processor. It’s quicker and easier with nut flour or nut meal. A Vitamix would probably turn it smooth in an instant!
Ingredients:
- ½ cup (2 oz., 55 g) hazelnut flour or meal (or other nut). Bob’s Red Mill sells hazelnut and almond meal.
- ¼ cup (60ml) maple syrup (Syrup helps make it runnier. Sugar makes it stiffer.)
- ¼ cup (60 ml) almond oil, hazelnut oil or olive oil
- 2 Tbsp. (30 ml) regular cocoa
- 1 tsp. (5ml) gluten-free vanilla extract
- ½ tsp. salt
- ½ tsp. (3 ml) hazelnut extract or suitable nut extract (this really intensifies the flavor)
Directions:
- Put ingredients in food processor or blender and run until as smooth as you like, scraping down sides. You probably can’t get it as smooth as commercial brand.
- Taste and keep adjusting sugar and consistency to what you like. Different brands do give different texture and taste results. Homemade can never replicate the commercial product. It can come close, but it’s not exact. This tasted really good on a bagel.
TAGS: HOLIDAY, APPETIZERS/SNACKS
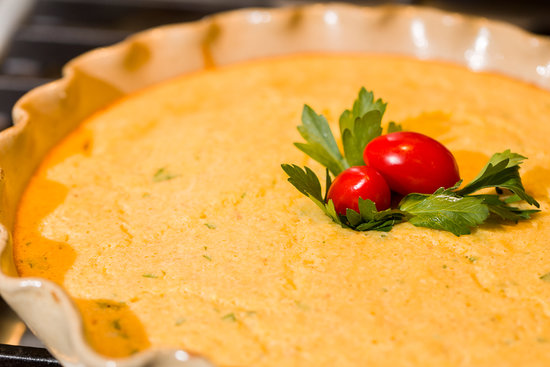
Corn Pudding
Corn Pudding
From Chef Oonagh Williams of Royal Temptations Catering
Makes about 12 servings.
Ingredients:
- 1 stick (4oz.) butter melted
- 3 large eggs
- 8 slices of center cut bacon, scissored thin and cooked with sliced white of bunch of green onions.
- 1 cup sour cream
- 1 can (11 oz.) whole kernel corn, drained
- 1 can (14+3/4 oz.) cream-style corn
- 1 cup corn meal
- ½ cup Oonagh’s Gluten-Free Flour Mix
- Salt and pepper
- 1 Tbsp. gluten-free baking powder
- 3 Tbsp. sugar
- Green of bunch of green onions cut into thin slices.
Directions:
- Melt butter in the microwave in a microwave safe bowl.
- Stir in sour cream and eggs until smooth.
- Stir in corn and creamed corn.
- Mix together cornmeal, gluten-free flour blend, sugar, baking powder, salt and pepper. Add to wet ingredients and stir together. Stir in cooked bacon and onion mix and green of green onions.
- Either pour into two 8×8 or one 9×13 and bake in preheated 350* oven for about 35- 45 minutes until set and lightly browned. It does puff slightly.
<< Back to Recipes
TAGS: THANKSGIVING, SIDE DISHES, HOLIDAY
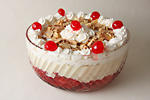
English Sherry Trifle
English Sherry Trifle
From Chef Oonagh Williams of Royal Temptations Catering
Ingredients:
Cake
- 2 eggs
- 1 batch of Gluten-Free Sponge Cake (Ladyfinger recipe) cooked in 8×8 pan
- Strawberry jam or seedless raspberry jam
- 1 lb. container of frozen strawberries or raspberries, thawed (can also be used while still frozen)
- 4-serving packet of strawberry or raspberry gelatin
- 1/3 cup sherry or raspberry liqueur
Custard
- 4 large eggs (or 6 egg yolks for richer flavor and more yellowy color)
- 3 cup half-and-half (don’t bother with lower fat milk)
- 1 Tbsp vanilla
- 1/2 cup sugar
- 2 Tbsp cornstarch
- Pinch of salt
- Fresh nutmeg, grated
Garnish
- 1 cup heavy or whipping cream
- 1 Tbsp powdered sugar
- 1 tsp vanilla
- Grated chocolate, maraschino cherries, and toasted almonds (optional)
Directions:
1. Choose an attractive glass bowl of about 8 cup capacity. Cut cake into 8 pieces, cut each piece in half and spread with jam, then make two halves into a sandwich. Arrange cake/jam squares in base of bowl to fit tightly. Cut any left over cake into smaller pieces and lay around sides of bowl.
2. Pour powdered gelatin into heat-proof 4-cup jug or bowl and carefully add 1 cup of boiling water. Stir well until gelatin is totally dissolved. Add strawberries/raspberries to hot gelatin. The juice from the fruit will make up the additional water normally added. Add the sherry or raspberry liqueur.
3. Gently but quickly pour gelatin and fruit over cake, ensuring every piece of cake is saturated by mix. Gently push cake down with spoon or fork so the cake at the edges of the bowl is even with cake in the center. Spread fruit out so that it is distributed evenly on top of the cake. Leave to set.
4. When the gelatin is set, make the custard: Heat the half-and-half in a small saucepan up to boiling point. While it’s heating, mix eggs, cornstarch, sugar and vanilla together in 4-cup heat-proof jug.
5. Pour hot milk onto egg mix, whisking the whole time, then pour back into pan, stirring the whole time. Heat over a very low heat, stirring constantly until sauce has thickened. This should only take a minute or two. If custard starts looking grainy, stir vigorously; the lumps should disappear. Stir in a pinch of fresh, ground nutmeg.
6. Pour over cake base, making sure that the gelatin is set first. Leave to set.
7. Whisk cream, sugar and vanilla together until stiff, and spread or pipe on top of custard once custard has cooled and set. Garnish with toasted almonds and/or chocolate. In England, it is also traditional to use Maraschino cherries as a garnish on the cream rosettes.
Tips & Alternatives:
I traditionally make this in an 8-cup decorative bowl. However, you can also make individual trifles by putting cake into decorative glasses of about 1 cup capacity and by adding all the ingredients in layers to the glasses. You must remember to push moistened cake down into individual glasses to make enough space for the rest of the ingredients.
<< Back to Recipes
TAGS: HOLIDAY, DESSERT
Gluten-Free Mini Apple Pies
Gluten-Free Mini Apple Pies
From Tina and Miranda Jade Turbin of GlutenFreeHelp.info
Ingredients:
- 3 small apples
- 1/3 cup sugar
- 1 Tbsp. gluten-free flour mix
- 1 Tbsp. cinnamon
- ¼ tsp. nutmeg
- 1 gluten-free pie crust
Directions:
1. Peel apples.
2. Cut apples into thin, small pieces.
3. In a bowl with a lid, mix apples, sugar, gluten-free flour, cinnamon and nutmeg.
4. Seal and refrigerate for 12 or more hours to allow the mixture to get juicy.
5. Cut pie crust into circles to fit and place in mini tart pans (about 2-inch pans), about 10 such pans.
6. Preheat oven to 350 degrees.
7. Fill crusts with apple mixture.
8. Put extra crust pieces on top and add some slivered almonds if you wish, sprinkle with sugar.
If you have extra apple mix and mix, you can make “apple burritos” by rolling up the apple mixture in extra crust and sprinkling sugar on top.
10. Bake for approximately 15-20 minutes until golden brown.
<< Back to Recipes
TAGS: THANKSGIVING, HOLIDAY, DESSERT
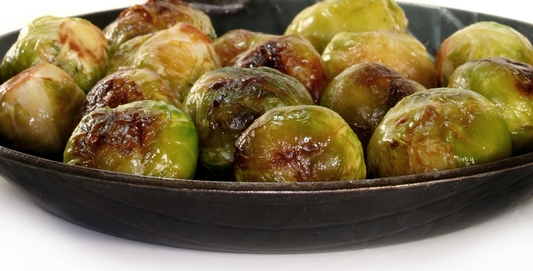
Alice’s Brussels Sprouts and Maple Syrup
Alice’s Brussels Sprouts and Maple Syrup
From Alice Bast, Founder and President of the National Foundation for Celiac Awareness
Ingredients:
- Fresh Brussels sprouts, removed from stalk
- Vegetable oil
- Maple syrup
Directions:
- Preheat oven to 350.
- Coat Brussels sprouts in oil and place on baking sheet. Bake in oven for 15 minutes.
- Remove from oven and drizzle maple syrup over sprouts. Toss lightly. Return to oven and bake for another 5 minutes.
<< Back to Recipes
TAGS: DAIRY-FREE, HOLIDAY, SIDE DISHES, THANKSGIVING, VEGAN, VEGETARIAN
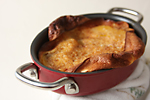
American Popovers (British Yorkshire Pudding)
American Popovers (British Yorkshire Pudding)
From Chef Oonagh Williams of Royal Temptations Catering
Makes 6 muffin tops
Ingredients:
- 3 large eggs
- ½ cup Oonagh’s Gluten-Free Flour Mix
- ¼ tsp xanthan gum
- ¼ tsp garlic powder
- ¼ tsp dry mustard powder (make sure it’s gluten-free)
- 2 Tbsp chopped fresh parsley
- 2 Tbsp chopped green tops of green onions
- ½ cup milk (whole milk is best)
- Salt and pepper to taste
- 2 Tbsp olive oil
- ¼ stick of butter, melted (optional)
Directions:
1. Preheat oven to 425 degrees.
2. Place 6 muffin tops tray and oil in oven to heat while oven preheats.
3. Whisk eggs in a large bowl until slightly fluffy, about 1 minute.
4. Add flour, xanthan gum, garlic powder, mustard, herbs, milk, salt and pepper to taste and beat just to blend. Let stand for about 5 minutes. Batter should be pourable, but neither runny nor stiff.
5. Remove pan from oven, divide hot melted butter evenly between holes (1 teaspoon in each) and pour in batter, about ¼ cup per hole. Batter will sizzle as it hits hot pan and immediately start forming a skin on edges. The pan must be hot.
6. Immediately put pan in oven and cook for about 15-20 minutes until puddings are deep golden brown, have risen all the way around the pan, normally quite unevenly and very little flat area. The more you bake them, the crispier they become with no soft areas.
7. Remove from oven and immediately serve since they will rapidly deflate. Serve onto a heated plate plus hot gluten-free gravy as they go cold rapidly.
Tips & Alternatives:
For a sweet version to serve at breakfast: Add 1 tsp. vanilla or almond extract, 2 tsp. sugar, and a bit of orange zest. Serve with warmed maple syrup, cinnamon sugar, powdered sugar and melted butter.
<< Back to Recipes
TAGS: DINNER, HOLIDAY, BREAKFAST, BREADS
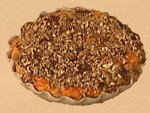
Southern Sweet Potato Casserole
Southern Sweet Potato Casserole
From Chef Oonagh Williams of
Royal Temptations Catering
Ingredients:
Filling
- 3 cups cooked and mashed sweet potatoes (about 3 large potatoes, roughly 3 lbs. total weight)
- 1/3 cup melted butter (I also make this with Earth Balance for a dairy-free version)
- 1/3 cup sugar – white or light brown
- 1 Tbsp vanilla
- 2 extra large or 3 large eggs
- ½ cup milk (1% is okay; I’ve also made this with lactose-free milk and almond milk)
Topping
- 1 cup packed light brown sugar
- 1/3 cup Oonagh’s Gluten-Free Flour Mix
- 1 cup chopped pecan or walnut pieces
- ¼ cup (2 oz.) melted butter or Earth Balance
Directions:
1. Combine the filling ingredients and mix well. Spread in a greased 9” x 13” pan, two 9” pie plates or one deep 10” pie plate. You can also pour into eight ½-3/4 cup custard cups or ramekins.
2. Mix the topping ingredients and sprinkle over the sweet potato mixture.
3. Bake in a 350 degree oven for 30-40 minutes, depending on dish used for cooking. The casserole rises like a cake and then will deflate on cooling. A wide, shallow dish should be ready in 30 minutes; the deep 10” dish will take 40 minutes.
Tips & Alternatives:
Note that if you refrigerate it overnight for baking fresh on Thanksgiving, it will take longer because you are starting with colder ingredients.
For smaller quantities, I use a 2 cup oven proof casserole and only 1 sweet potato and divide ingredients by 3. The casserole is full and should be baked on a baking sheet since the topping may overflow as the sweet potato mix rises.
For smaller quantities, I use a 2 cup oven proof casserole and only 1 sweet potato and divide ingredients by 3. The casserole is full and should be baked on a baking sheet since the topping may overflow as the sweet potato mix rises.
<< Back to Recipes
TAGS: THANKSGIVING, SIDE DISHES, HOLIDAY
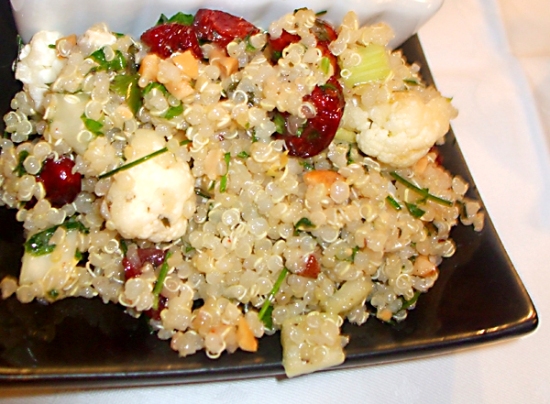
Gluten-Free Winter Tabbouleh
Gluten-Free Winter Tabbouleh
From Chef Oonagh Williams of Royal Temptations Catering
Ingredients:
Salad
- ½ cup raw quinoa grain cooked as directed and cooled
- ½ cup raw cauliflower, divided into tiny florets
- 3 Tbsp. chopped fresh parsley
- 2 Tbsp. chopped fresh mint
- Greens of 2 green onions (scallions, spring onions)
- ¼ cup chopped, toasted nuts (walnuts are traditional; I prefer cashews)
- 2 ribs of celery, washed and cut into small slices
- 1/3 cup of dried cranberries
Dressing
- ¼ cup regular olive oil
- 1 tsp. gluten-free Dijon mustard
- ½ tsp. sugar
- 1 Tbsp. white Balsamic vinegar
- 1 Tbsp. fresh lemon juice (You can also replace the 1 Tbsp. of Balsamic vinegar with an additional tablespoon of lemon juice)
- Salt and pepper to taste
Directions:
1. Combine all dressing ingredients and mix well. Drizzle over cooked quinoa.
2. Add remaining ingredients and stir until the dressing and ingredients are well incorporated. Let sit for an hour or more to let the flavors meld.
Tips & Alternatives:
Add more nuts and feta cheese on top as a finishing touch.
Don’t add spinach – it will wilt and turn brown.
Try adding chopped apple for a fresh bite. Toss it in with some orange slices – the acidity will keep the apple from browning, and it’s better than adding lemon juice mixed with water.
Other quinoa salad options:
- Make a guacamole version with avocado, fresh mango instead of dried fruit, cilantro and jalapeno.
- Go Greek with oregano, artichokes and olives.
- For Italian flavors, try basil, bell peppers and sun-dried tomatoes.
Remember to rinse the quinoa before cooking to get rid of the saponin (natural insect repellent on the quinoa grains) smell and taste. Put quinoa in the sieve and run cold water through it for a few minutes. I frequently rub the grains at the same time.
<< Back to Recipes
TAGS: VEGETARIAN, THANKSGIVING, SIDE DISHES, HOLIDAY, DAIRY-FREE