Gluten-Free Recipes for For Kids
Kitchen Sink Cookies
January 21, 2019Kitchen Sink Cookies
Courtesy of Crunchmaster ![]()
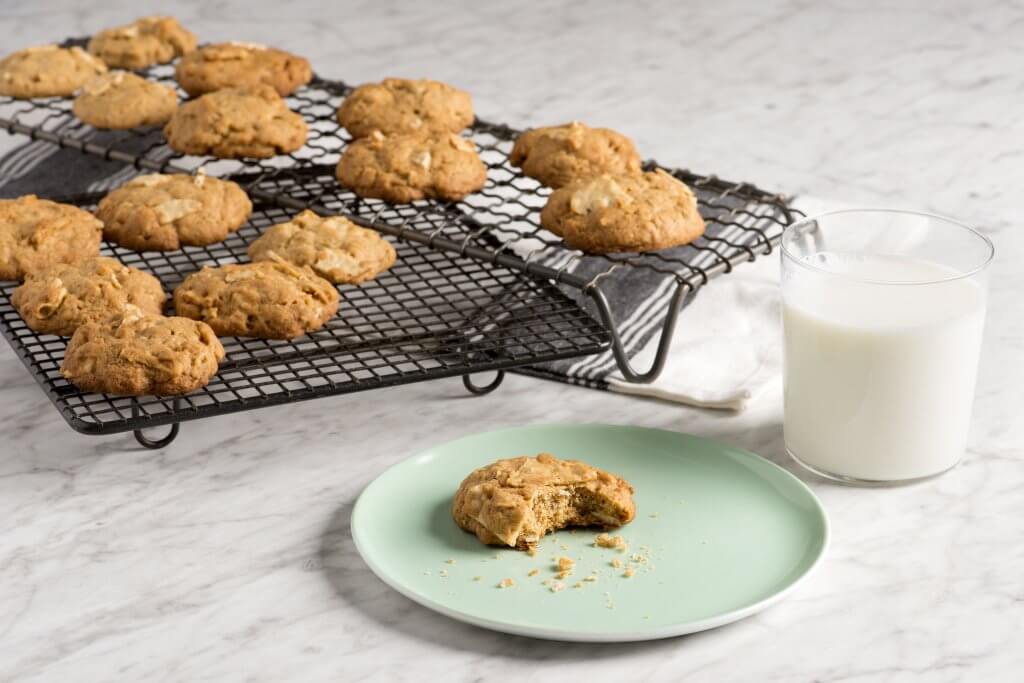 Gluten-Free Kitchen Sink Cookies
Ingredients:
- 1 cup Crunchmaster® Hint of Sea Salt 7 Ancient Grains Crackers, crushed
- ¾ cup butter, softened
- 1 cup brown sugar
- ¼ cup white sugar
- 2 tsp. almond extract
- 2 cups gluten free baking mix
- 1 tsp. baking soda
- 1 tsp. baking powder
- ¾ tsp. salt
- 1/3 tsp. ground cinnamon
- ¼ tsp. all-spice
- 2 large eggs
- ½ cup gluten free rolled oats
- 1/6 tsp. fresh orange zest
Directions:
- Preheat oven to 350 degrees F.
- In a large mixing bowl, cream butter and sugars. Slowly add eggs and almond extract continue to mix.
- In a separate bowl, combine gluten free flour mix, Crunchmaster Cracker crumbs, rolled oats, baking soda, baking powder and salt; add to egg mixture and mix well to combine. Add cinnamon, all-spice and orange zest. Mix well and portion out teaspoon sized balls onto baking sheets.
- Bake for 10-12 minutes or until golden brown.
- Remove from oven; set aside to cool before serving.
<< Back to Recipes
TAGS: DESSERT, FOR KIDS
Quinoa Cilantro Taco Salad
January 2, 2019Quinoa Cilantro Taco Salad
Courtesy of Crunchmaster![]()
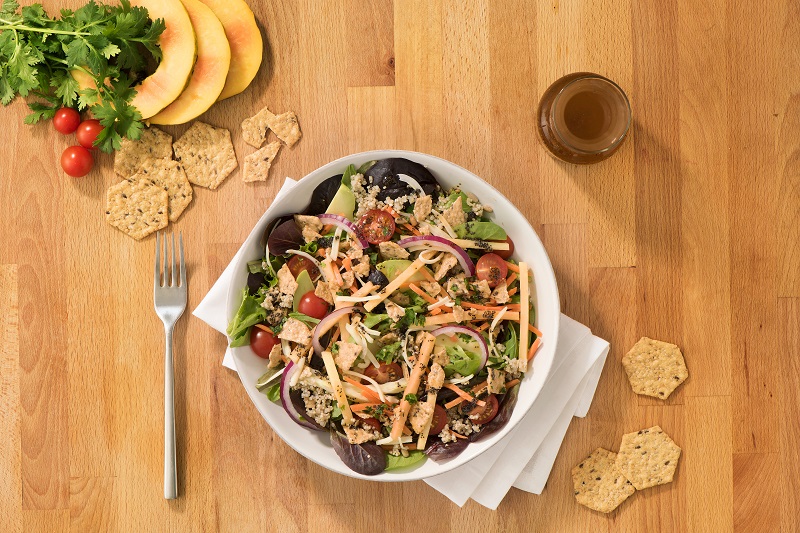 Gluten-Free Quinoa Cilantro Taco Salad
Ingredients:
- 1 cup Crunchmaster® Roasted Garlic Multi-Seed Crackers, crushed
- 2 tbsp Olive oil
- 1 tsp Apple cider vinegar
- 1 tsp Cumin
- ½ tsp Chili powder
- ¼ tsp Sea salt
- 2 tbsp Poppy seeds
- 1/3 cup Sunflower seed
- 1 cup Quinoa, cooked
- 4 cups Mixed salad greens
- 5 Fresh chives
- ½ cup Cabbage, shredded
- 6 Cherry tomatoes
- 1 Medium red onion, sliced
- ½ cup Fresh cilantro, finely chopped
- 2 tbsp Fresh parsley, finely chopped
- 1 Medium carrot, cut into matchsticks
- 1 Ripe avocado, peeled, pitted and sliced
- 1 Papaya, cut into 1/4-inch slices
- 1 cup Shredded mozzarella cheese
Directions:
- Combine olive oil, apple cider vinegar, cumin, chili powder, sea salt, poppy seeds and quinoa in a large mixing bowl; gently toss to combine.
- In a large serving bowl, add mixed salad greens; top with quinoa mixture. Add crushed Crunchmaster® Crackers and remaining ingredients; mix well.
<< Back to Recipes
TAGS: VEGETARIAN, LUNCH, FOR KIDS, DINNER
Mini Quiches
November 7, 2018Mini Quiches
![]() Courtesy of Crunchmaster
Courtesy of Crunchmaster
Gluten-Free Mini Quiches
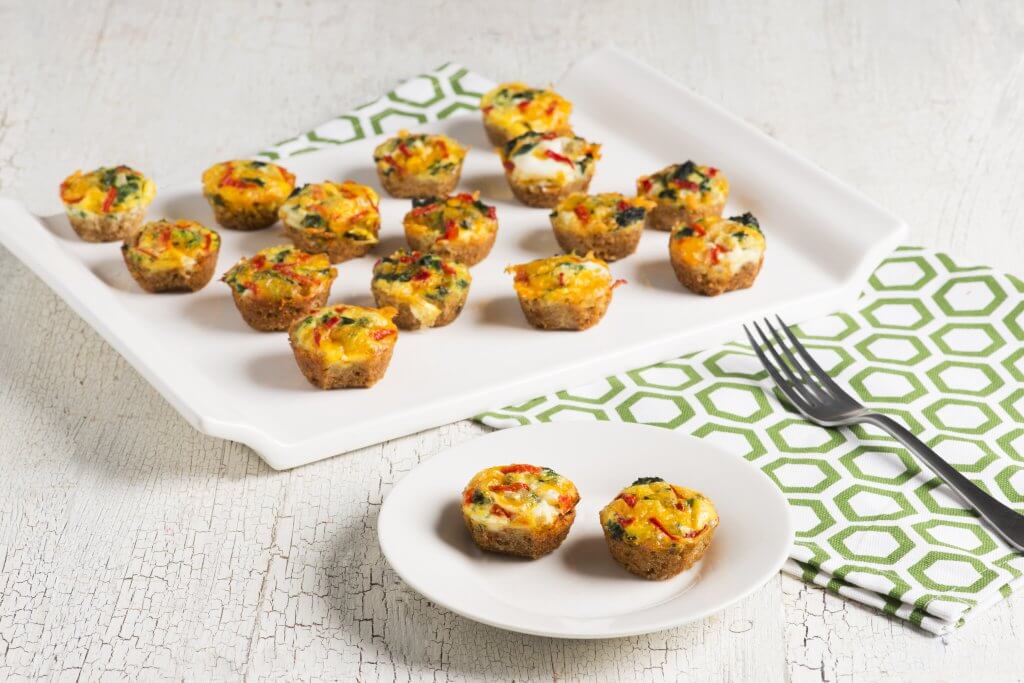 Makes 24 mini quiches
Ingredients:
- 1 ¼ cups finely crushed Crunchmaster® Rosemary & Olive Oil Multi-Seed Crackers
- Gluten-free non-stick cooking spray
- ½ tsp. salt
- ½ tsp. black pepper
- ¼ tsp. grated fresh nutmeg
- 6 tbsp. unsalted butter, melted
- 1 cup shredded sharp cheddar cheese
- 1 cup milk
- Oils & Vinegars
- 2 tbsp. olive oil
- 1 cup finely chopped onion
- 1 – 10 ounce package frozen spinach, thawed
- 1 roasted red pepper, cut into 48 small slivers
- 2 large eggs
Directions:
- Preheat oven to 350 degrees. Spray a min muffin pan (24 tins) with non-stick cooking spray.
- Combine the cracker crumbs and melted butter. Divide crumb mixture among the prepared mini muffin cups and press down firmly. Bake for 7 – 8 minutes. Remove from oven and set aside.
- In a large skillet over medium heat, heat the oil and add the chopped onion. Cook the onions until very soft and starting to brown, about 10 minutes, stirring occasionally. Squeeze all the liquid out of the spinach, add to the onions along with the salt, pepper and nutmeg and cook, stirring, for 30 seconds. Divide the mixture evenly on the cracker crumbs. Divide the shredded cheese on top of the spinach mixture.
- Whisk the eggs and milk together and spoon into the muffin cups; do not fill all the way. Top with the roasted red pepper slivers and bake until set and browned, about 20 minutes.
<< Back to Recipes
TAGS: VEGETARIAN, APPETIZERS/SNACKS, BREAKFAST, FOR KIDS, HOLIDAY, LUNCH, THANKSGIVING
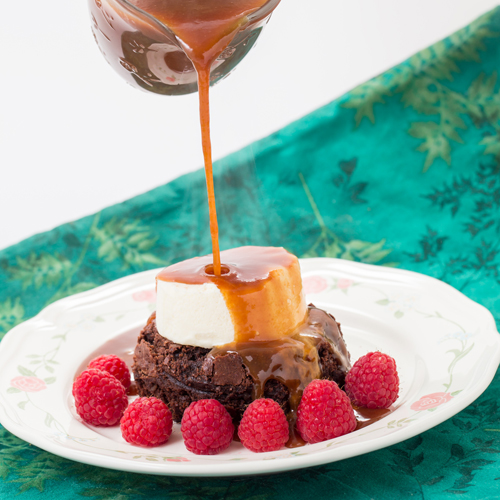
Sweet Sauces – Caramel Sauce, Raspberry Sauce and Chocolate Ganache
June 11, 2018Sweet Sauces – Caramel Sauce, Raspberry Sauce and Chocolate Ganache
This delicious and versatile gluten-free sauces should be a staple in your kitchen!
From Chef Oonagh Williams of Gluten-Free Cooking with Oonagh
Gluten-Free Caramel Sauce
I have only seen a few brands of caramel sauce actually labeled gluten-free, but with far more ingredients than this recipe. Too many ice cream/sweet sauces are based on corn syrup and flavorings.
Summertime, parties, BBQ’s – what’s easier than your favorite brownie, pound cake, sliced with selection of sauces and ice cream or just ice cream sundaes. Everyone loves that!
Ingredients:
- 3/4 c sugar (6 oz, 180g)
- 1/4 c (2 fl oz, 60 ml) water
- 1 c heavy cream
- 2 tbsp (30 ml. 1 oz) butter
- 1 tsp (5 ml) gluten-free vanilla extract
- pinch of salt
Directions:
1. Put sugar in 8″ skillet with water, cover and bring to slow boil while sugar melts. Swirl pan to dissolve all sugar or sugar crystals will form.
2. Once sugar is totally dissolved, remove lid and boil syrup swirling pan as syrup changes color. You want a nice golden brown color, not dark brown. It only takes a few minutes so don’t walk away. The syrup browns at different rates so swirling pan gently mixes it all together. If pan starts smoking, it’s overcooked. Undercooked is tasteless.
3. Add cream and stand back as caramel will spatter, boil up and solidify in places. Stir to dissolve caramel. Add butter, vanilla and salt and stir all together.
4. Sauce will thicken as it cools.
Dairy-free Option: Make with Asian style coconut milk and add coconut butter.
For Adults: To sauce add 1/4 c toasted chopped pecans and 1-2 tbsp rum or other alcohol. Serve with grilled pineapple rings or grilled halved peaches and ice cream, match made in Heaven.
Warning: Don’t make caramel sauce with kids or animals underfoot, sugar burns are really dangerous, plus if you’re distracted, sugar over cooks rapidly and burns, so you have to throw it out.
Gluten-Free Raspberry/Berry Sauce
Ingredients:
- 1 x 12 oz – 16 oz (375 – 500g) bag of frozen raspberries or bag of frozen mixed berries
- ½ c (4 oz 125 g) ordinary sugar
- 1/2 c (120 ml, 4 fl oz) water
- ½ c (120 ml, 4 fl oz) Seedless raspberry jam or jelly for extra oomph of flavor
- Raspberry liqueur, Amaretto, brandy, rum for adults.
- Choose different jams and alcohols that match the fruit
Directions:
1. Melt sugar and water together, add raspberries (or other fruit), and simmer for just a few minutes. Stir in raspberry jam until it melts. Depending on ripeness of raspberries and your personal taste you might want to add more sugar.
I like to buy baskets of fresh raspberries in season and freeze them. Somehow they don’t break up nearly as much as bought frozen raspberries when they are simmered in sugar and water.
You can sieve the sauce and make it a ‘couli,’ so there are no seeds.
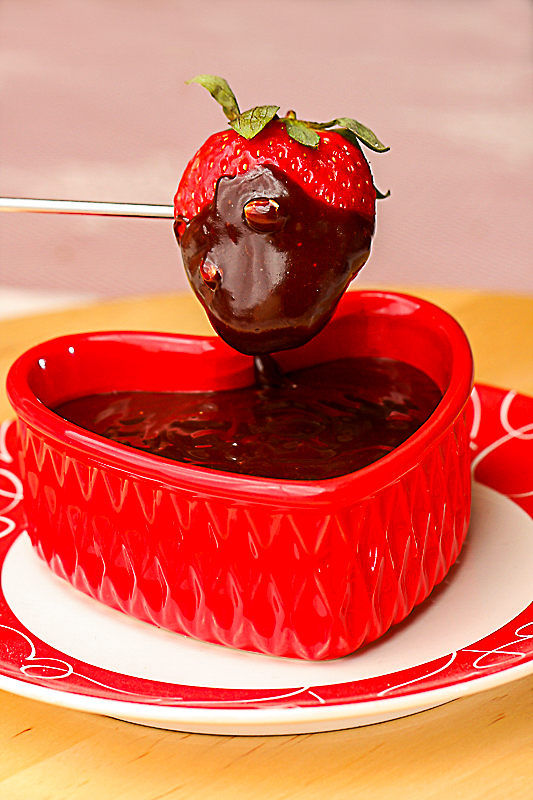 Gluten-Free Chocolate Ganache
Melt together 1 pint (2 cups) heavy cream and 11 oz bag of Tollhouse semi-sweet chocolate or with Sodelicious vanilla or hazelnut creamer mixed with gluten-free chocolate. I use an immersion blender to make sauce totally smooth. Thicken as it cools, very runny when hot. Add some sugar if too ‘dark’ for kids.
This can also be used as a dipping sauce for fruit.
<< Back to Recipes
TAGS: FOR KIDS, DESSERT, DAIRY-FREE
Colby Jack Cheese Quesadilla
May 9, 2018Colby Jack Cheese Quesadilla
From Cindy Gordon of Vegetarian Mamma
 When it comes to eating gluten-free, we need to make sure that the food we are putting into our bodies is indeed gluten-free. When it comes to cheese, you do need to be cautious. Love deli cheese? You have to be cautious of cross contamination from the cheese slicer in the deli. If you want to be safe and not worry, you need to search out Boar’s Head Cheese.
Boar’s Head is a family owned business that started in New York City over 110 years ago. Frank Brunckhorst founded the company out of his dissatisfaction with the quality of deli meats available at the time. He set out to create a brand that focused on quality meat, and started the line of deli meats, cheeses, and condiments that we still enjoy today. Boar’s Head prides themselves as being master craftsmen in their industry, and skilled artisans in the art of meat and cheese making. They hold themselves to high standards of quality, use only the finest ingredients, and their entire product line is gluten-free.
Boar’s Head offers 25 varieties of cheese, in styles from all over the world. You can find Vermont cheddar, Danish blue cheese, Swiss cheeses, French goat cheese, and more at your local deli. Boar’s Head has 6 varieties of Gouda cheese, fresh mozzarella, and two varieties of hard Italian cheese as well.
Boar’s Head Cheese is delicious enough to eat as a stand-alone item or on your favorite sandwich. We recently created a delicious and quick lunch option that uses Boar’s Head Cheese.
Lunch time on the weekends is hectic around my house. There always seems to be something going on. We rely on Boar’s Head to provide us with delicious tasting gluten-free cheese. Our latest creation was a quesadilla.
For this quesadilla we used the Colby Jack cheese from Boar’s Head. Colby Jack is a tasty mixture of Colby and Monterey Jack cheeses. It is a semi soft cheese that is sold in many shapes. For our quesadilla, we used the Coby Jack cheese slices.
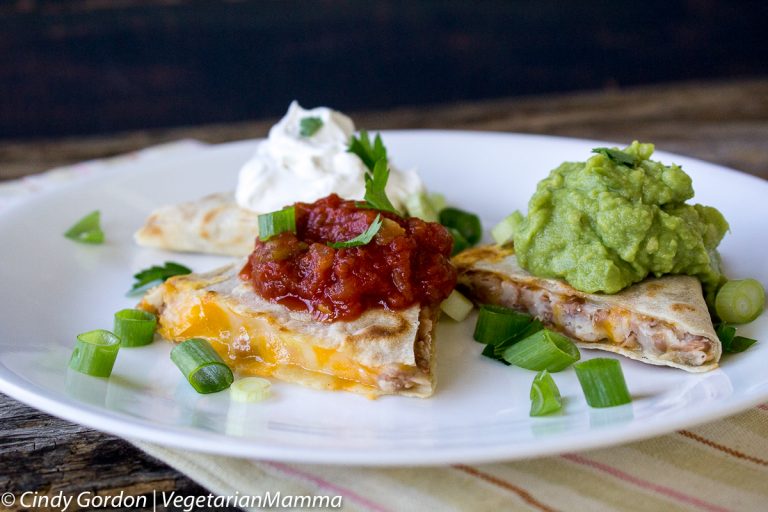
Boar’s Head Colby Jack Cheese Quesadilla
Ingredients:
- 1 gluten-free soft tortilla shell
- ½ cup pinto beans, smashed
- 2 slices of Boar’s Head Colby Jack Cheese
- optional garnish: Sour Cream, Guacamole, Salsa, Cilantro, Green Onions
Directions:
- In a medium skillet over medium heat, warm the soft tortilla shell.
- Place one slice of Boar’s Head Colby Jack cheese on half of the tortilla.
- Next, layer the smashed beans on top of the cheese slice.
- Place the remaining Colby Jack cheese slice on top of the smashed beans.
- Fold the tortilla in half. Warm each side to a golden brown or until the cheese melts.
- Garnish with your favorite extras such as sour cream, guacamole, salsa, cilantro or green onions.
ENJOY!
Boar’s Head Cheese is a great option for my family. We love that the cheese slices come in resealable containers. This works out very well for my family. The cheese stays fresh and protected in the containers.
Check out the full selection on their website, you’re sure to find your favorite.
Guest Author, Cindy Gordon, is the owner and writer behind VegetarianMamma.com Cindy shares recipes that are gluten-free and vegetarian on her site. Her site also shares insight to her gluten-free travel experiences and provides tips on where to safely travel while gluten-free.
<< Back to Recipes
TAGS: VEGETARIAN, LUNCH, FOR KIDS, DINNER
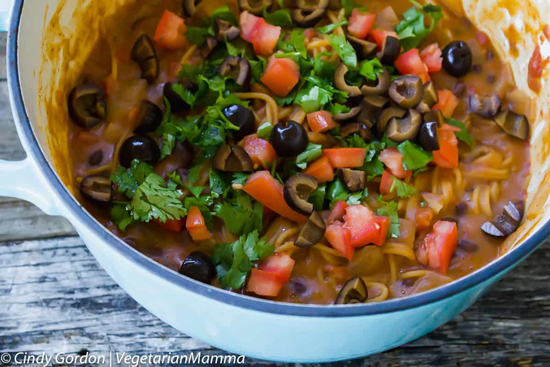
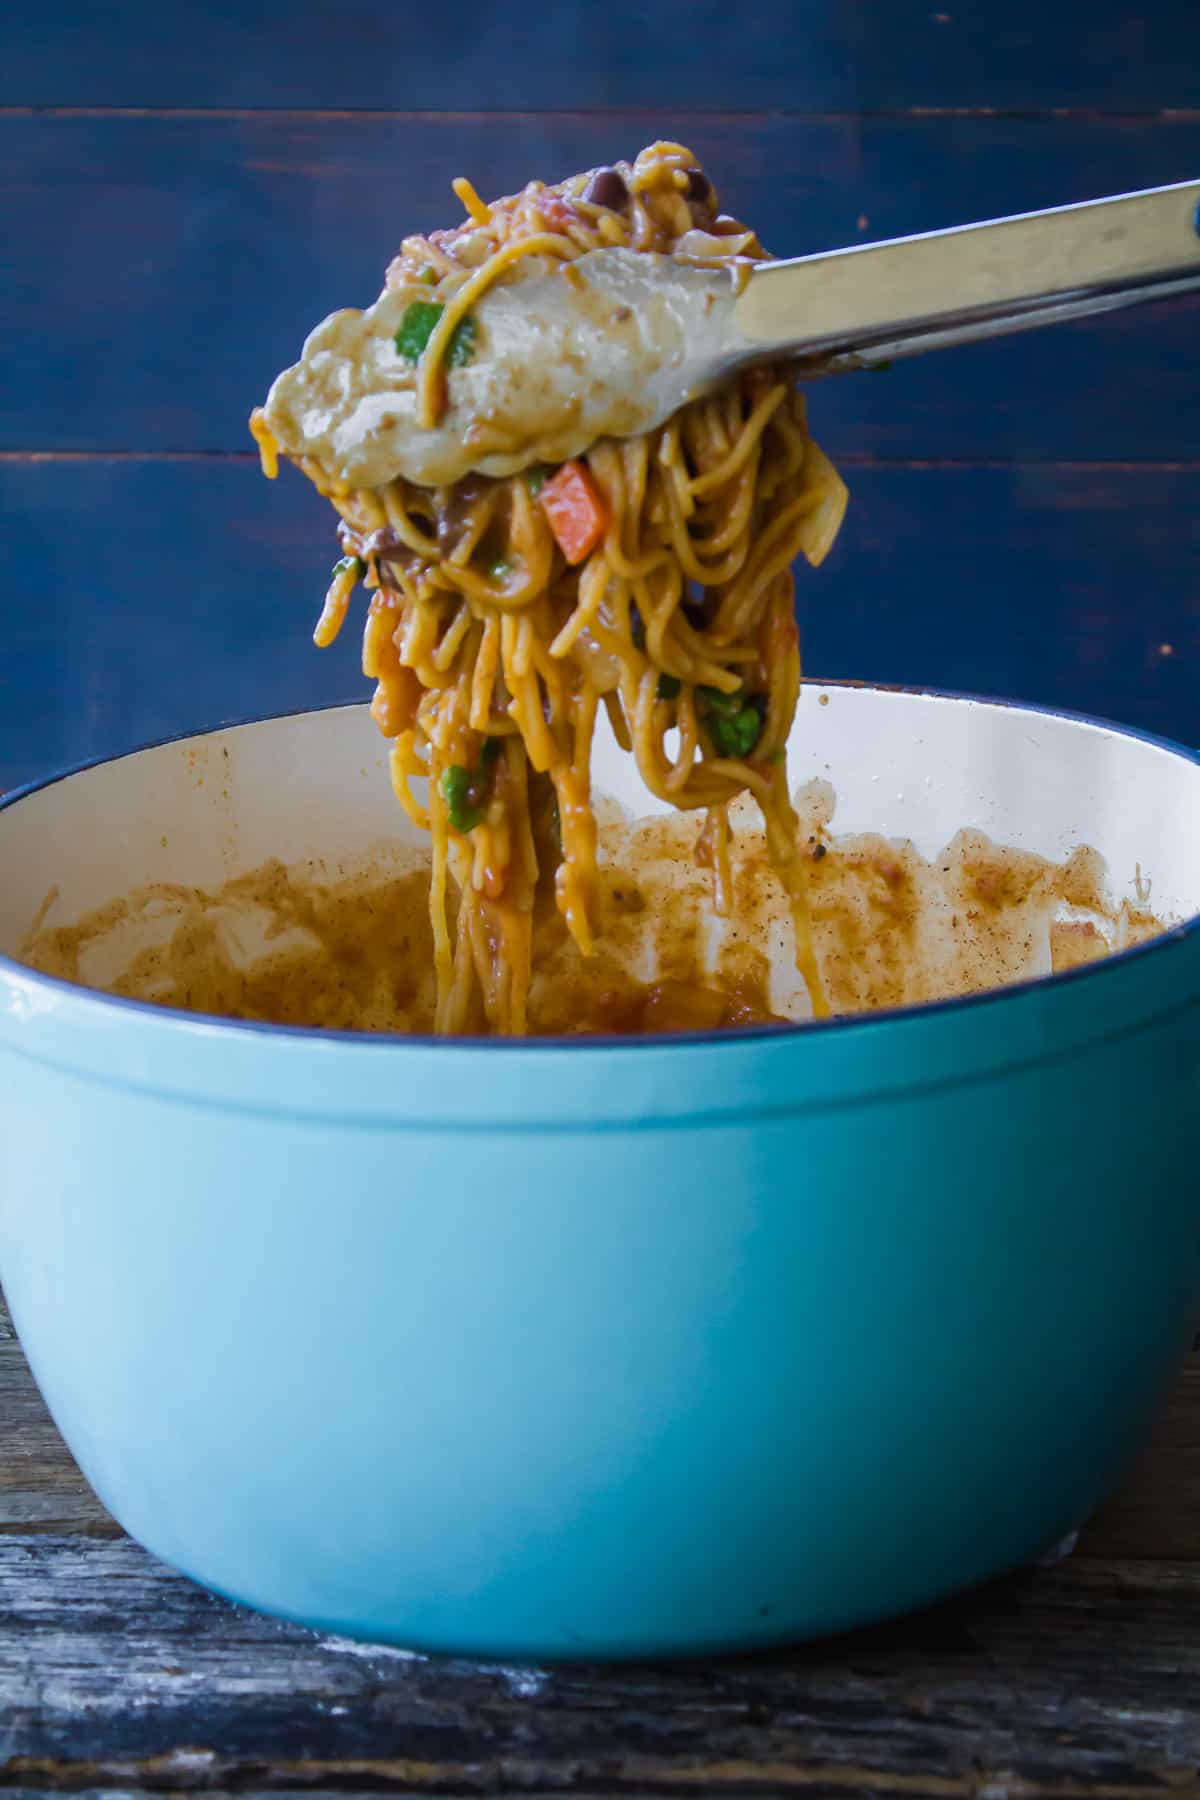
One Pot Taco Spaghetti
April 16, 2018One Pot Taco Spaghetti
One Pot Taco Spaghetti is a delicious and comforting gluten-free dish that you can whip up in a snap for your family!
 From Cindy Gordon of Vegetarian Mamma
Pasta is certainly a comfort food for me. Finding an easy recipe like Gluten-Free One Pot Taco Spaghetti is perfect for my busy nights.
I have been wanting to try a one pot pasta meal for a long time. I knew that I would have to use my favorite pasta. I used Explore Cuisine’s Organic Chickpea Spaghetti for this dish.
This dish starts by frying up some onion in a large soup type pot. Heat up that oil and throw in the oils! Can you smell them yet?
Then you are going to add in the black beans and taco seasoning. Be sure to check the label to make sure the taco seasoning is gluten-free.
Gluten has a sneaky way of finding its self into taco seasoning. So if you need to be gluten-free, please check the label.
Next up, we are adding in the remaining ingredients and three cups of water. You can leave your pasta full length or break in half.
It is up to you! Then we cover and wait! Not much longer!
Once your pasta is done, give the pasta a toss. Hopefully, you remembered to stir in that last two minutes so it didn’t stick. BUT if it did stick…no worries. It happens to the best of us! Promise!
Ingredients:
- 1 tbsp oil
- 1 cup onion diced
- 1 can black beans drained and rinsed
- 1.4 oz package of taco seasoning make sure its gf
- 10 oz diced tomatoes with jalapeño and cilantro or similar
- 8 oz of Explore Cuisine Chickpea Spaghetti
- ½ tomato diced
- ½ c black olives quartered
- Cilantro for garnish
<< Back to Recipes
TAGS: VEGETARIAN, FOR KIDS, DINNER
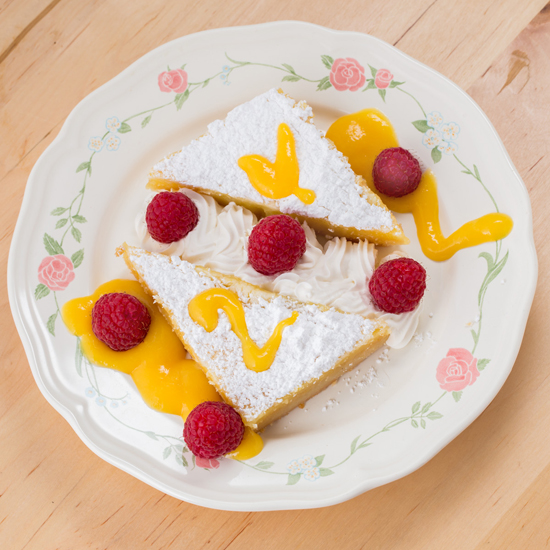
Lemon Squares
April 4, 2018Lemon Squares
This delicious gluten-free version of classic lemon squares is sure to please!
From Chef Oonagh Williams of Gluten-Free Cooking with Oonagh
 I’ve eaten some gluten-free lemon squares, and tried out some recipes and really didn’t like the topping, mainly because to me the texture was like a gluey custard. Then, by chance, I read someone saying they made a lemon curd topping instead. I make lemon curd frequently in the microwave (and lemon curd means lemon butter not anything cheese), and I’m happy with my gluten-free shortbread pastry dessert base, so went from there. Tanginess will depend on size of lemon you zest and juice. I like it tangy but not sour and just quote number of lemons to use, not teaspoons of zest (honestly, how do you accurately measure teaspoons of zest or grams on a scale) or amount of juice. No flour or cornstarch (cornflour in UK) needed in lemon top.
I have made these with Earth Balance for the base and coconut oil for the lemon curd. Obviously not the flavor of butter but still tasty.
Ingredients:
Shortbread base
- 1 c (4 oz, 112g ) my gluten-free flour mix (see below)
- ½ c (2 oz, 56 g) gluten-free almond flour (ground almonds in UK)
- ½ c (2 oz, 56 g) powdered sugar (Icing sugar in UK)
- 1+1/2 sticks (6 oz, 168g) butter, hard from the fridge and cut into 1 tablespoon slices
- ¾ tsp (4 ml) xanthan gum
Lemon curd toppings
- 2 lemons, washed, zested, squeezed of juice and strained of pips. (approx ½ c 120 ml juice)
- 1+1/4 c (8 oz, 224 g) sugar
- 2 eggs
- 4 oz (112g) unsalted butter at room temperature
- Powdered sugar to finish when cold
Directions:
1. Preheat oven to 350*F (180*C). Put flours, sugar and xanthan gum in food processor. Add cold hard butter and run food processor until mix resembles fine breadcrumbs.
2. Grease 8×8 (20×20 cm) baking pan. Sprinkle in shortbread mix, spread evenly and press down.
3. Bake in preheated oven for about 30-40 minutes. You do want the base to be light golden brown all over now or it doesn’t taste cooked enough.
4. Put lemon juice, sugar and lemon zest in 4 cup (1 ltr) jug and microwave until sugar is melted.
5. Remove from microwave, add butter or coconut oil and stir until butter/coconut oil melts in hot liquid. This also cools liquid so eggs don’t scramble.
6. Using an immersion blender, add eggs one at a time with blender running. This mixes eggs in really well, no white bits of egg white showing and chops lemon zest even further so no need to strain the mix at all.
7. Pour lemon mix onto baked shortbread base. Cook in preheated oven for 15-20 minutes. There should still be a wobble in the custard and slightly wet in the center. Don’t cook it until it’s set all over, then it tastes rubbery and looks scrambled. This is an egg custard. It might be risen slightly around edges, popped air bubbles showing.
8. Cool totally then dust heavily with powdered sugar to hide any air bubbles. I don’t find the powdered sugar dissolves into top. The base might have some crumbs, but it’s a shortbread. Keeps well covered in the fridge. I cut it up and transfer to covered container.
My Gluten-Free Mix
I use for one cup of gluten-free mix:
- ½ cup potato starch
- ¼ c tapioca starch from Asian market or Goya or Yoki brand in supermarkets.
- 2 tbsp amaranth or millet flour: Bob’s Red Mill (millet is roughly one third the price of amaranth, is not so nutritious, but is more readily available.)
- 2 tbsp sorghum flour: Bob’s Red Mill.
<< Back to Recipes
TAGS: DESSERT, HOLIDAY, FOR KIDS
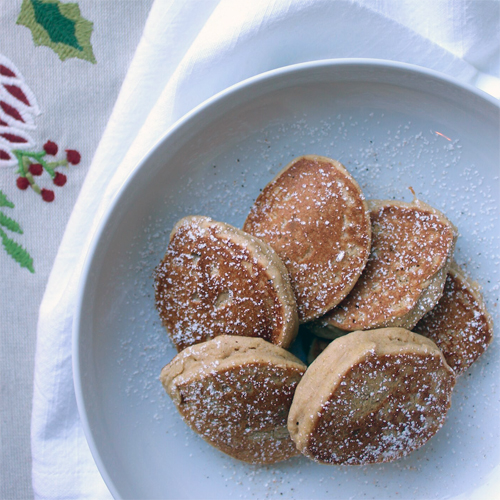
Eggless Nog Pancakes
December 11, 2017Eggless Nog Pancakes
 Ingredients:
Eggless Nog:
- 1 ¾ cup dairy-free milk
- 3 tbsp maple syrup
- 2 tbsp tapioca starch
- 1 tsp vanilla
- ½ tsp nutmeg
- 1/8 tsp cinnamon
Pancakes:
- 1 ½ cup Enjoy Life Foods Pancake & Waffle Mix
- 2 tbsp neutral-flavored oil
Directions:
- Bring 1¼ cup milk and maple syrup to a simmer on the stove.
- In a small bowl, whisk together the remaining ½ cup milk with the tapioca starch, vanilla, nutmeg and cinnamon.
- Add to the warmed milk and whisk to combine. Simmer 3–4 minutes until thickened. Remove from heat.
- When ready to make the pancakes, mix together the Enjoy Life Foods Pancake & Waffle Mix, oil and the Eggless Nog.
- Heat a nonstick griddle and lightly grease. Use a ¼ cup measuring cup to pour batter onto heated griddle. Cook 30 seconds to 1 minute per side until lightly golden brown.
- ENJOY!
<< Back to Recipes
TAGS: VEGETARIAN, VEGAN, HOLIDAY, FOR KIDS, DAIRY-FREE, BREAKFAST
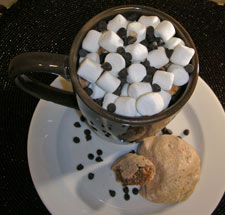
Hot Chocolatey Cocoa
November 28, 2017Hot Chocolatey Cocoa
 Courtesy of Enjoy Life
 Makes 2 – 6 oz. cups
Ingredients:
- 1/4 C. Enjoy Life Foods Mini Chips
- 3 T. sugar
- 1 1/2 T. cocoa powder
- 1/8 t. vanilla
- 12 oz. rice milk (or milk alternative of your choice)
Directions:
Microwave Directions:
- Mix all ingredients.
- Heat in microwave for 30 second, stir. Continue heating and stirring until boiling.
- Let cool to your desired temperature and enjoy.
Stovetop Directions:
- Mix all ingredients.
- Stir constantly, heat over medium/low heat until boiling.
- Let cool to your desired temperature and enjoy.
Optional Recipe Variation: Top with marshmallows or whip-cream. If you love chocolate, dribble a few Mini Chips on top for an extra chocolatey taste!
<< Back to Recipes
TAGS: DAIRY-FREE, VEGETARIAN, VEGAN, HOLIDAY, FOR KIDS, DRINKS, DESSERT
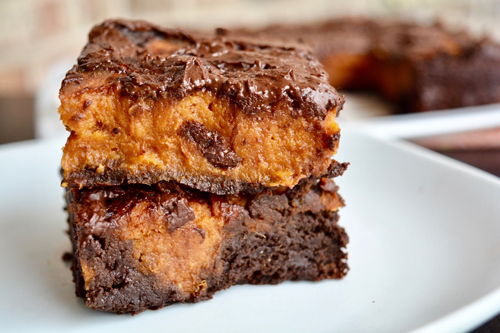
Brownie-Bottom Pumpkin Bars
October 23, 2017Brownie-Bottom Pumpkin Bars
 Courtesy of Enjoy Life
Makes about 16 large bars
Ingredients:
For the brownie mixture:
- 1 box Enjoy Life Foods Brownie Mix
- 3/4 C. cold water
- 2 T. mild olive oil or grapeseed oil
For the pumpkin mixture:
- 1 1/4 C. mashed pumpkin
- 1/4 C. pure maple syrup
- 1/4 C. Enjoy Life Foods All-Purpose Flour
- 1 t. ground cinnamon
- 1/2 t. vanilla extract
- 1/4 t. ground nutmeg
- 1/4 t. ground ginger
- Pinch ground cloves
- Pinch salt
For the topping:
- 1/4 C. Enjoy Life Foods Mini Chips
- 2 t. mild olive oil or grapeseed oil
Directions:
- Preheat the oven to 375˚F. Line an 8×8-inch baking pan with parchment paper.
- To make the brownies, put the Brownie Mix in a large bowl. Add the cold water and oil. Stir until well mixed.
- Scrape the mixture into the prepared pan, smoothing evenly. Bake for 15 minutes.
- While the brownies are baking, prepare the pumpkin mixture. Put the mashed pumpkin, maple syrup, All-Purpose Flour, cinnamon, vanilla extract, nutmeg, ginger, cloves, and salt in a large bowl. Briskly whisk until well combined.
- After the brownies have baked for 15 minutes, remove from the oven. Dollop the pumpkin mixture onto the par-baked brownies, swirling throughout the batter.
- Bake for an additional 35 to 40 minutes, until a toothpick inserted in the brownies comes out clean, and the pumpkin portions are firm to the touch. Let cool in the pan for at least 1 hour.
- To prepare the topping, put the Mini Chips and oil in a microwave safe bowl. Microwave on high for 15 seconds and stir. Repeat in 10 second intervals until melted and smooth. Drizzle the chocolate mixture over the top of the brownies.
- Carefully remove the brownies from the pan, then cut into squares.
- Serve, storing leftovers in an airtight container in the refrigerator for up to 3 days, and any other leftovers to the freezer.
<< Back to Recipes
TAGS: VEGETARIAN, VEGAN, THANKSGIVING, HOLIDAY, FOR KIDS, DESSERT, DAIRY-FREE